building an ABS pipe standing wheel
So first, let me get out of the way that there's very much easier ways to convert your Brent pottery wheel to a standing wheel than building an armature out of ABS pipe. In fact, I'd say that this is one of the most labor-intensive ways to make one. I got this design from Don Clarke, who put a basic description and some photos on his website, so I wanted to put full instructions and measurements here in my blog in case anyone is foolish inspired enough to make one.
Here's the advantages of an ABS pipe wheel lift:
- floor footprint the same size as regular wheel
- easy to mop under
- cheap
- sturdy
And here's the disadvantages:
- difficultly of construction
- ABS sawdust
- no way to change height once built
- not possible to be exact about height (up to 1" error)
- no extra space for tools/pedal/etc
Not dissuaded yet? Well, let's start work.
The first step is to determine the ideal height for a standing wheel for you. The wheelhead should hit somewhere around your bellybutton, but that varies a bit by your throwing technique and how tall the items you typically throw are.
The best way to really figure this out is to try out a temporary setup. I used my Artista portable wheel and a table, with boards to raise it. If you have to use your Brent for this, then I suggest a combination of cinderblocks and bricks to test different heights. That wheelhead is 20" from the bottom of the pipe legs on the Brent (at least, it is on my 25-year-old model C), so measure from the floor to the wheelhead and subtract 20" to get the height of the armature you want.
I wanted between 39" and 40", so the rest of my measurements below are based on that height. The rest of these instructions also assume that the measurements of a Brent haven't changed in the last 30 years, which I don't think they have, but you really want to double-check.
Once you've done that, it's time to go shopping! Here's what you'll need:
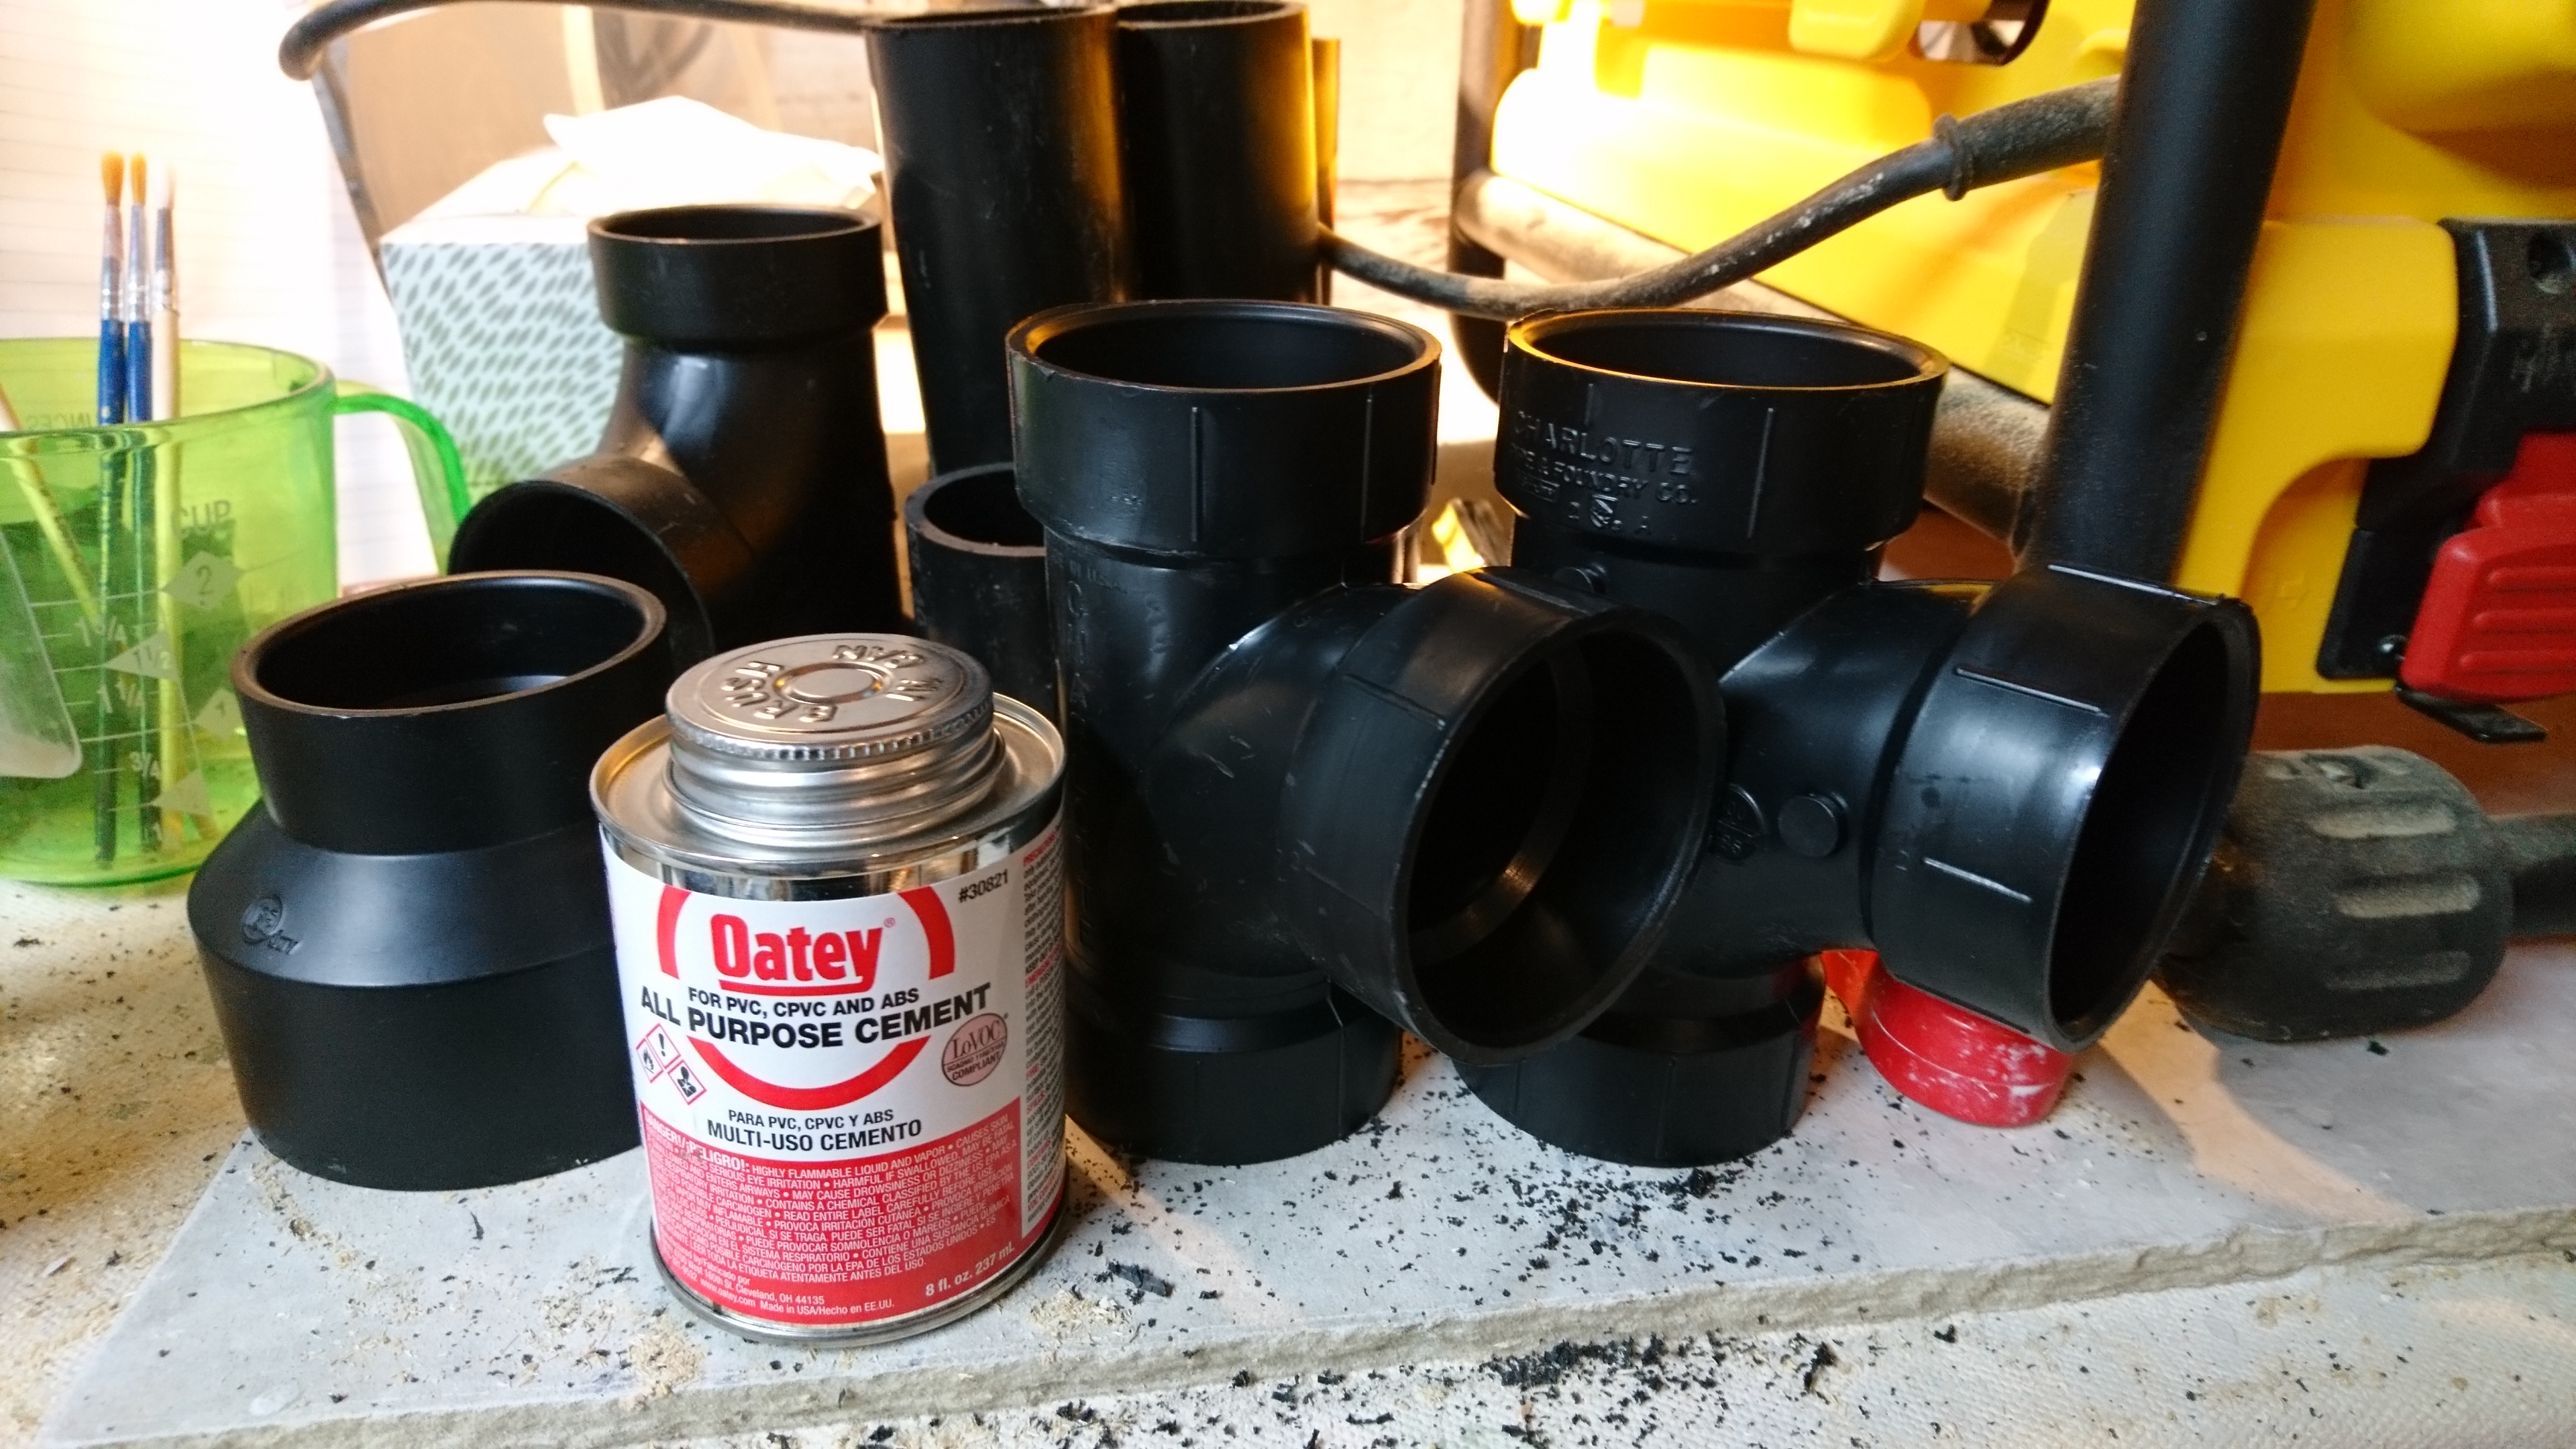
- 10-ft of 2" ABS plastic sewer pipe
- 8 x 2" "sanitary" t-joints
- 3 x 2-to-3" ABS expansion joints
- 1 can of ABS or all-pipe "glue"
- Quality 30" ruler or T-square
- Small level
- Miter saw with fine-tooth (80 to 160) blade, preferably electric cutoff type
- 1-2 pairs of disposable nitrile gloves
- Hearing, hand, and eye protection and a large apron or similar
Some tips based on my own hard experience: first, buy extra of most things. I got 20ft of pipe and 2 extra t-joints and it still wasn't enough to make up for my screw-ups in cutting and gluing, and I had to go back to the hardware store. Second, do this during good weather where you can do your sawing and gluing outside. That ABS "sawdust" gets everywhere and will totally ruin any clay it gets into if you make the mistake of cutting it in your studio. Third, get a miter saw instead of doing this with a table saw like I did, you'll have a much easier time with cutting the pipe.

Once you have all the parts and equipment, you'll want to flip your wheel upside down and level it using blocks. You need to do this because you will have to do final assembly of the armature on the legs of the wheel, or there's no way you'll get the fit exactly right, and the fit needs to be precise or the legs of the Brent won't go in and you'll have to throw the whole thing out and start over.
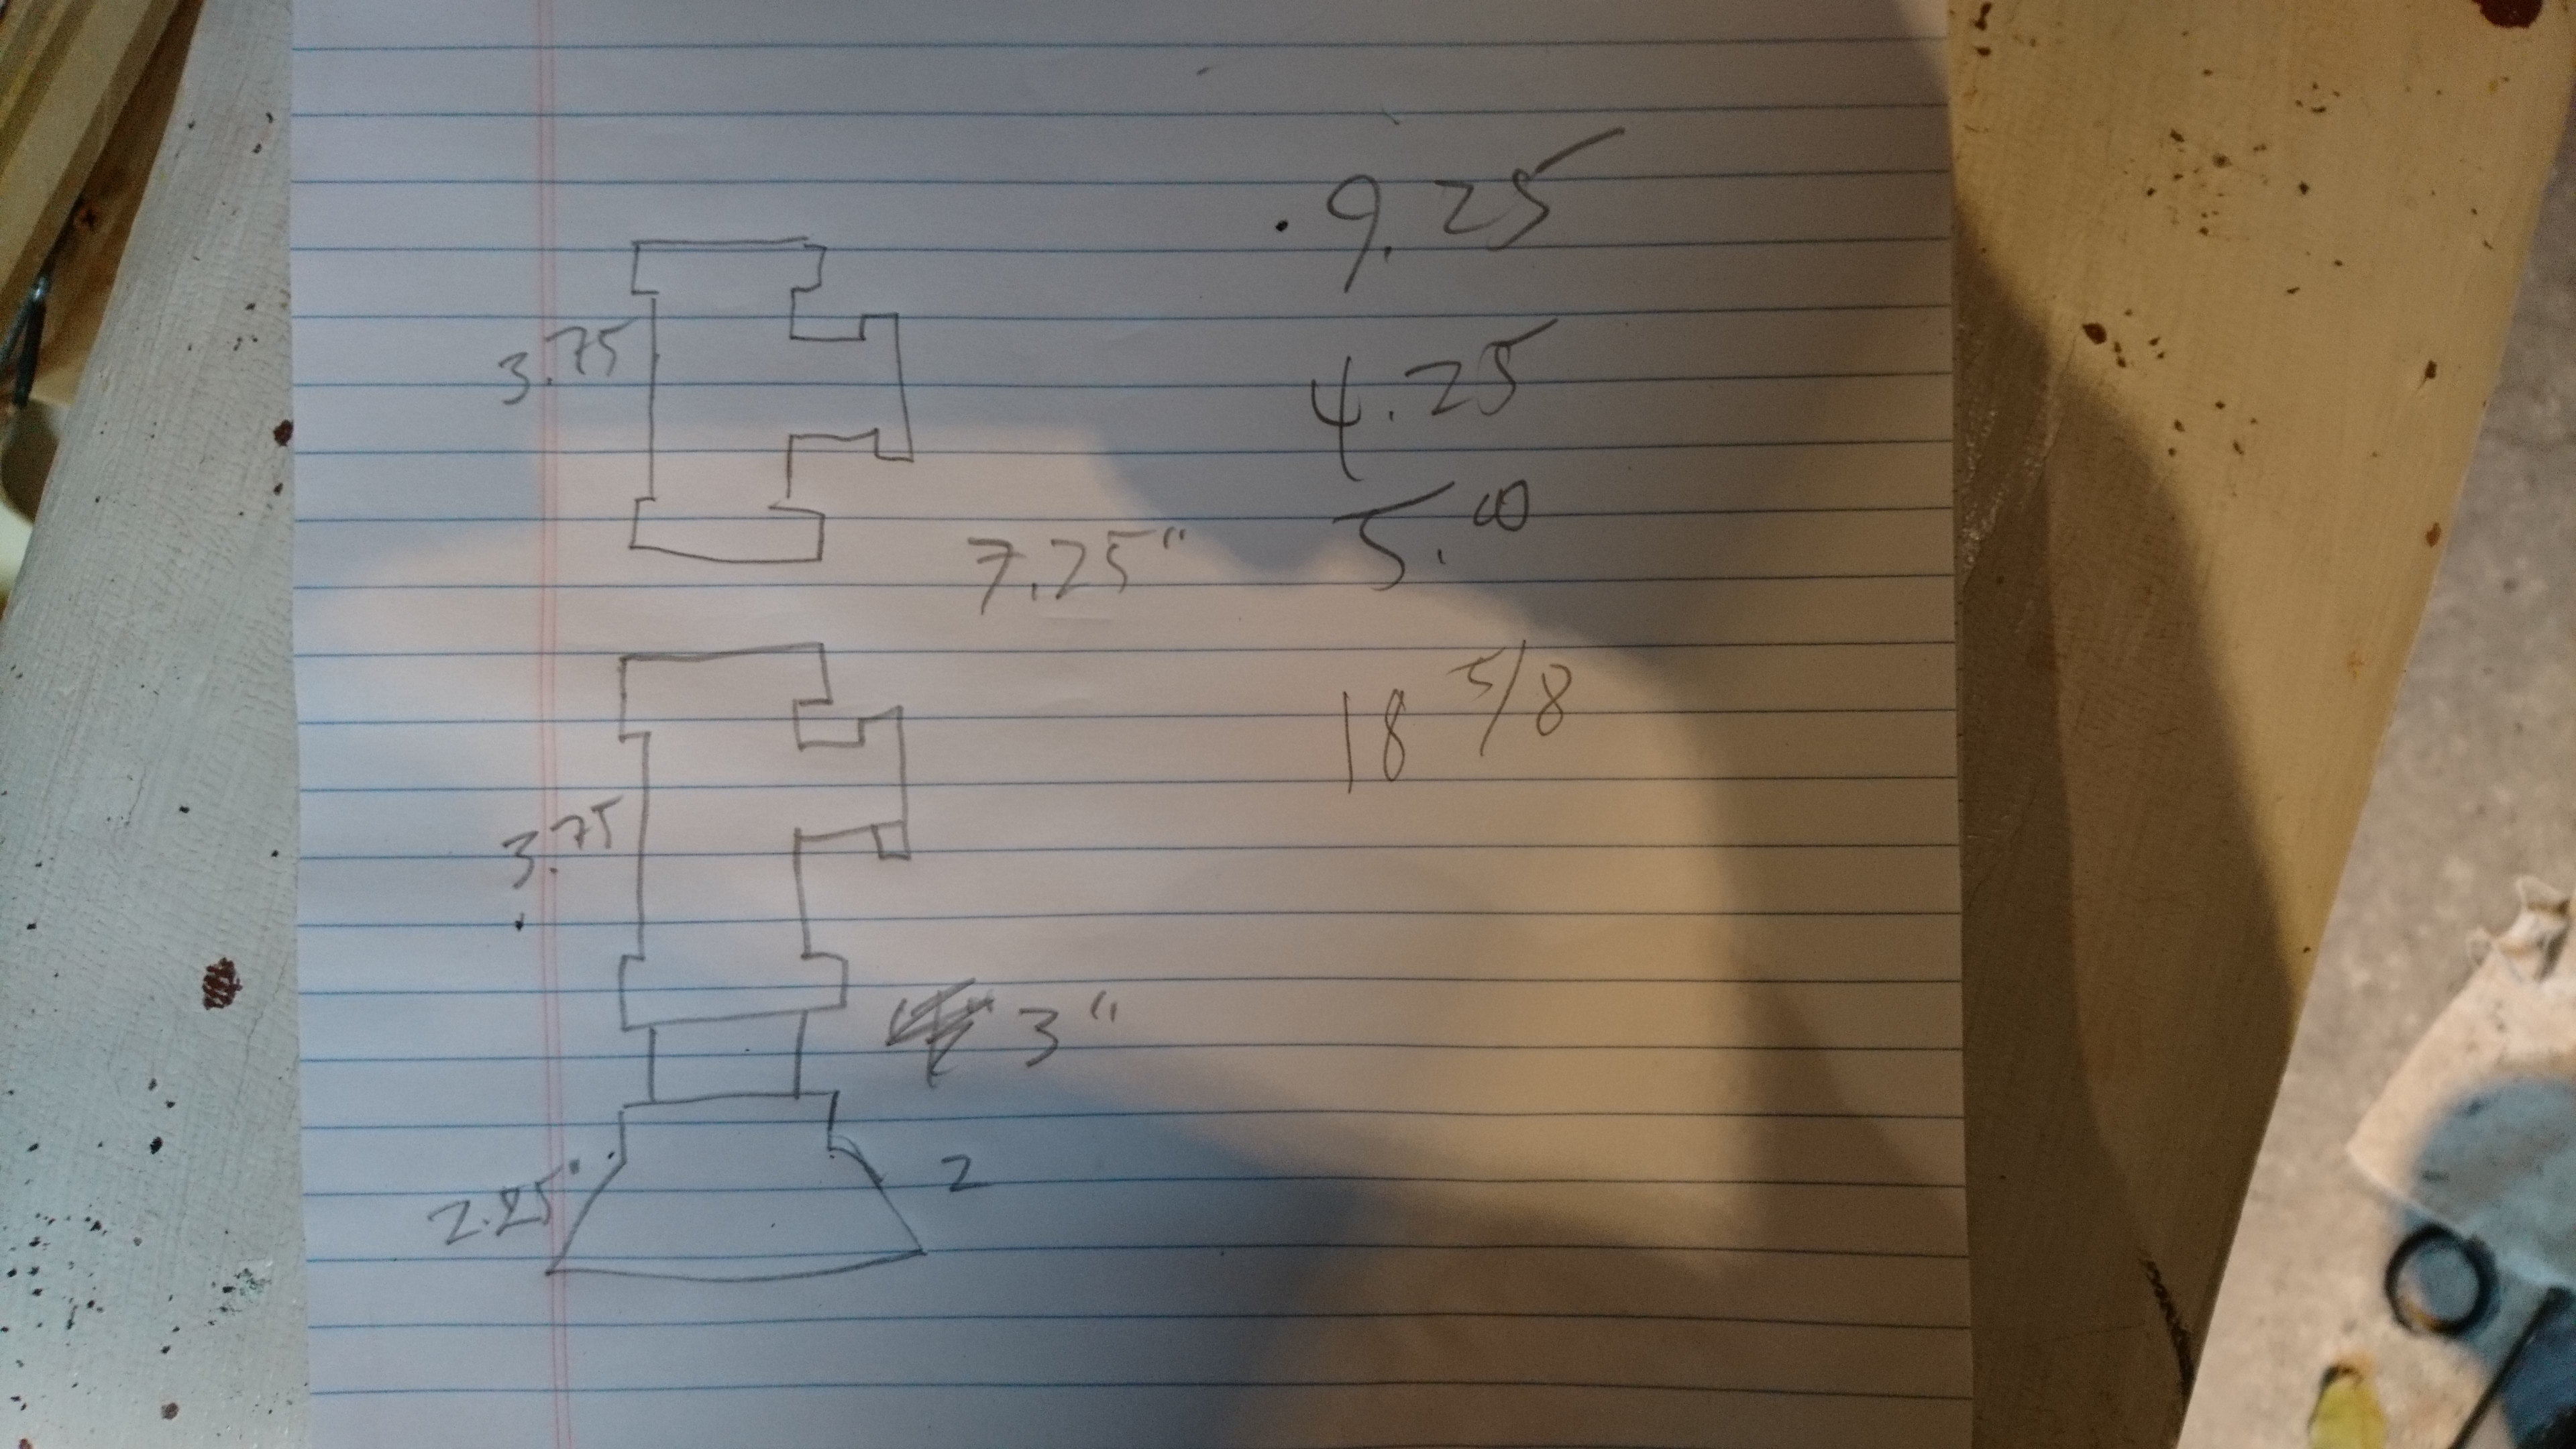
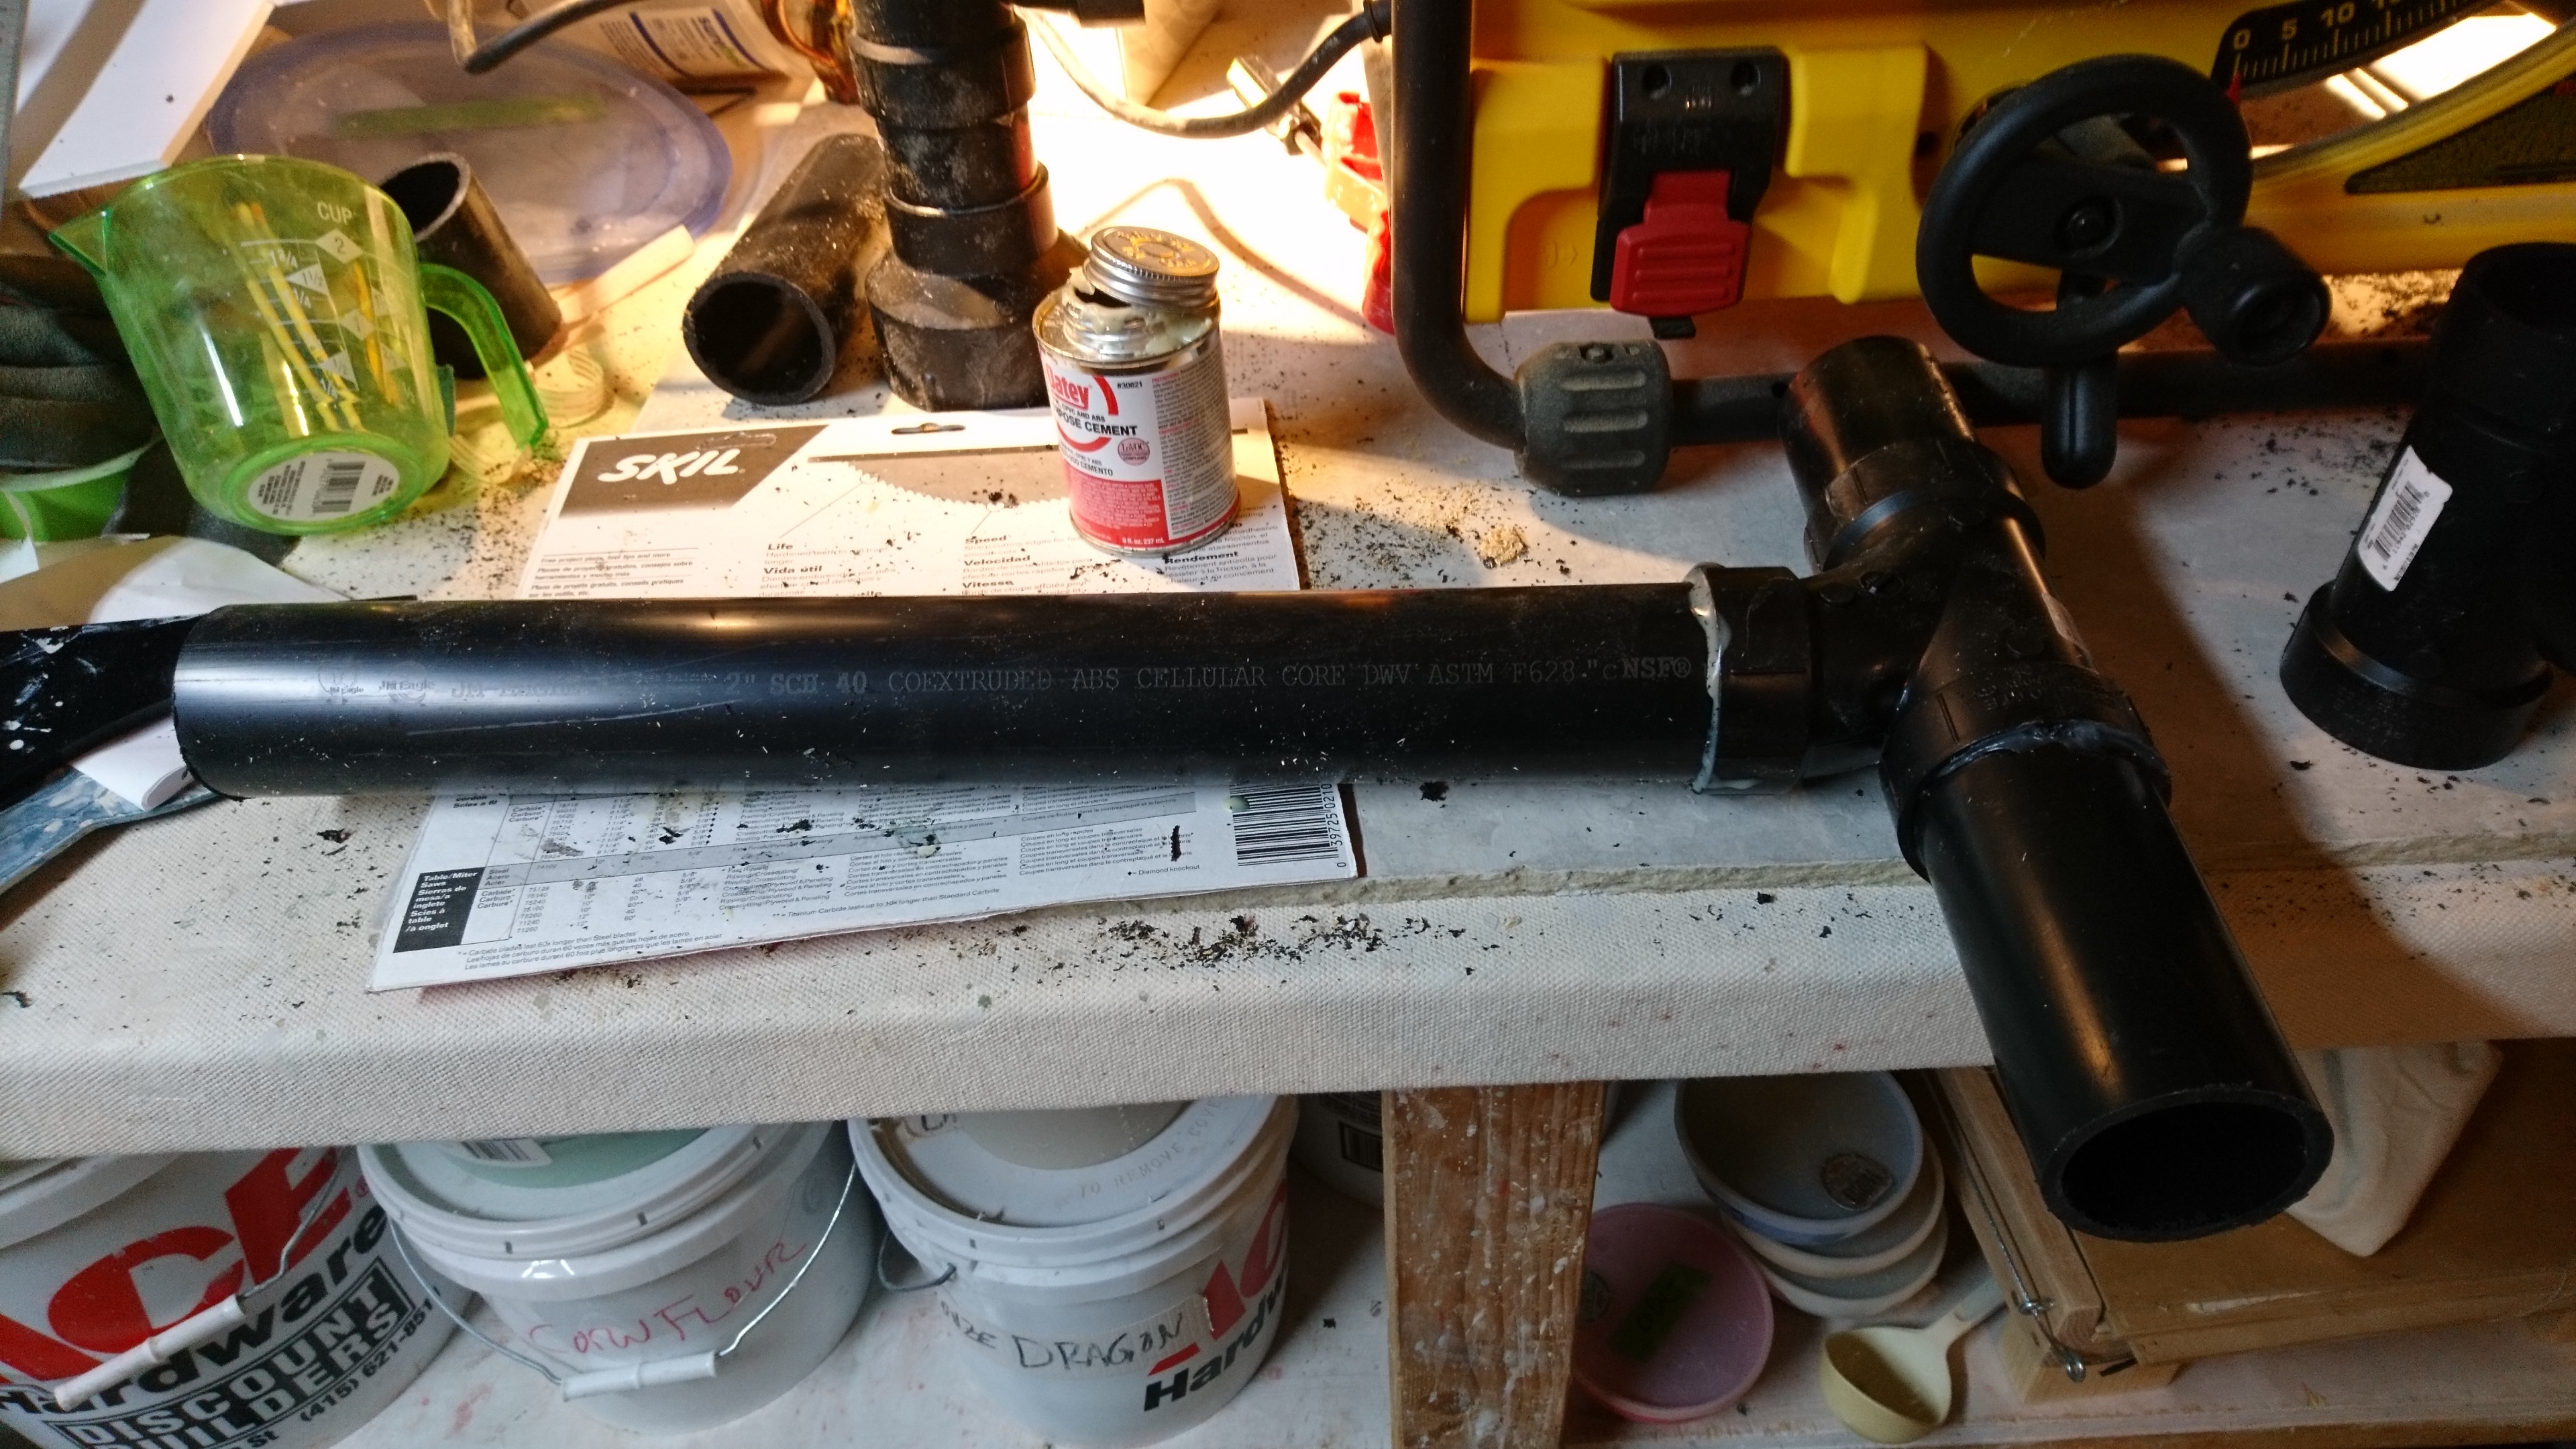
So, next we need to cut all the pieces for each "leg", which consists of an expansion joint as a foot, a 3" piece of pipe, a t-joint, a longer piece of pipe, and another t-joint. That longer piece of pipe is where you adjust the height of this. For my target 39.5", I used a 7.25" long pipe, so lengthen or shorten yours depending on whether you want to be taller or shorter.
Now, you'll notice a difficulty with sanitary T-joints. They aren't symmetrical. Since they're designed for sewer output, the bottom of the T curves, and is closer to one side than the other. This means that you have to pay close attention to the orientation of the T-joint, and this is also where your main gluing screw-ups will come in.
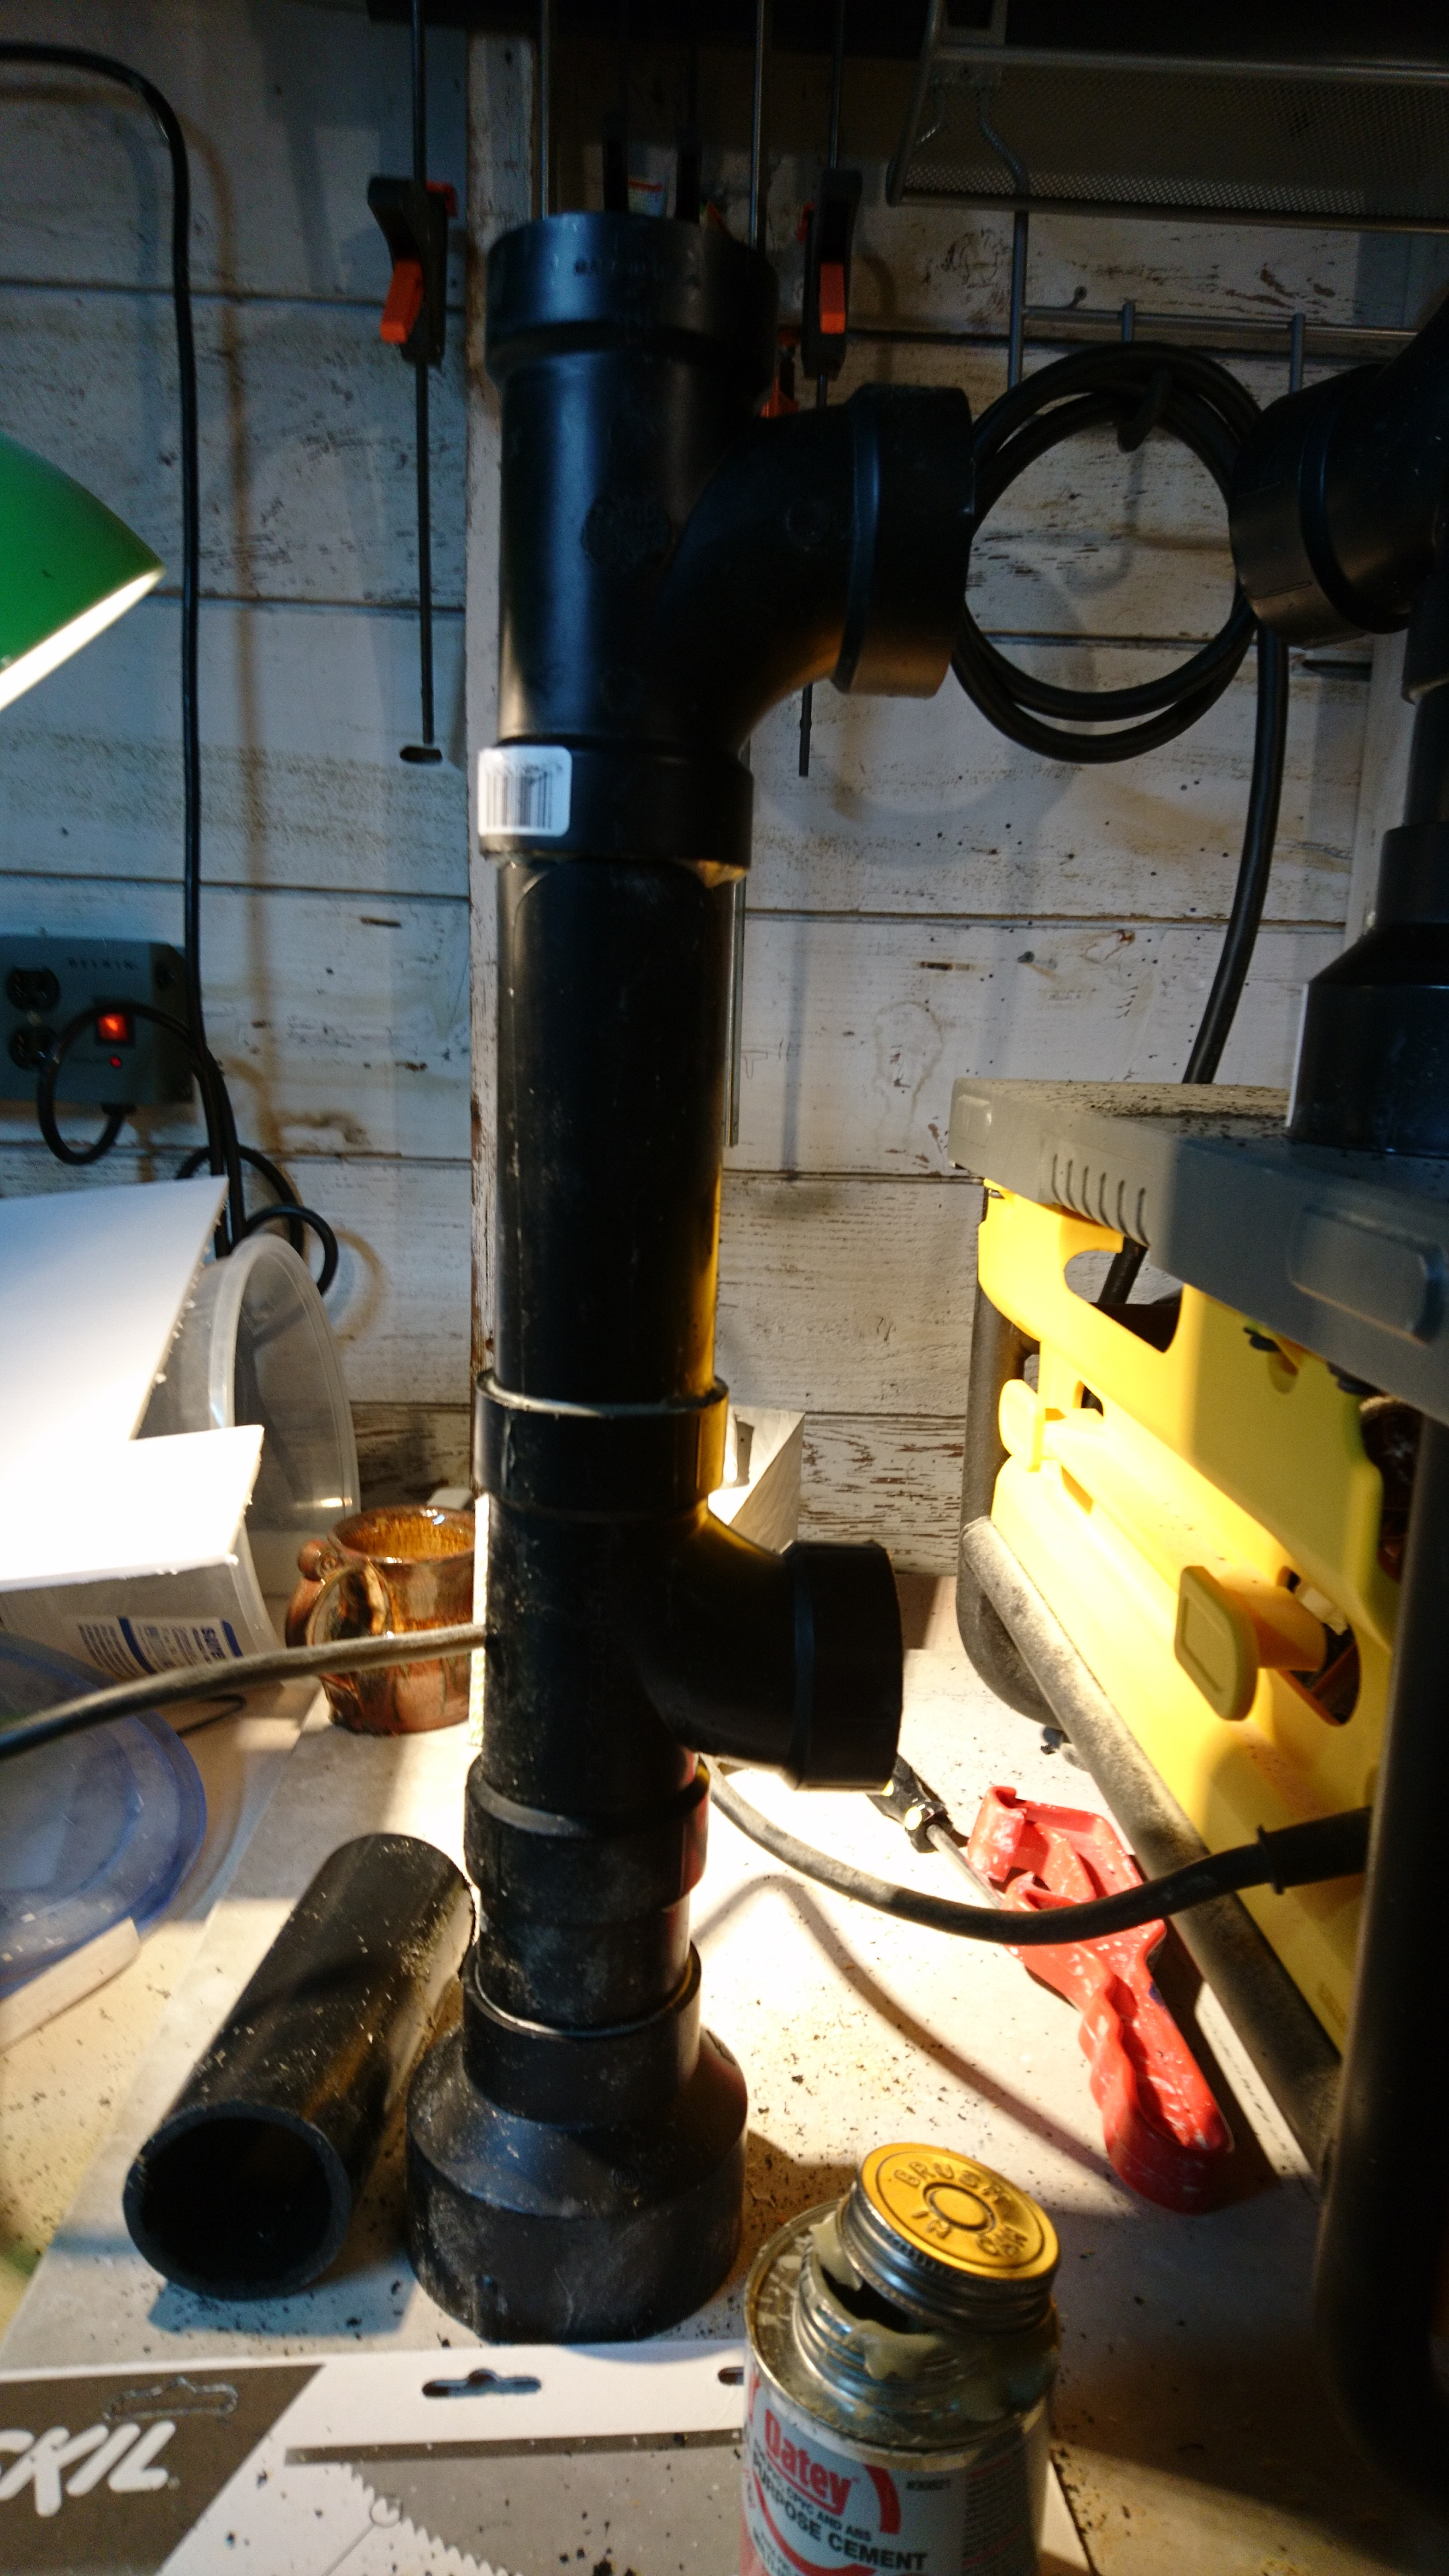
Having cut all those pieces, we need to glue them. Put on the nitrile gloves. While ABS glue is non-toxic, it "melts" the plastic and that black plastic will stick to your hands and require pumice to scrub off. You use the applicator in the can to rub the glue on both sides of the join and then push the pieces together. Here's the other challenge: ABS glue sets immediately, so you need to push the pieces into the right position the first time. And make sure that those t-joints face precisely the same direction.
Now, the three legs are going to be joined by two "T" shapes for stability. The short side of each "T" has a sanitary T-joint in the middle, but since those joints are off-center, you'll need to glue them with different length pipes on each side, one 4" and the other 5.25". Once this is set, you'll glue in the last, 28 5/8" long pieces for the long crossbar.
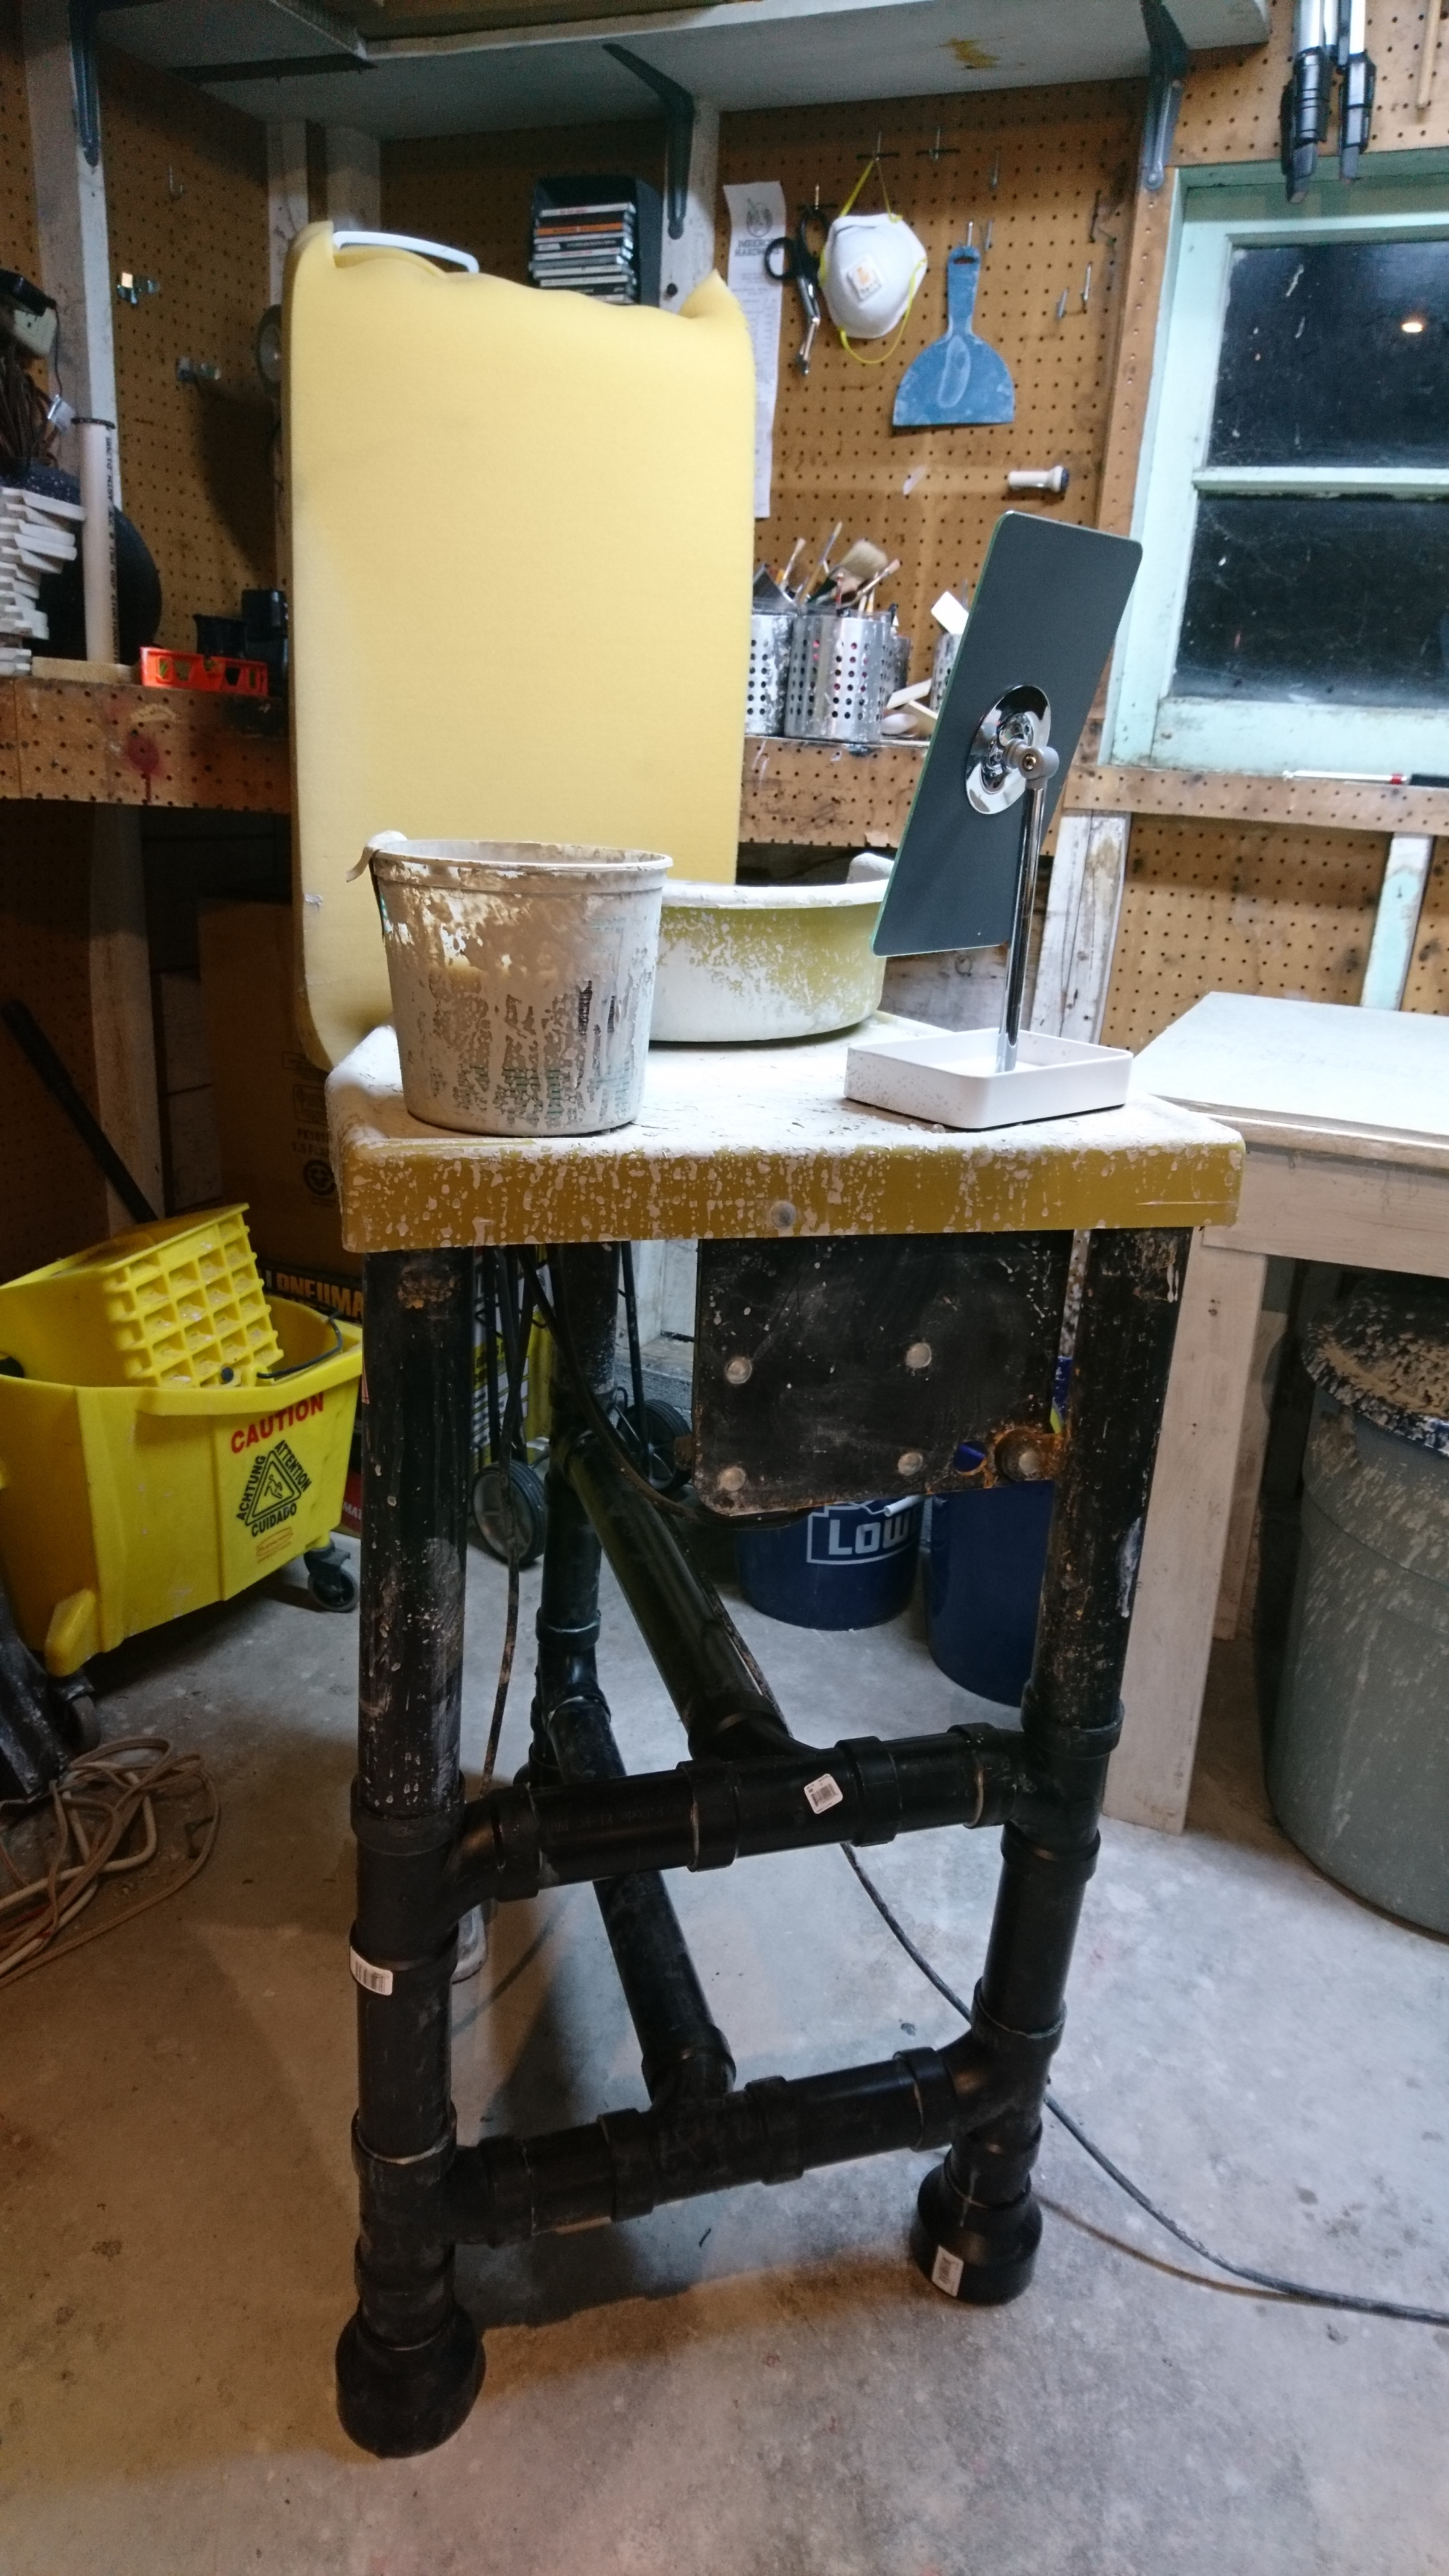
Now comes the really hard part. You're going to need to put all three legs on the legs of the wheel, and then insert the T stabilizers, with glue, between them. One thing that makes this super-tricky is that the tops of the legs fit very tightly onto the legs of the Brent, tightly enough that you generally need to hammer them on. If you do it right, you'll have this:
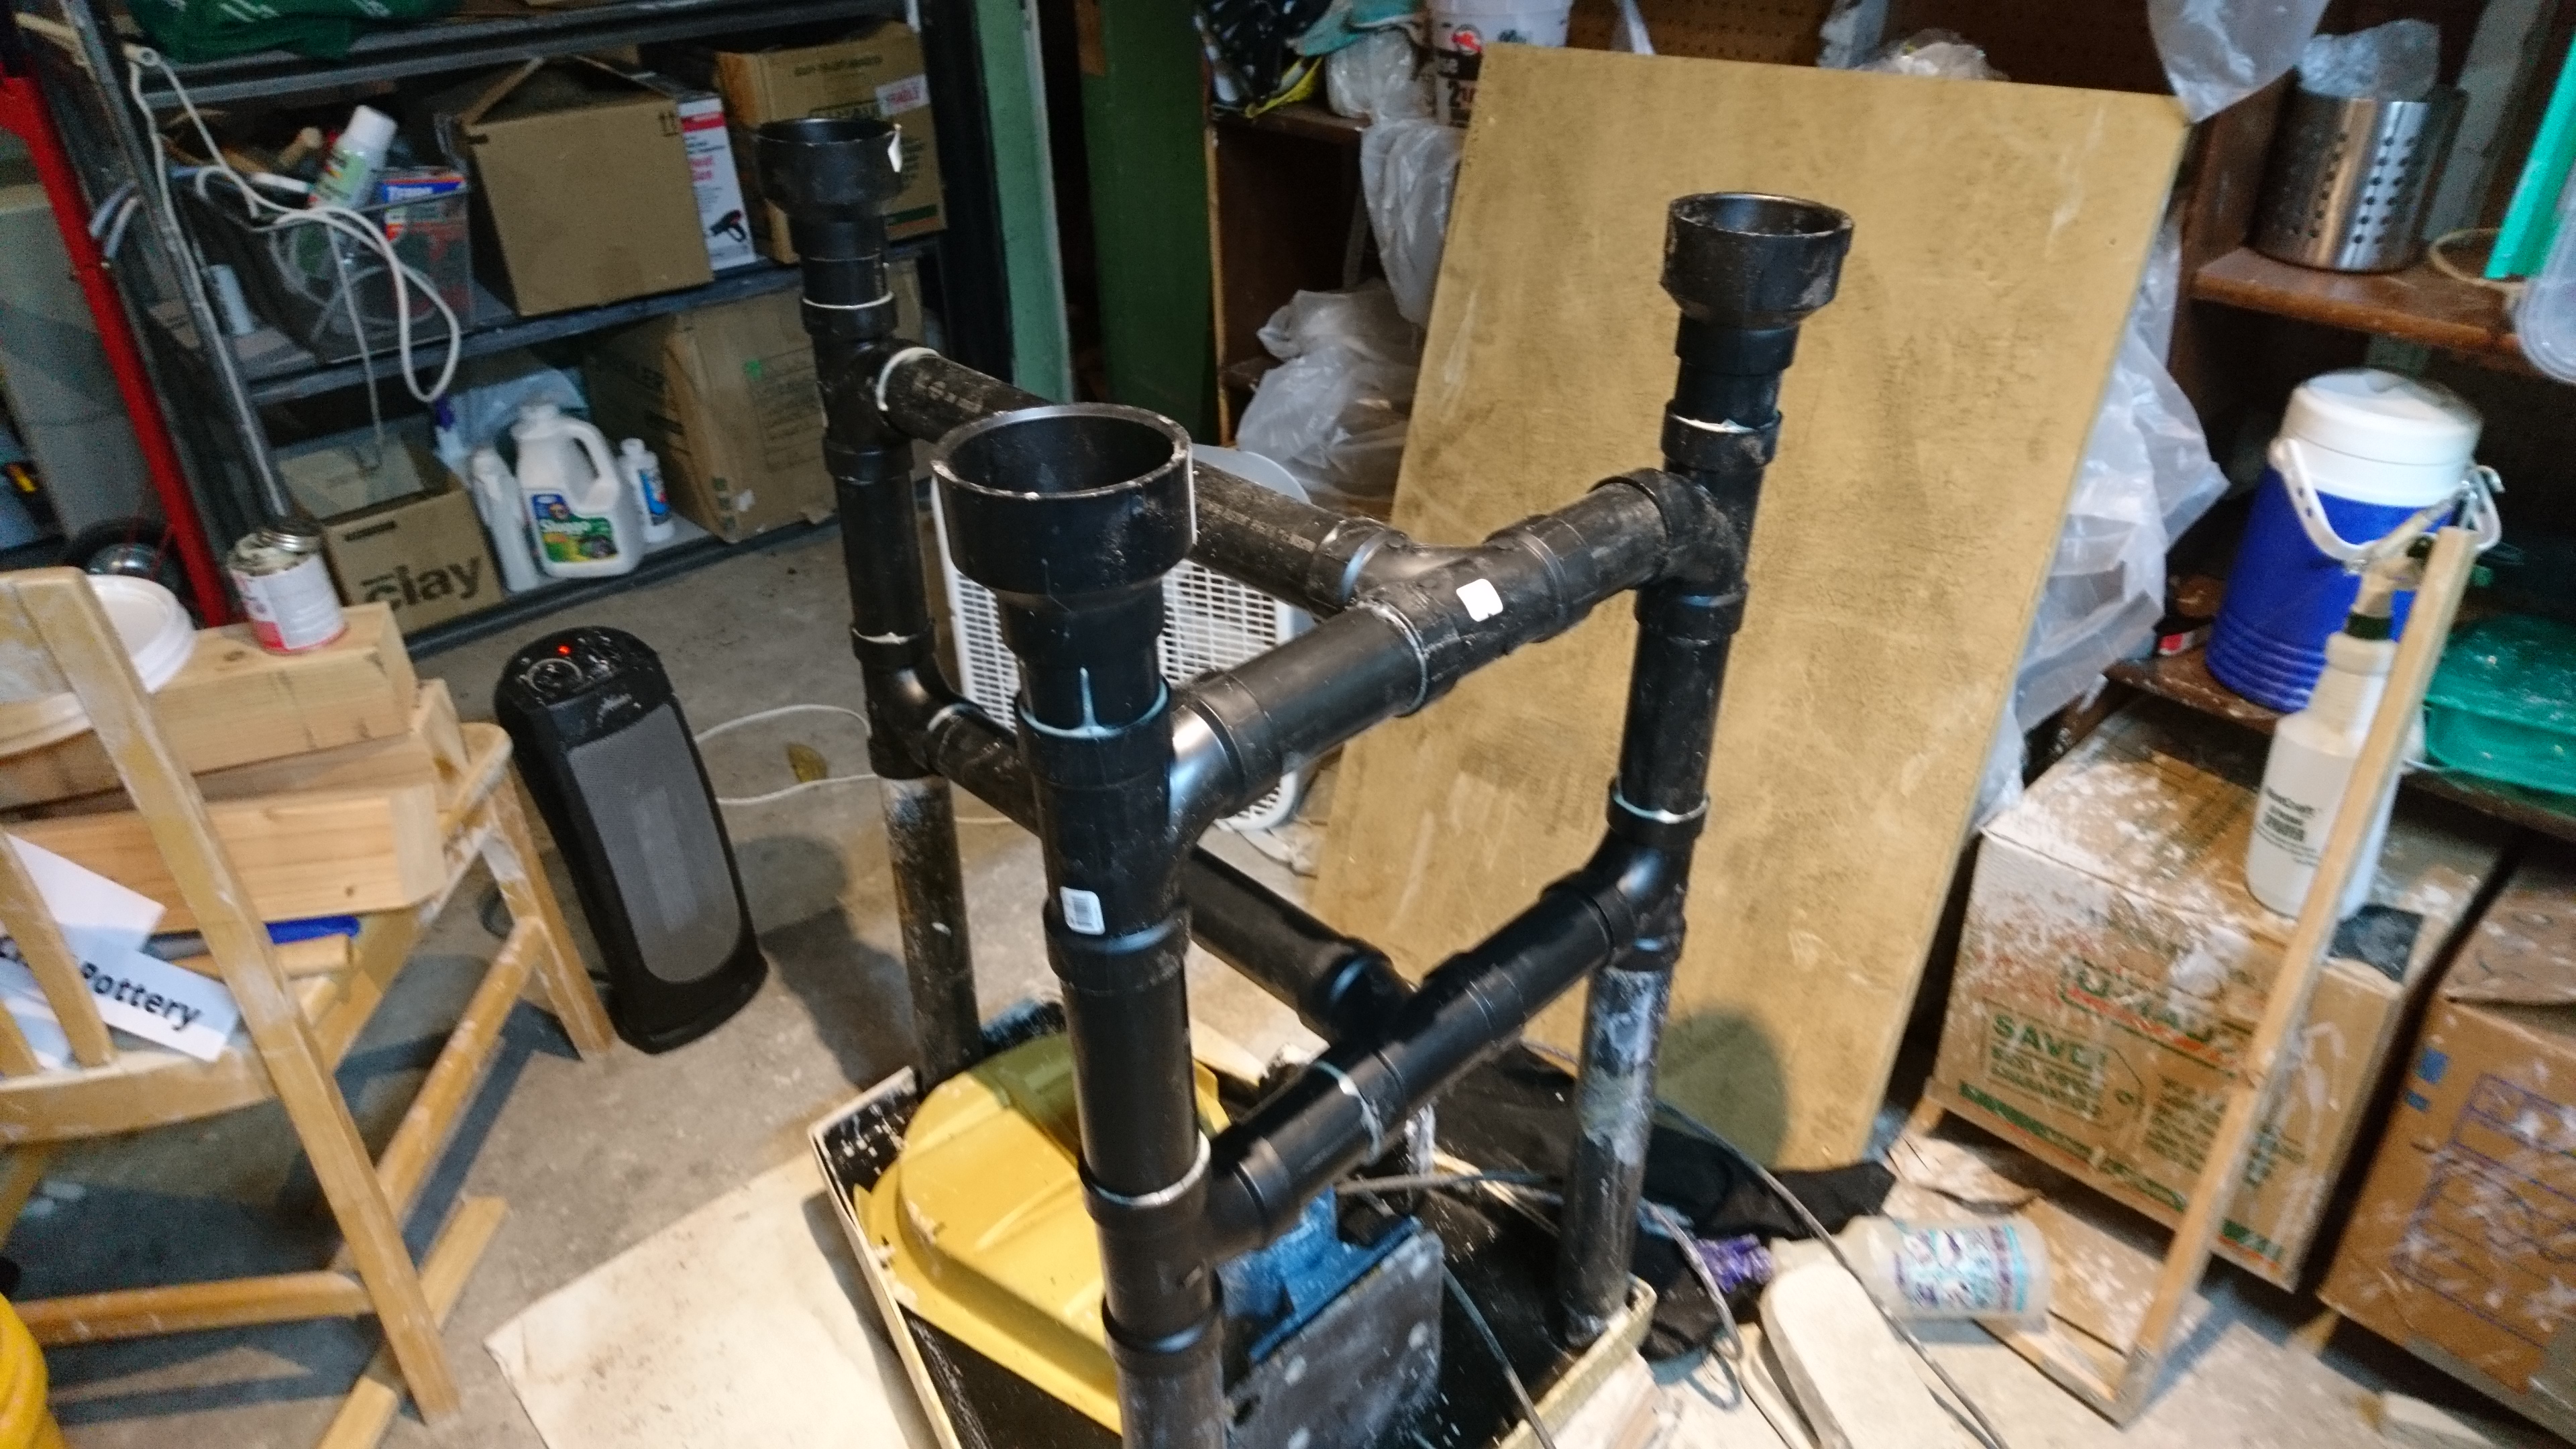
So, some steps:
- Remove any plastic feet from the wheel legs.
- Clean the bottom of the wheel legs, even sand them if they are rusty or corroded.
- Press each plastic leg assembly onto the 3 legs, and get it into position, but don't shove or hammer it down.
- Glue the long part of both Ts into the front leg, and then quickly before they set ...
- Lean the two back legs, insert the crossbars with glue, and push them back together, and then quickly ...
- Using a rubber mallet and some scrap wood, hammer all three legs into place before the glue is fully set, and
- Check that the feet are level using your level and bash them around with the mallet until they are.
As you can imagine, the above will go better with an assistant, since the last four steps have to be done before the glue sets, meaning in about 2 minutes total. Now, let that assembly dry and set for at least 12 hours before you flip it over, something which definitely requires an assistant, as you don't really want to put a lot of sideways pressure on the legs while flipping.
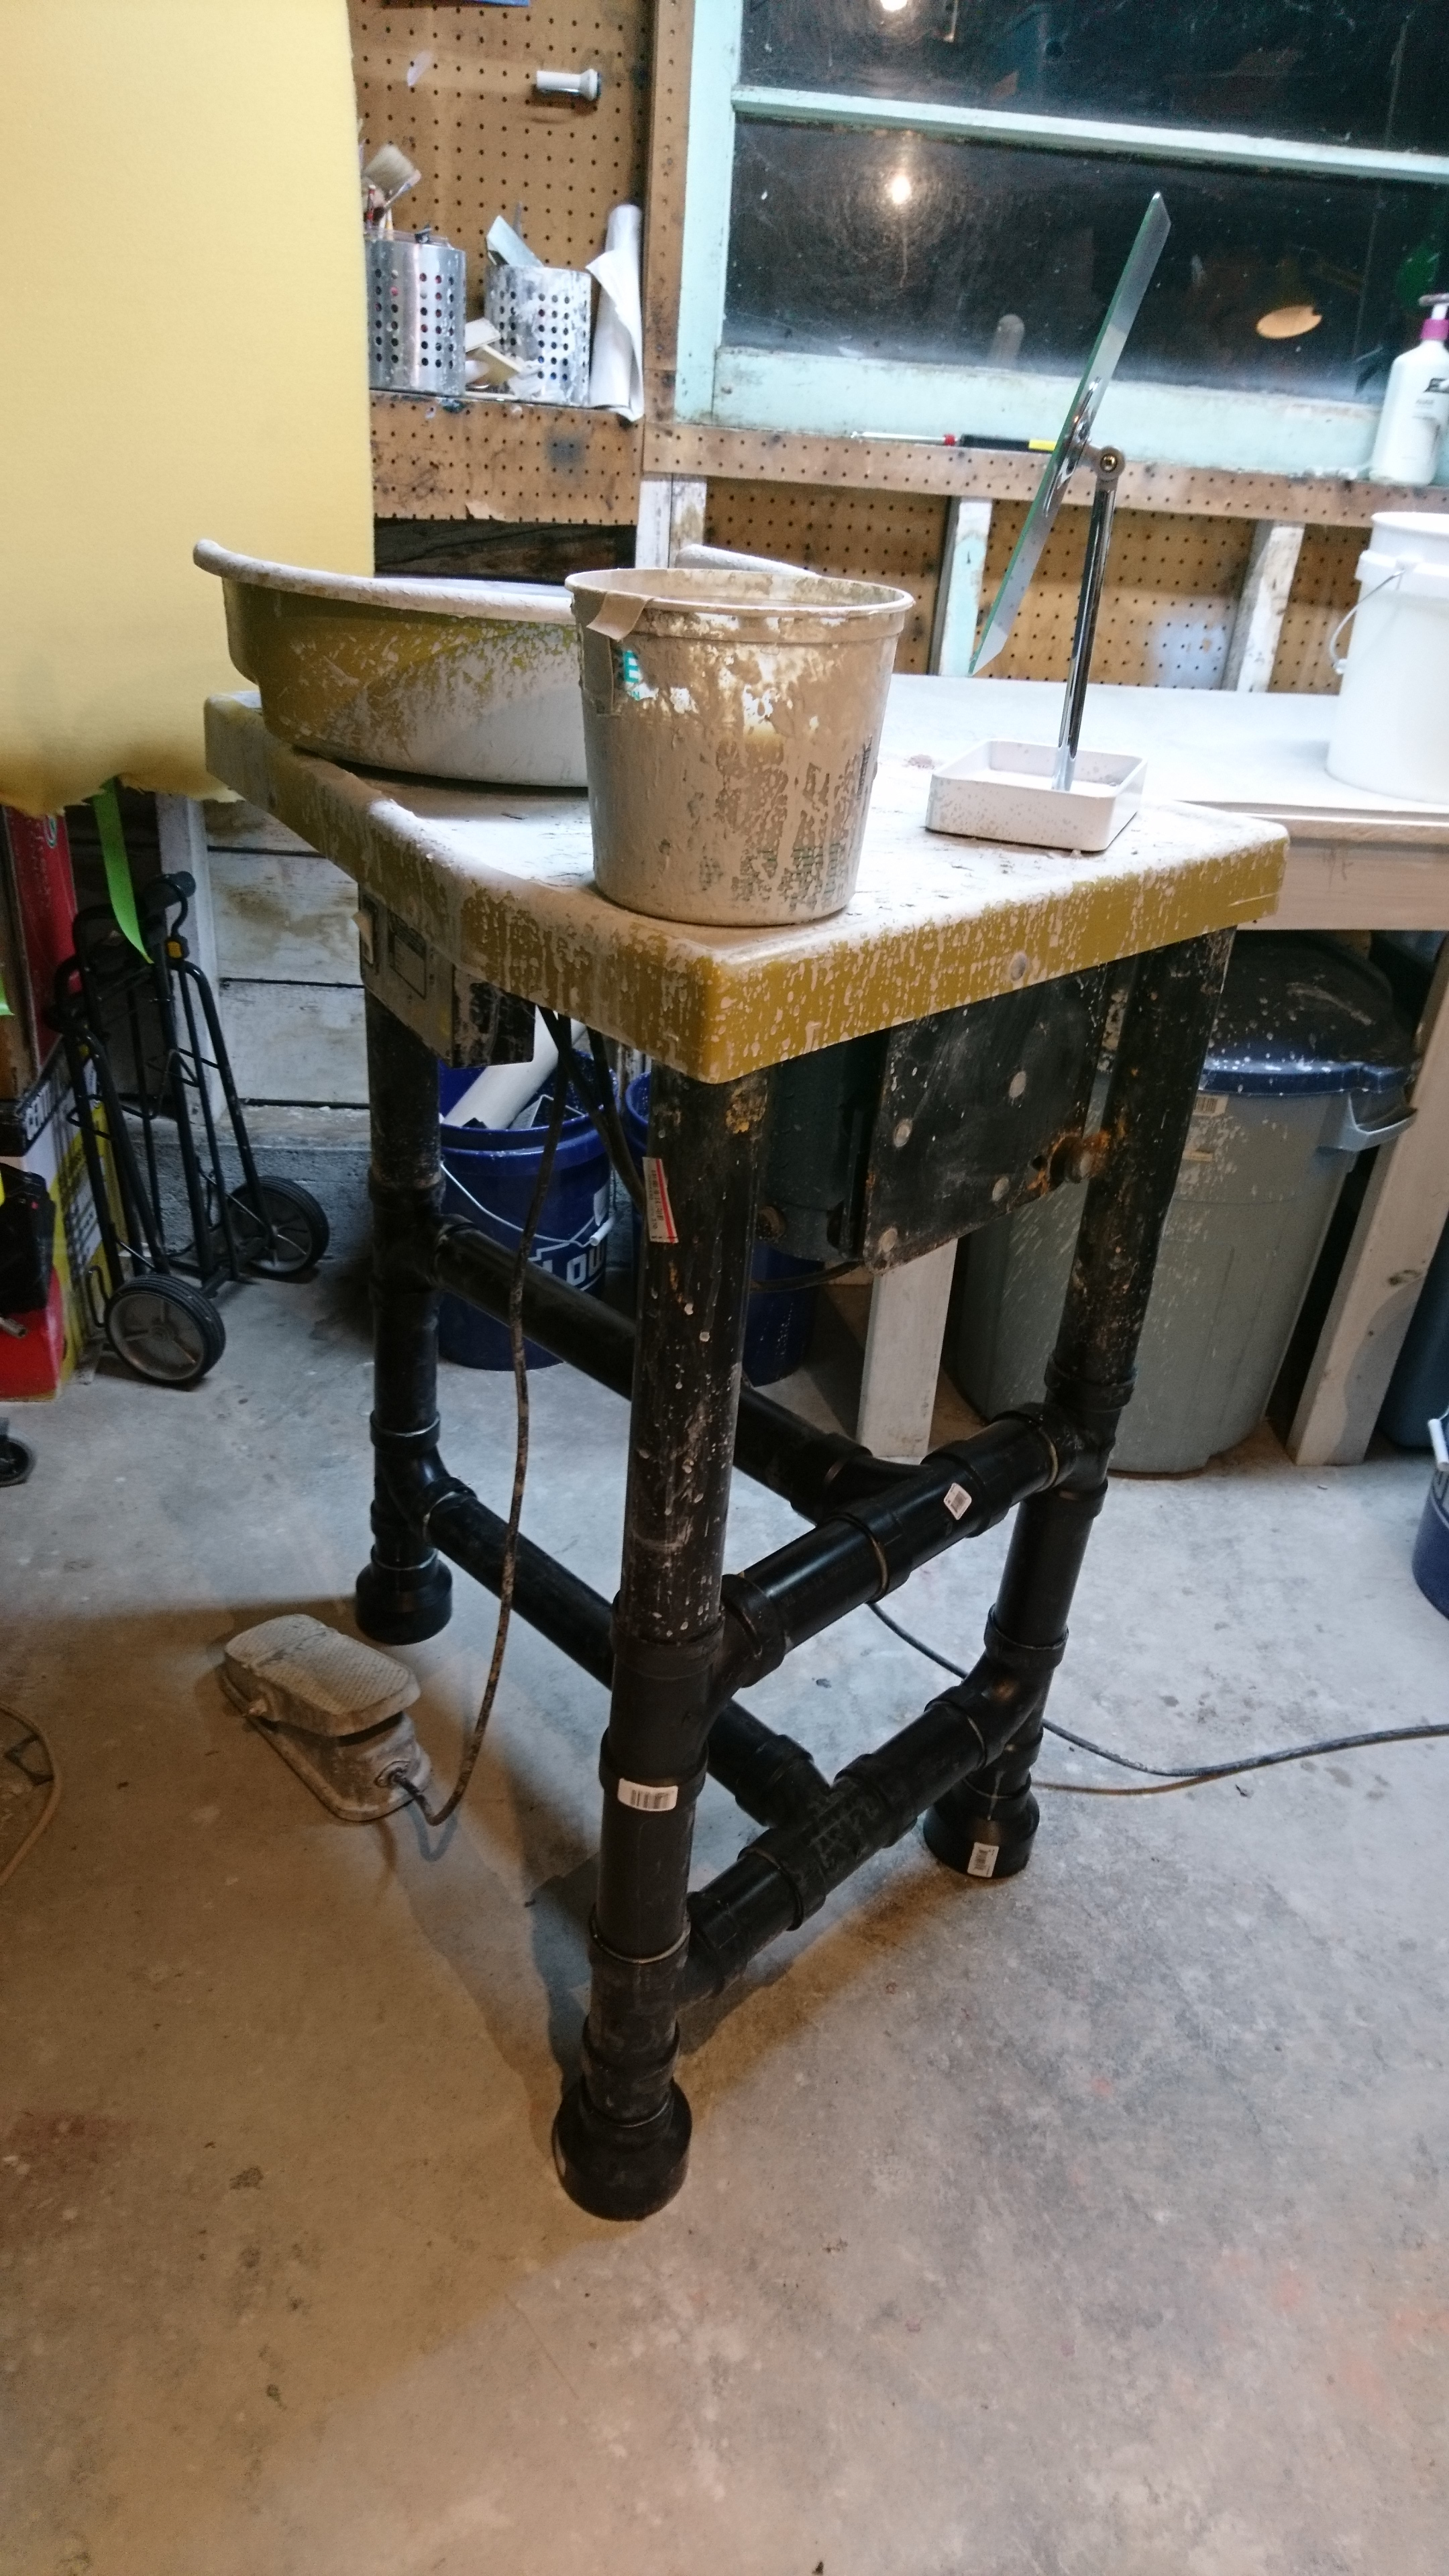
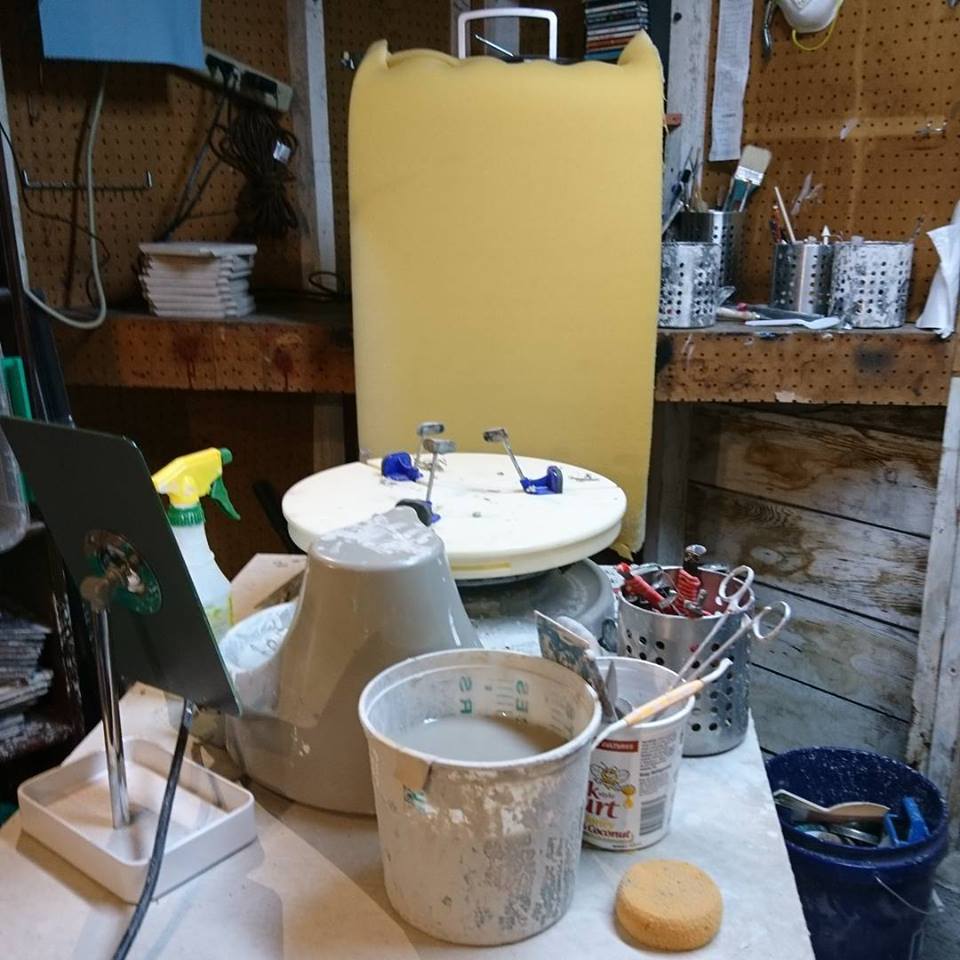
Now, build yourself a backrest, plug the wheel in, and you're ready to throw!