modern handle methods
When I learned how to put handles on things ... and generally join pieces of clay together ... back in the late Middle Ages, I learned it the way folks have done it for millenia. Score heavily with a sharp tool (like fork), slip, and score again. Then press together and try to wipe off all the mucky slip that's now everywhere. It's the tried and true method and I guarantee you as you're reading this, some pottery student somewhere is learning slip-and-score to attach a handle to a mug.
Sometimes "venerable" also means "outdated", and this is one of those times. Stop slipping and scoring. There's a new way, and by "new" I mean actually more than a decade ago, but somehow most potters haven't heard of it yet.
Hopefully, this will help.
You see, slip-and-score originates in the belief that clay doesn't want to stick together. And there's sometimes that's true -- like when there's a gap, or if the two pieces of clay are different levels of dryness. But most of the time, clay wants to stick. In fact, if it's wetter than leather hard, it's difficult to make it not stick. The other idea of the slip is to have plenty of mush so that no air bubbles get trapped between the two pieces, which can encourage cracking while drying. But the double scoring, if anything, makes air bubbles more likely. It definitely makes accidentally making a hole in the vessel more likely.
So, what's my alternative? A toothbrush and "magic water".
Y'see, when you've got a handle and a still pliable mug body, they want to stick together. You just need to make sure that the two surfaces come into maximum contact, and for insurance you add just a little deflocculant (a chemical that dissolves clay) to make the clay "stickier". Some folks use vinegar or saliva for this, but what works even better is a chemical solution called Magic Water popularized by potter Marian Williams. Magic water is a very weak solution of deflocculants. I make up 1/2 gallon at a time:
- 1/2 gallon distilled water
- 1.5 Tbs liquid sodium silicate
- 1.5g powdered soda ash
To encourage maximum adhesion, I dip an old toothbrush in the magic water solution, and rough up both surfaces that will be in contact. This works like barge cement; once you'd magic watered both surfaces, they'll stick and be hard to pull apart (so make sure you place that handle correctly). This works much better than score-and-slip, it's faster, and it's far less messy; your handle looks like you just pushed it there with your thumb. No slip-slop cleanup!
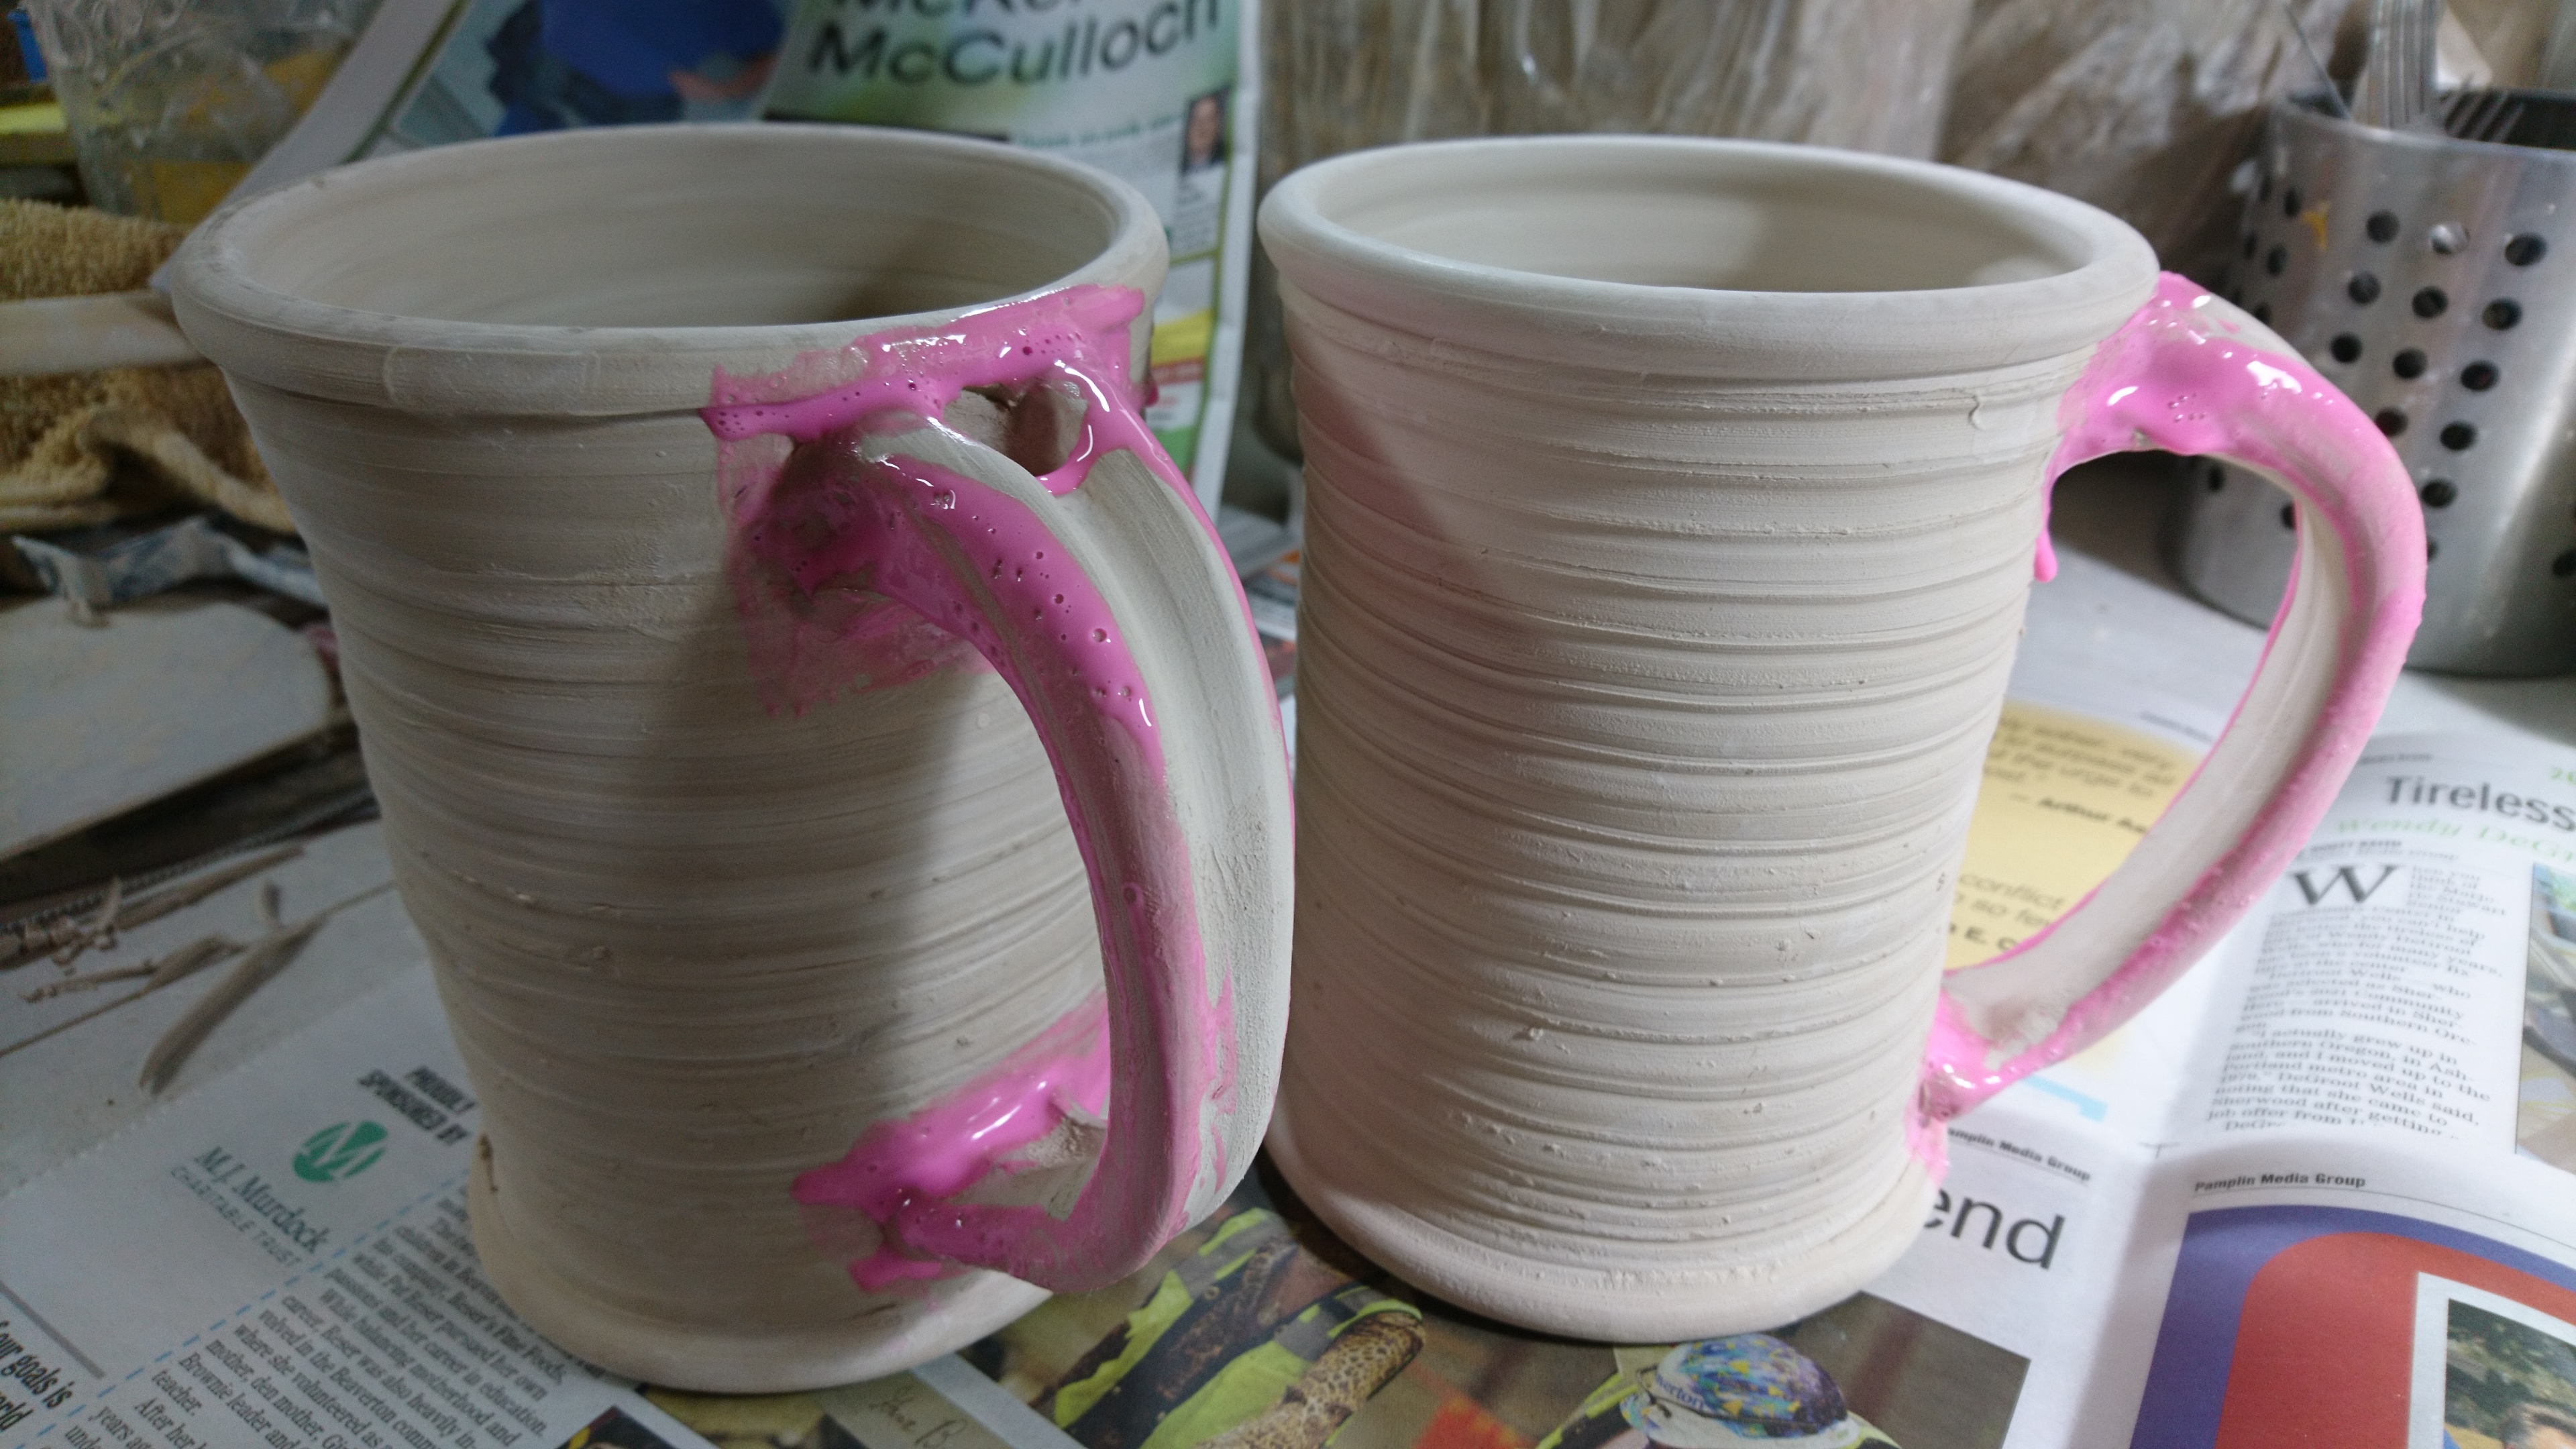
Now, some other tips to help with handles. At the top of this post, you'll notice pink stuff on the handle attachment points and the "sides" of the handle. That's a thick wax resist called Wax-On. For some reason, if you paint wax on any attachment seams when attaching handles and sprigs to pieces, those seams are much less likely to crack -- even when fast-dried. I don't know why this works, but it definitely does.
The other problem with handles is that they split while drying. This happens because the handle, which made of clay that's exposed on all four sides, dries faster than the body of the mug, where each band of clay is exposed on only two sides. So, if you paint two sides of each handle with wax resist, the handle will dry at the same rate as the mug it's attached to ... and not crack.
For my final tip, lemme encourage all you junior potters out there to learn to pull handles from the mug. Yes, it's hard to learn and you'll ruin a few mugs trying. But once you're good at it, the handles look better and are much faster to make than handles you make seperately, then attach.
Happy mug-making, all!