smooth bottoms
When you fire pottery in a shared kiln, as most of us do, you end up with defects and crud attached to the foot of your vessel: older glaze drips, bits of kiln wash, tiny chips of clay, little divots. It's an inevitable result of production firing at a certain scale. And while some potters may leave that to their customers to deal with, I really don't wanna sell someone a mug that's going to scratch the heck out of their grandmother's table. So smoothing those out is important to me.
Since I know a bunch of newer potters who are looking to do the same, I thought I'd lay out the tools I use to smooth out those bottoms.
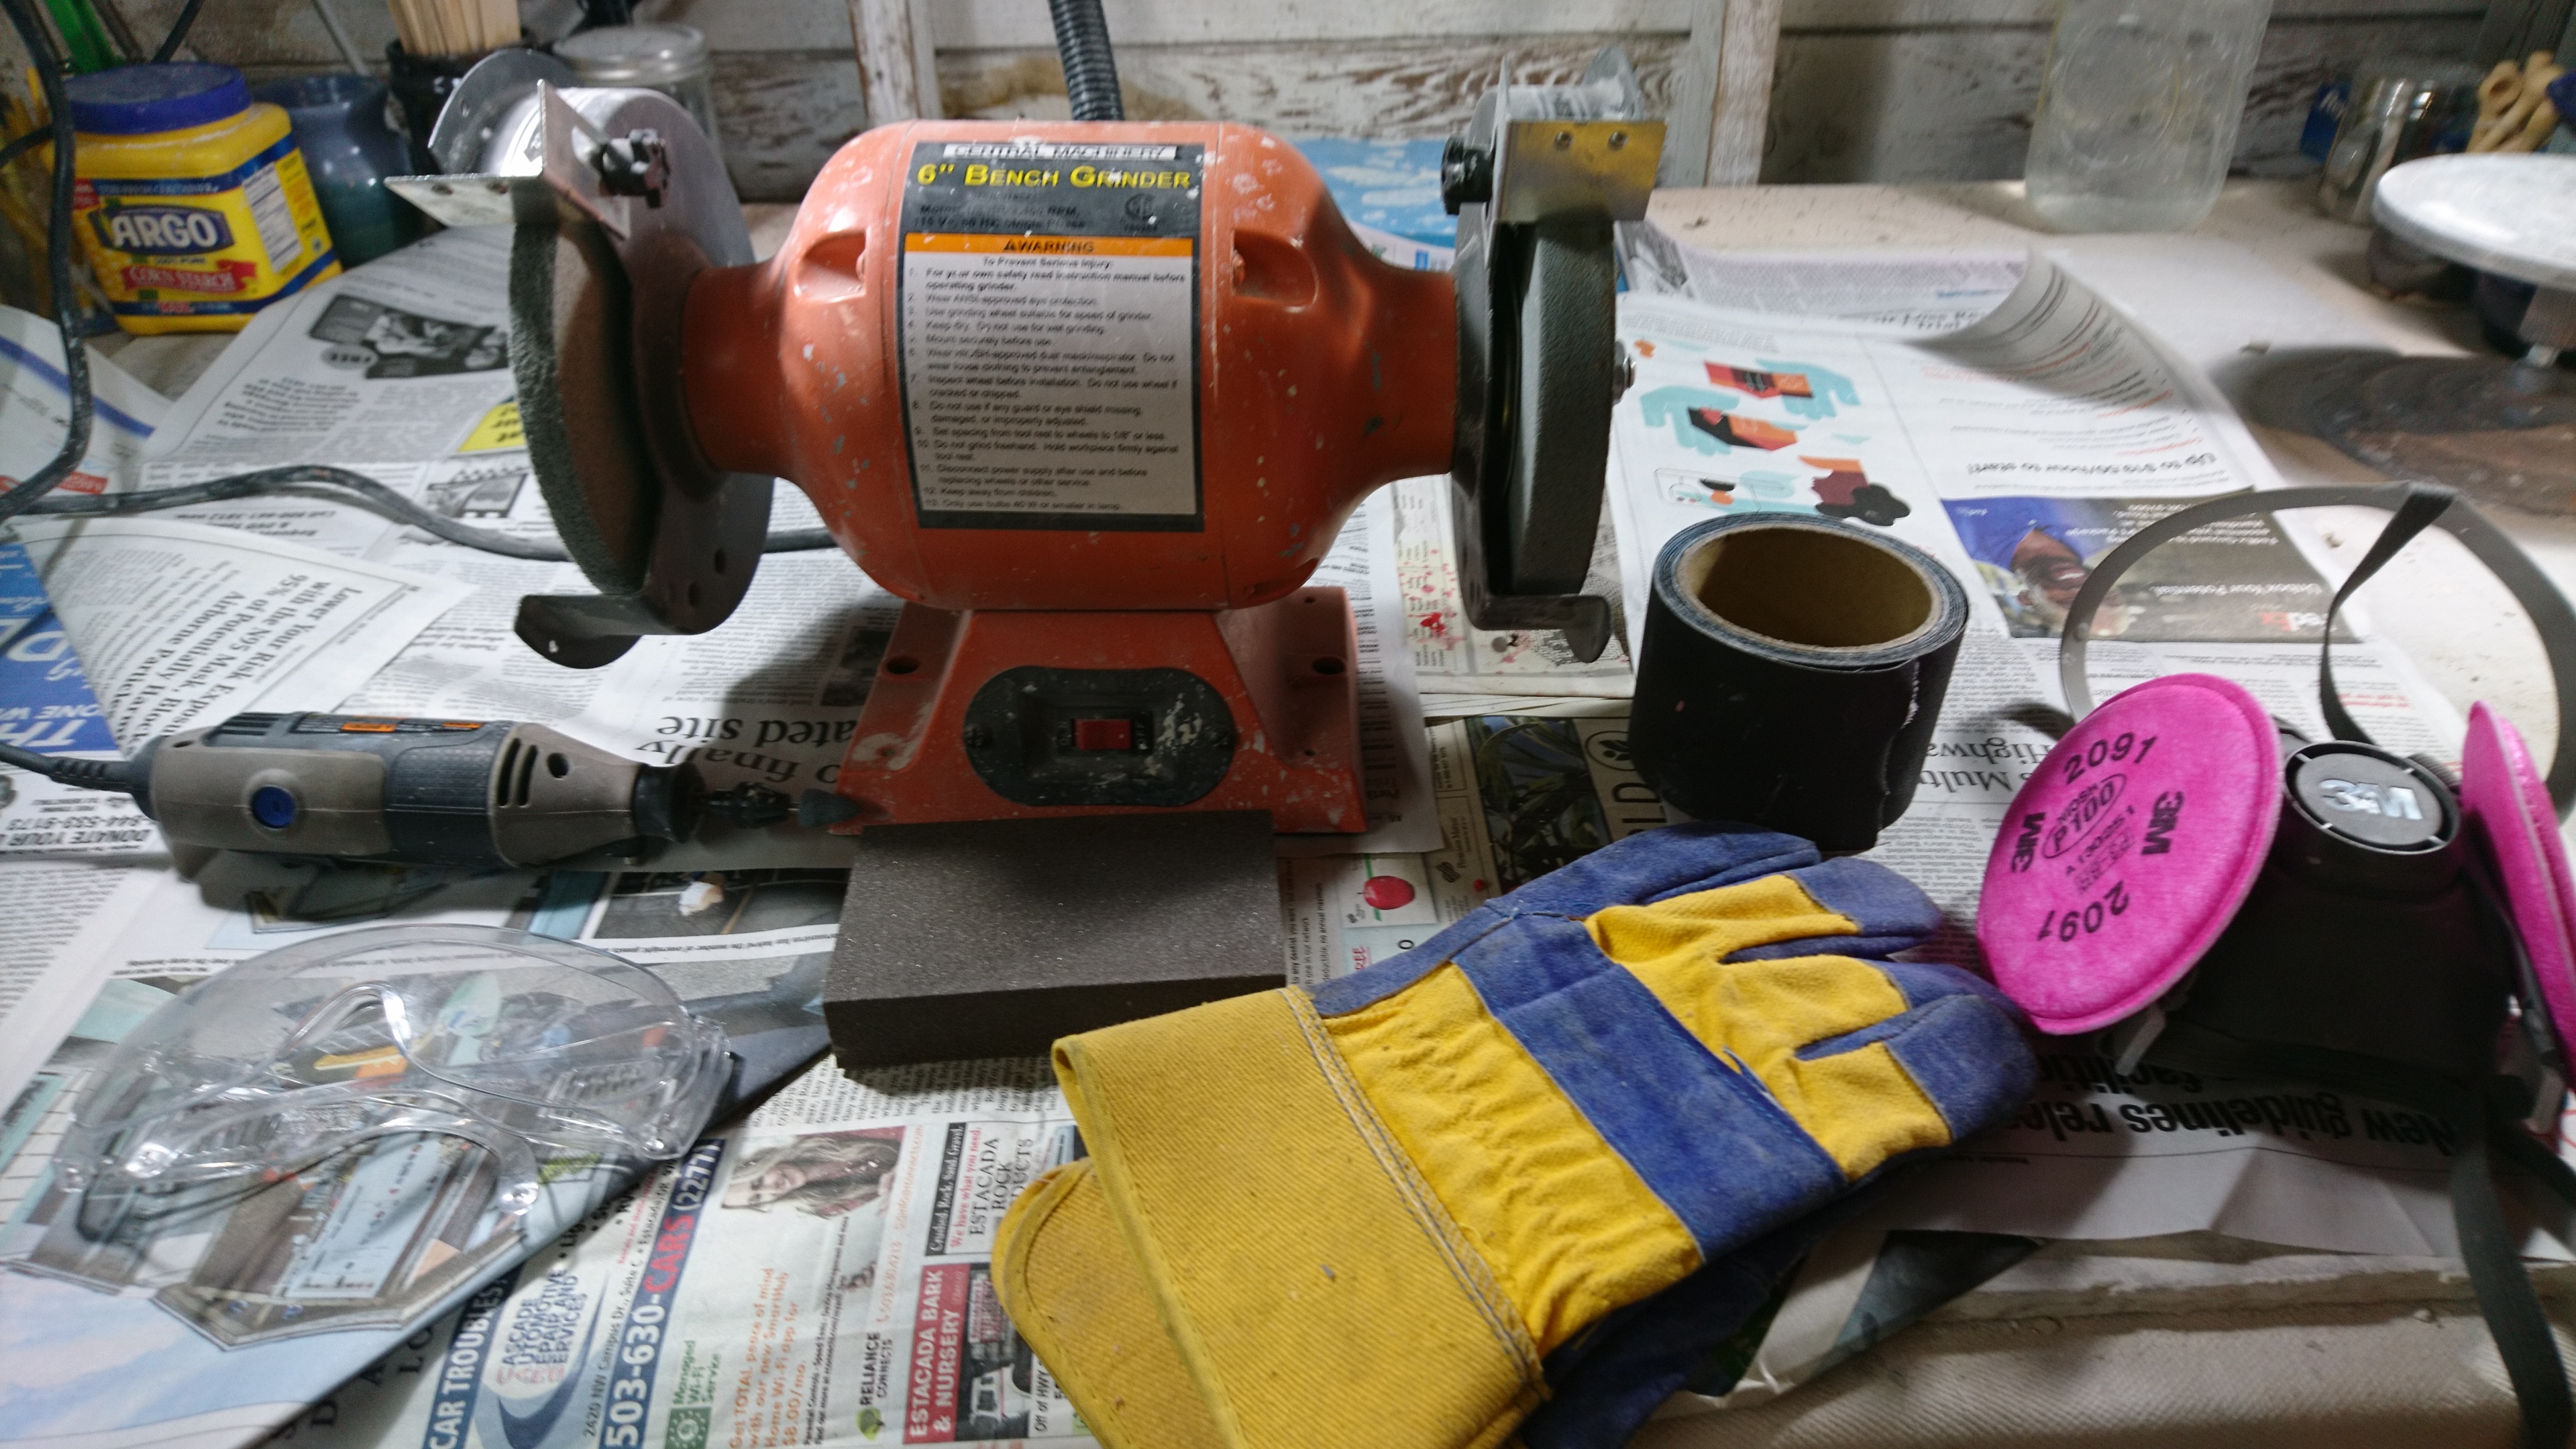
Safety Equipment: first, before you start grinding, you need to protect yourself! You need protective eyeglasses to protect your eyes (and your $300 perscription eyewear) and hearing protectors (not pictured). You also should wear some heavy rubber or leather gloves, in case you slip and touch a grindstone; better to ruin a glove than to take a trip to the ER. Finally, you need a silica-rated respirator, like the 3M P100 mask pictured. Silica dust is no joke, and you're about to grind ceramic.
Dremel Tool: next I start by using a Dremel with a cone-shaped grinding stone to remove any specific little pieces of stuff, like tiny fragments of kiln wash. The Dremel is great for spot grinding, especially if you need to smooth out a sharp bubble in a glaze somewhere.
6" Bench Grinder: this is the workhorse of pot smoothing. I have a 60-grit aluminum oxide grinding stone on the right to really remove material, like glaze drips or chunks of shelf. And on the left I have what I use the most: a 3M Deburring Wheel. Designed for finishing metalwork, deburring wheels are the equivalent of 200-grit sandpaper that lasts forever (seriously, that particular wheel has lasted through at least 2 years of pottery production). That's what I use for making the bottom of the foot baby-smooth even if there's nothing really wrong with the foot out of the kiln. It's totally worth the cost (that one was $80).
240-grit sandpaper/blocks: sometimes I need to smooth a rough spot that I can't reach with the wheel, or sometimes I just need to smooth a few cups and don't wanna get out the bench grinder. In that case, I reach for some 240-grit wet/dry sandpaper to give pot bottoms a quick buff.
Shop-Vac with HEPA Filters: (not pictured) I also have a double-filtered Shop Vac that I use for dust cleanup, in addition to doing a bunch of it on disposable newspaper. Dust is your enemy!
After you're done grinding and smoothing, remember that if you did it indoors you need to vacate that space or wear your respirator for at least 2 hours so the dust can settle. That silica dust will stay in the air and hurt your lungs for quite a while.
Now that I've gone over what I do use, lemme mention a few things I don't use, and why:
- Pottery-wheel-top sandpaper: this is presented as an alternative to getting a bench grinder. I've found it has two issues: it doesn't last as long as you expect it to (and you need to sacrifice a bat to each piece), and it's only good for sanding flat things (like, there's no way to smooth the inside of a foot).
- Wire wheels: this is what I tried before getting the deburring wheel. While a brass wire wheel will smooth your foot, it will also discolor it.
- Diamond grinding bits: again, I've found these wear out faster than you expect, and they're spendy. While the Dremel grinding stone also wears out, they're very cheap.
That's all, and get those bottoms smooth!
