portable warm sink for your studio
One of the major drawbacks of having a pottery studio in a 1951 detached garage is the lack of running water. In the summer, I have an outdoor sink I run with a garden hose, but that's no good in the winter. I needed something that would allow me to easily wash my hands and small tools, with warm or at least lukewarm water. It couldn't require a lot of space, or a lot of electricity.
Now, there's high-end options like the Cink, but even if I had the $2000, I don't have the space.
Instead, I give you the $50 portable warm-water studio sink. No, it's not elegant, but it does the job for a tight space and a tight budget.
First, you're going to need to buy this particular electric pump faucet, which was recommended to me by someone on Clay Buddies. There are possibly other brands that will work, but you'll need to fit them yourself then. While you're at it, pick up another Clay Buddies recommendation: this aquarium heater (the 50W version; do not get a more powerful one).
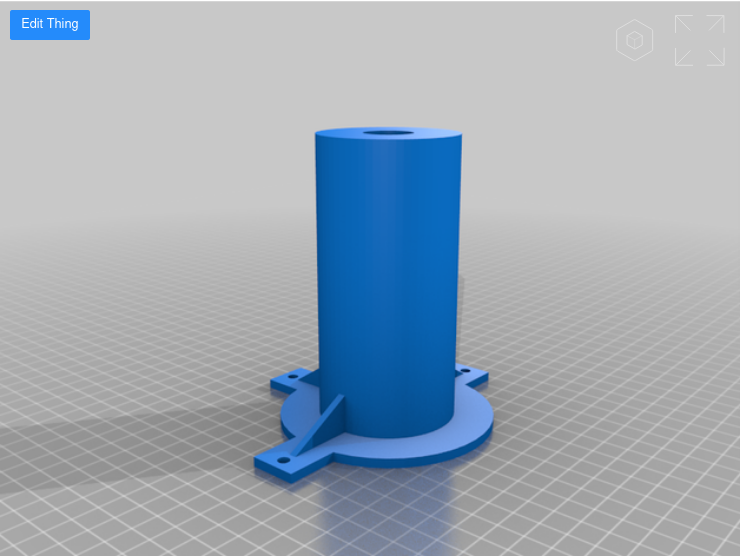
Now, that faucet is designed to go on top of a 5-gallon water cooler bottle. Which is not what we're putting it on top of, so we need to manufacture a fitting. Which means ... on to the 3D printer! You'll need to print this design. If you don't have a 3D printer, I recommend PrintaThing (please do not contact me about printing one for you for hire; that's not a business I'm interested in).
You're also going to need a few other tools:
- 3.8" drill
- hacksaw or keyhole saw
- drill bits, including 1/8", 1/4" and 3/8"
- hole cutter (hole saw) drill bit, in graduated sizes up to 2.5"
However, it only requires a few other materials, some of which you may already have:
- A 5 gallon insulated beverage cooler (buy one now, they're on sale for winter)
- One wood, plywood, or strand board, around 15 by 19 inches and 3/8" to 3/4" thick, ideally painted or varnished to keep it from getting waterlogged
- Three #8 by 1/2" screws, preferably brass
- One 1.5" rubber stopper
- Four 12" cable ties
- One multi-outlet extension cord or plug tree
- A plastic washbasin, no more than 4.5" tall
- A large funnel
- A micro-USB charger

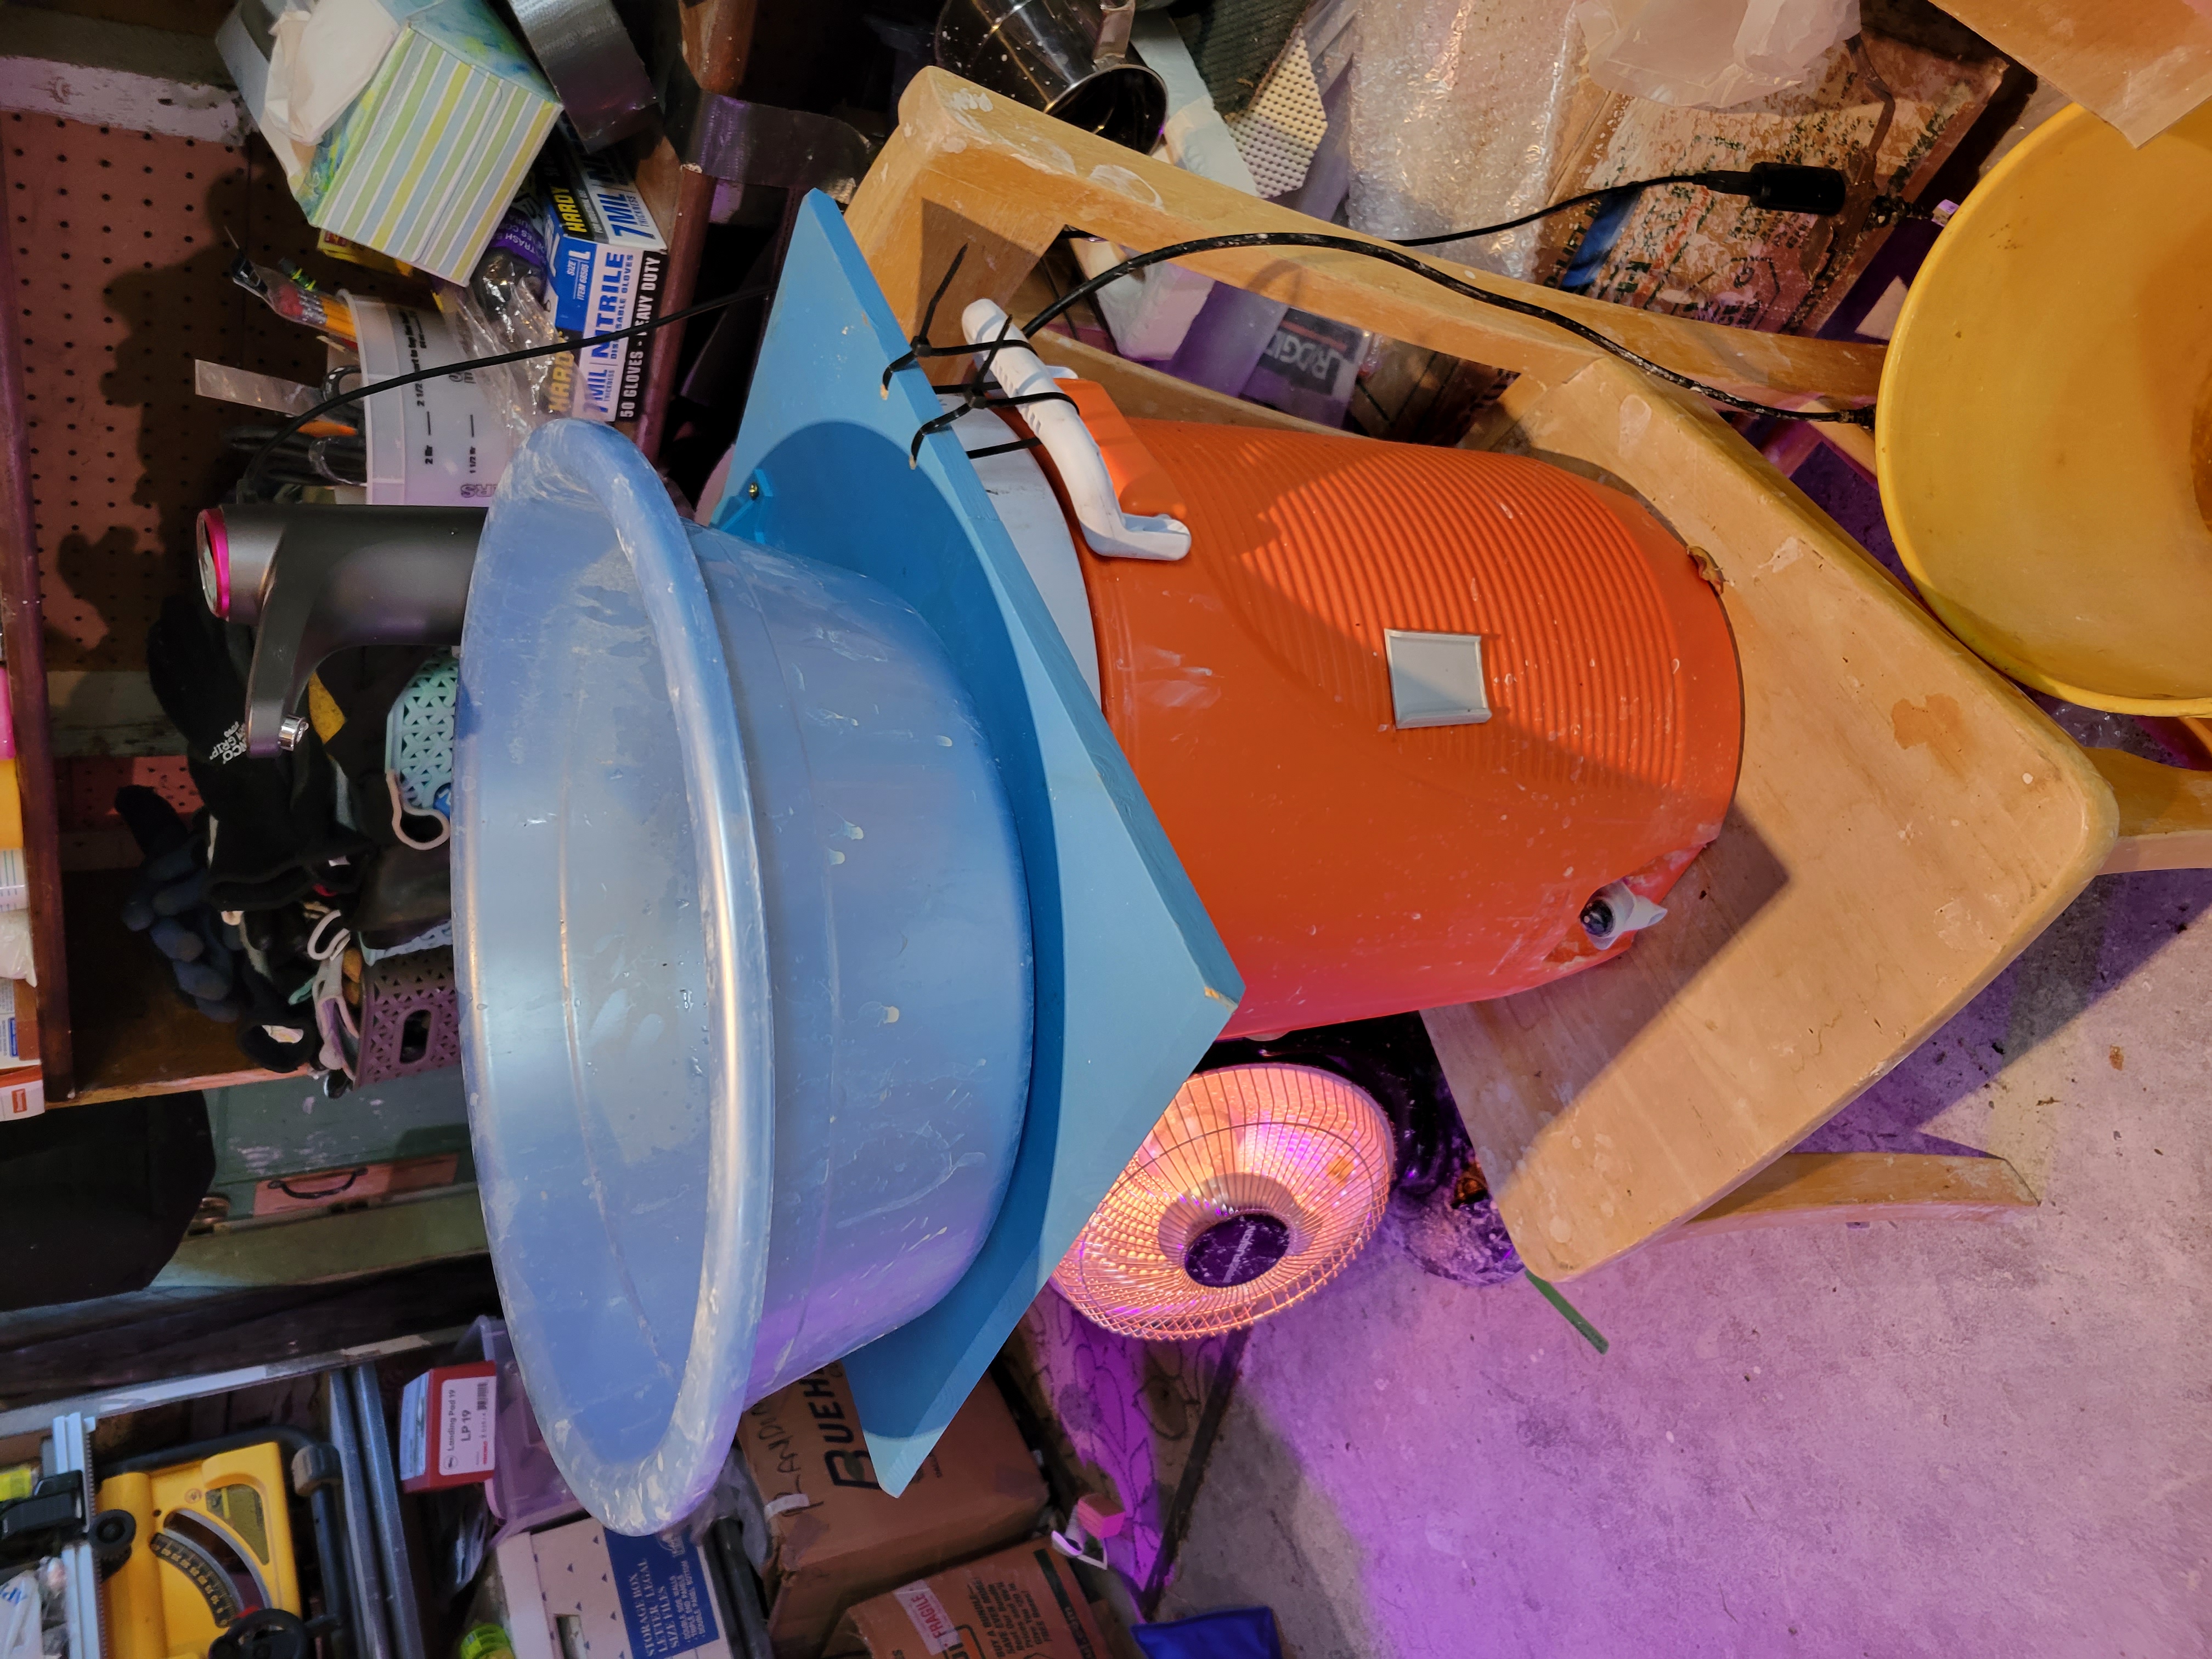
Now, first you need to use the saw cut a slot in the screw threads of the beverage cooler, so that you can slide down the cord of the aquarium heater and still screw the lid of the cooler closed. You'll need to cut a slot around 1/4" wide. Then slide the cord in, stick the heater to the bottom of the cooler, and run the cord to the extension cord. Fill the cooler most of the way with water, because after this refilling it will get significantly slower. Set the heater to 80F.
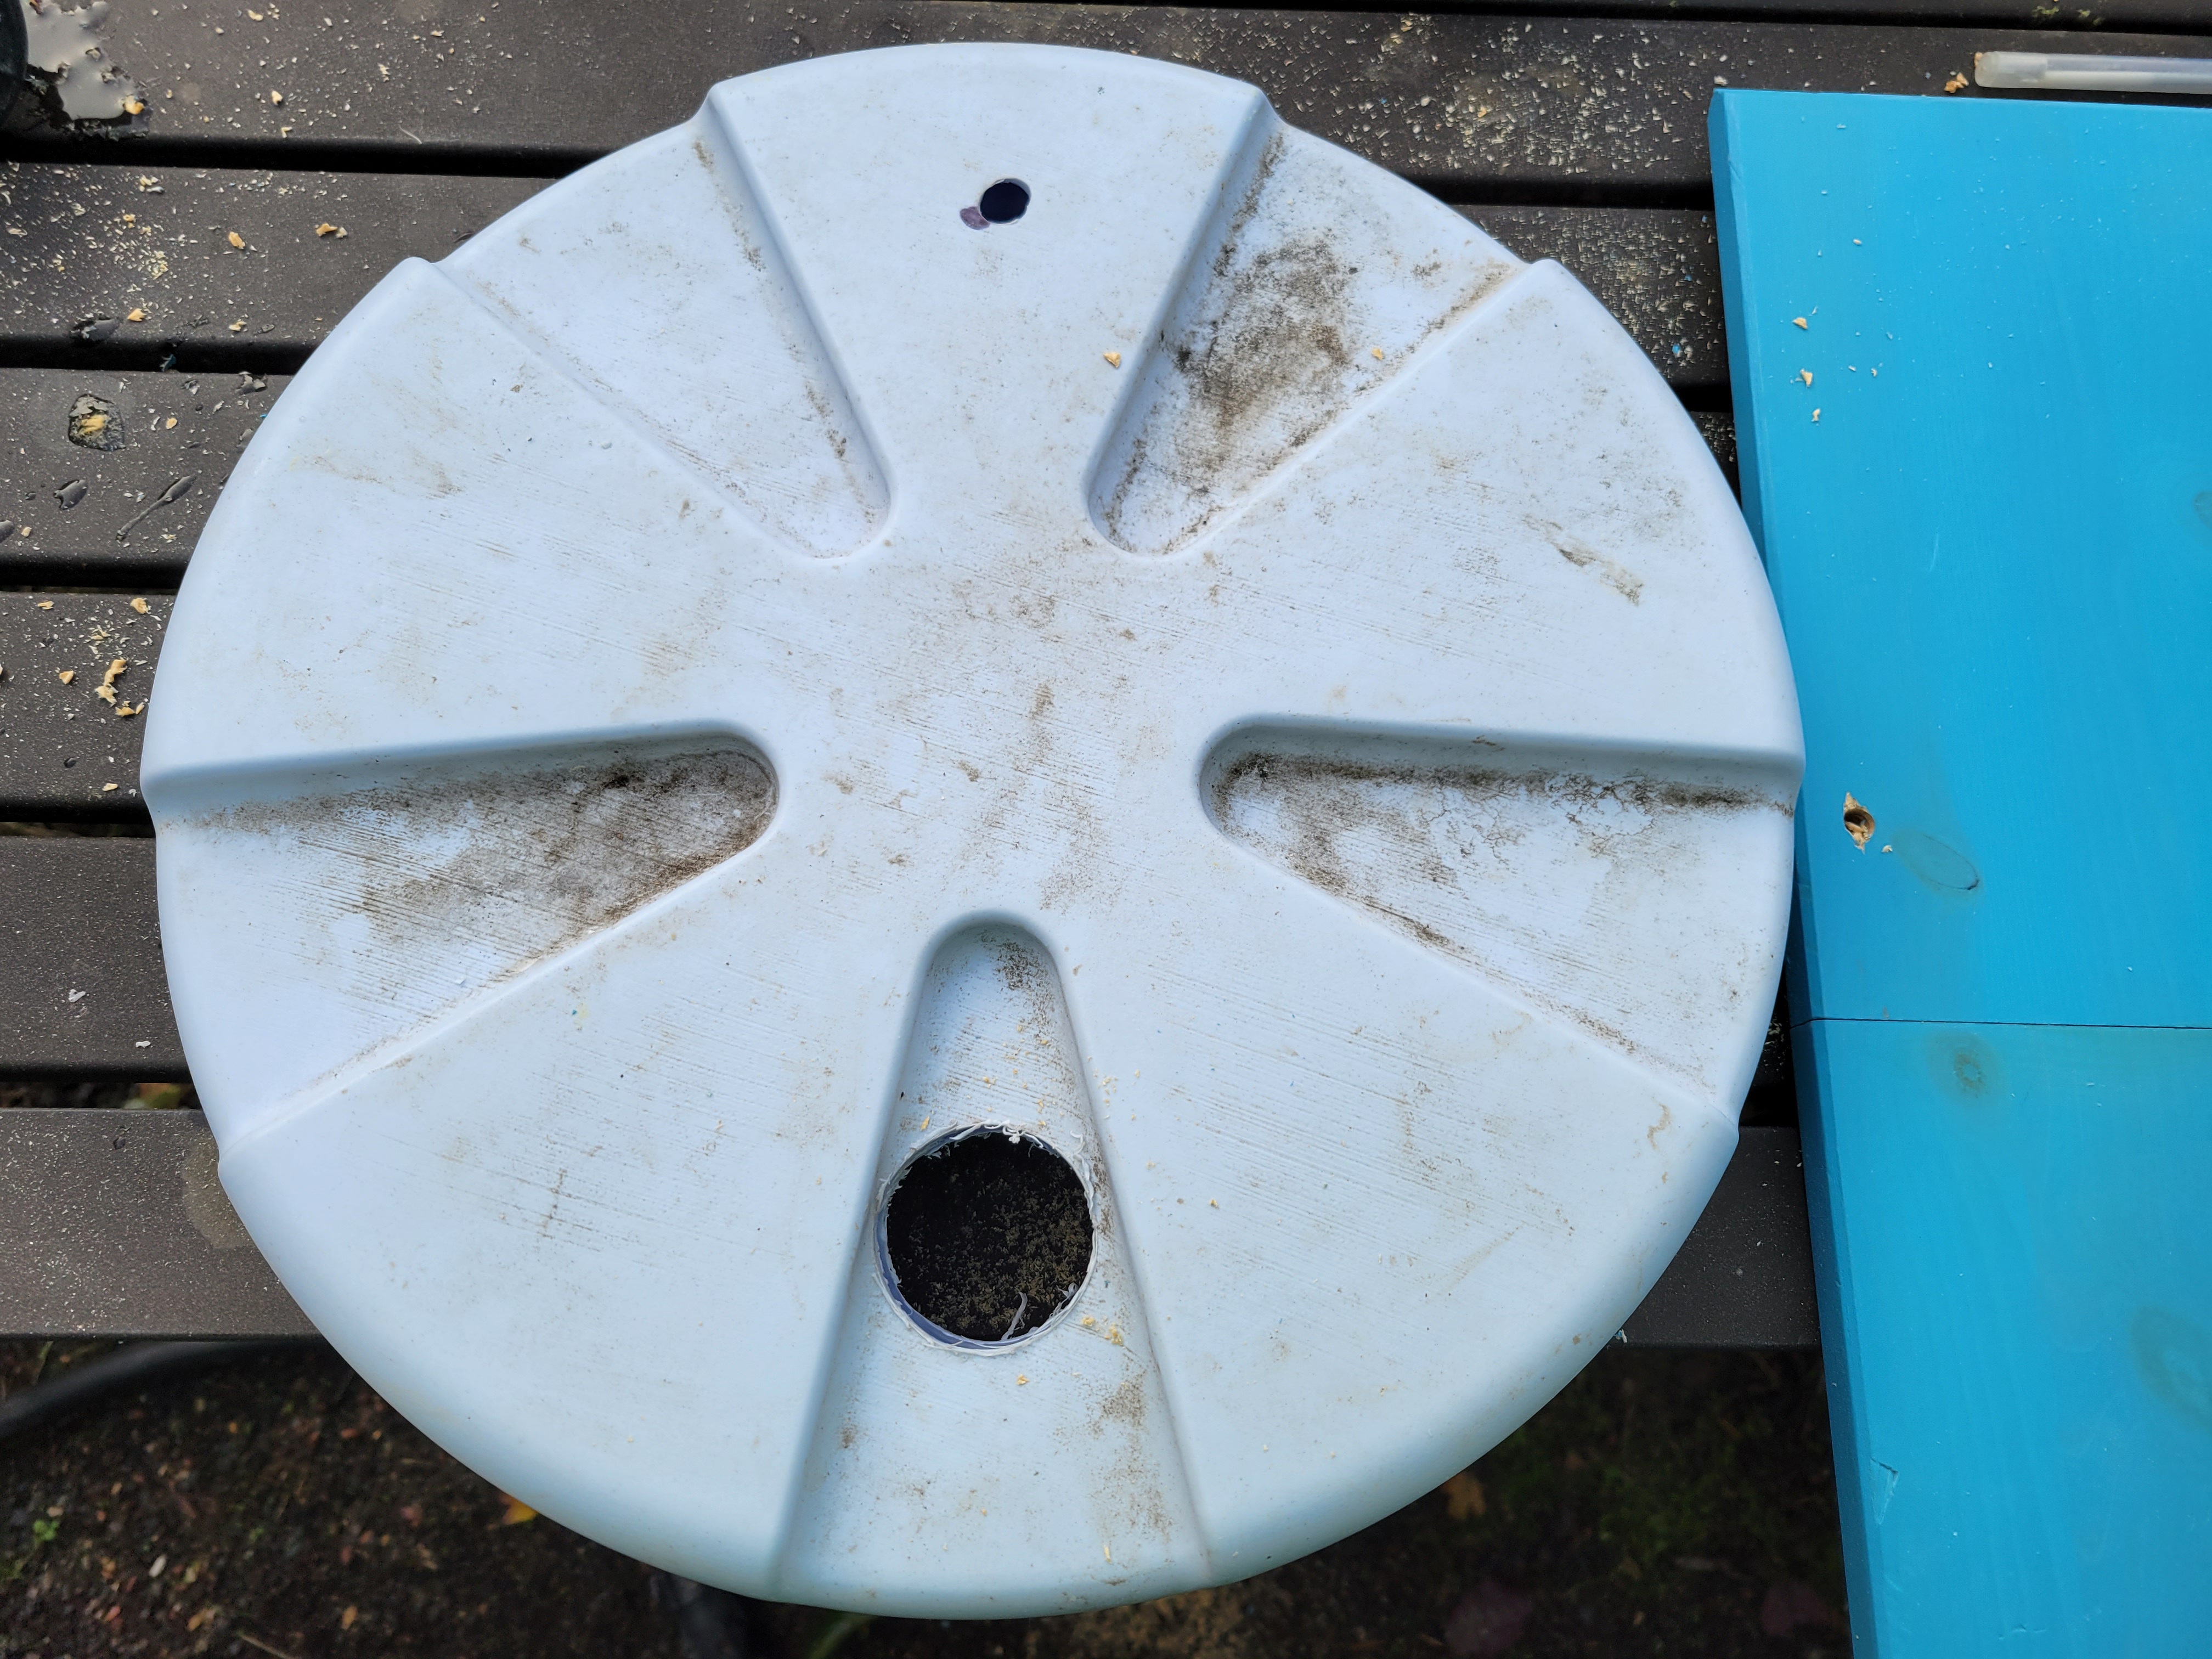
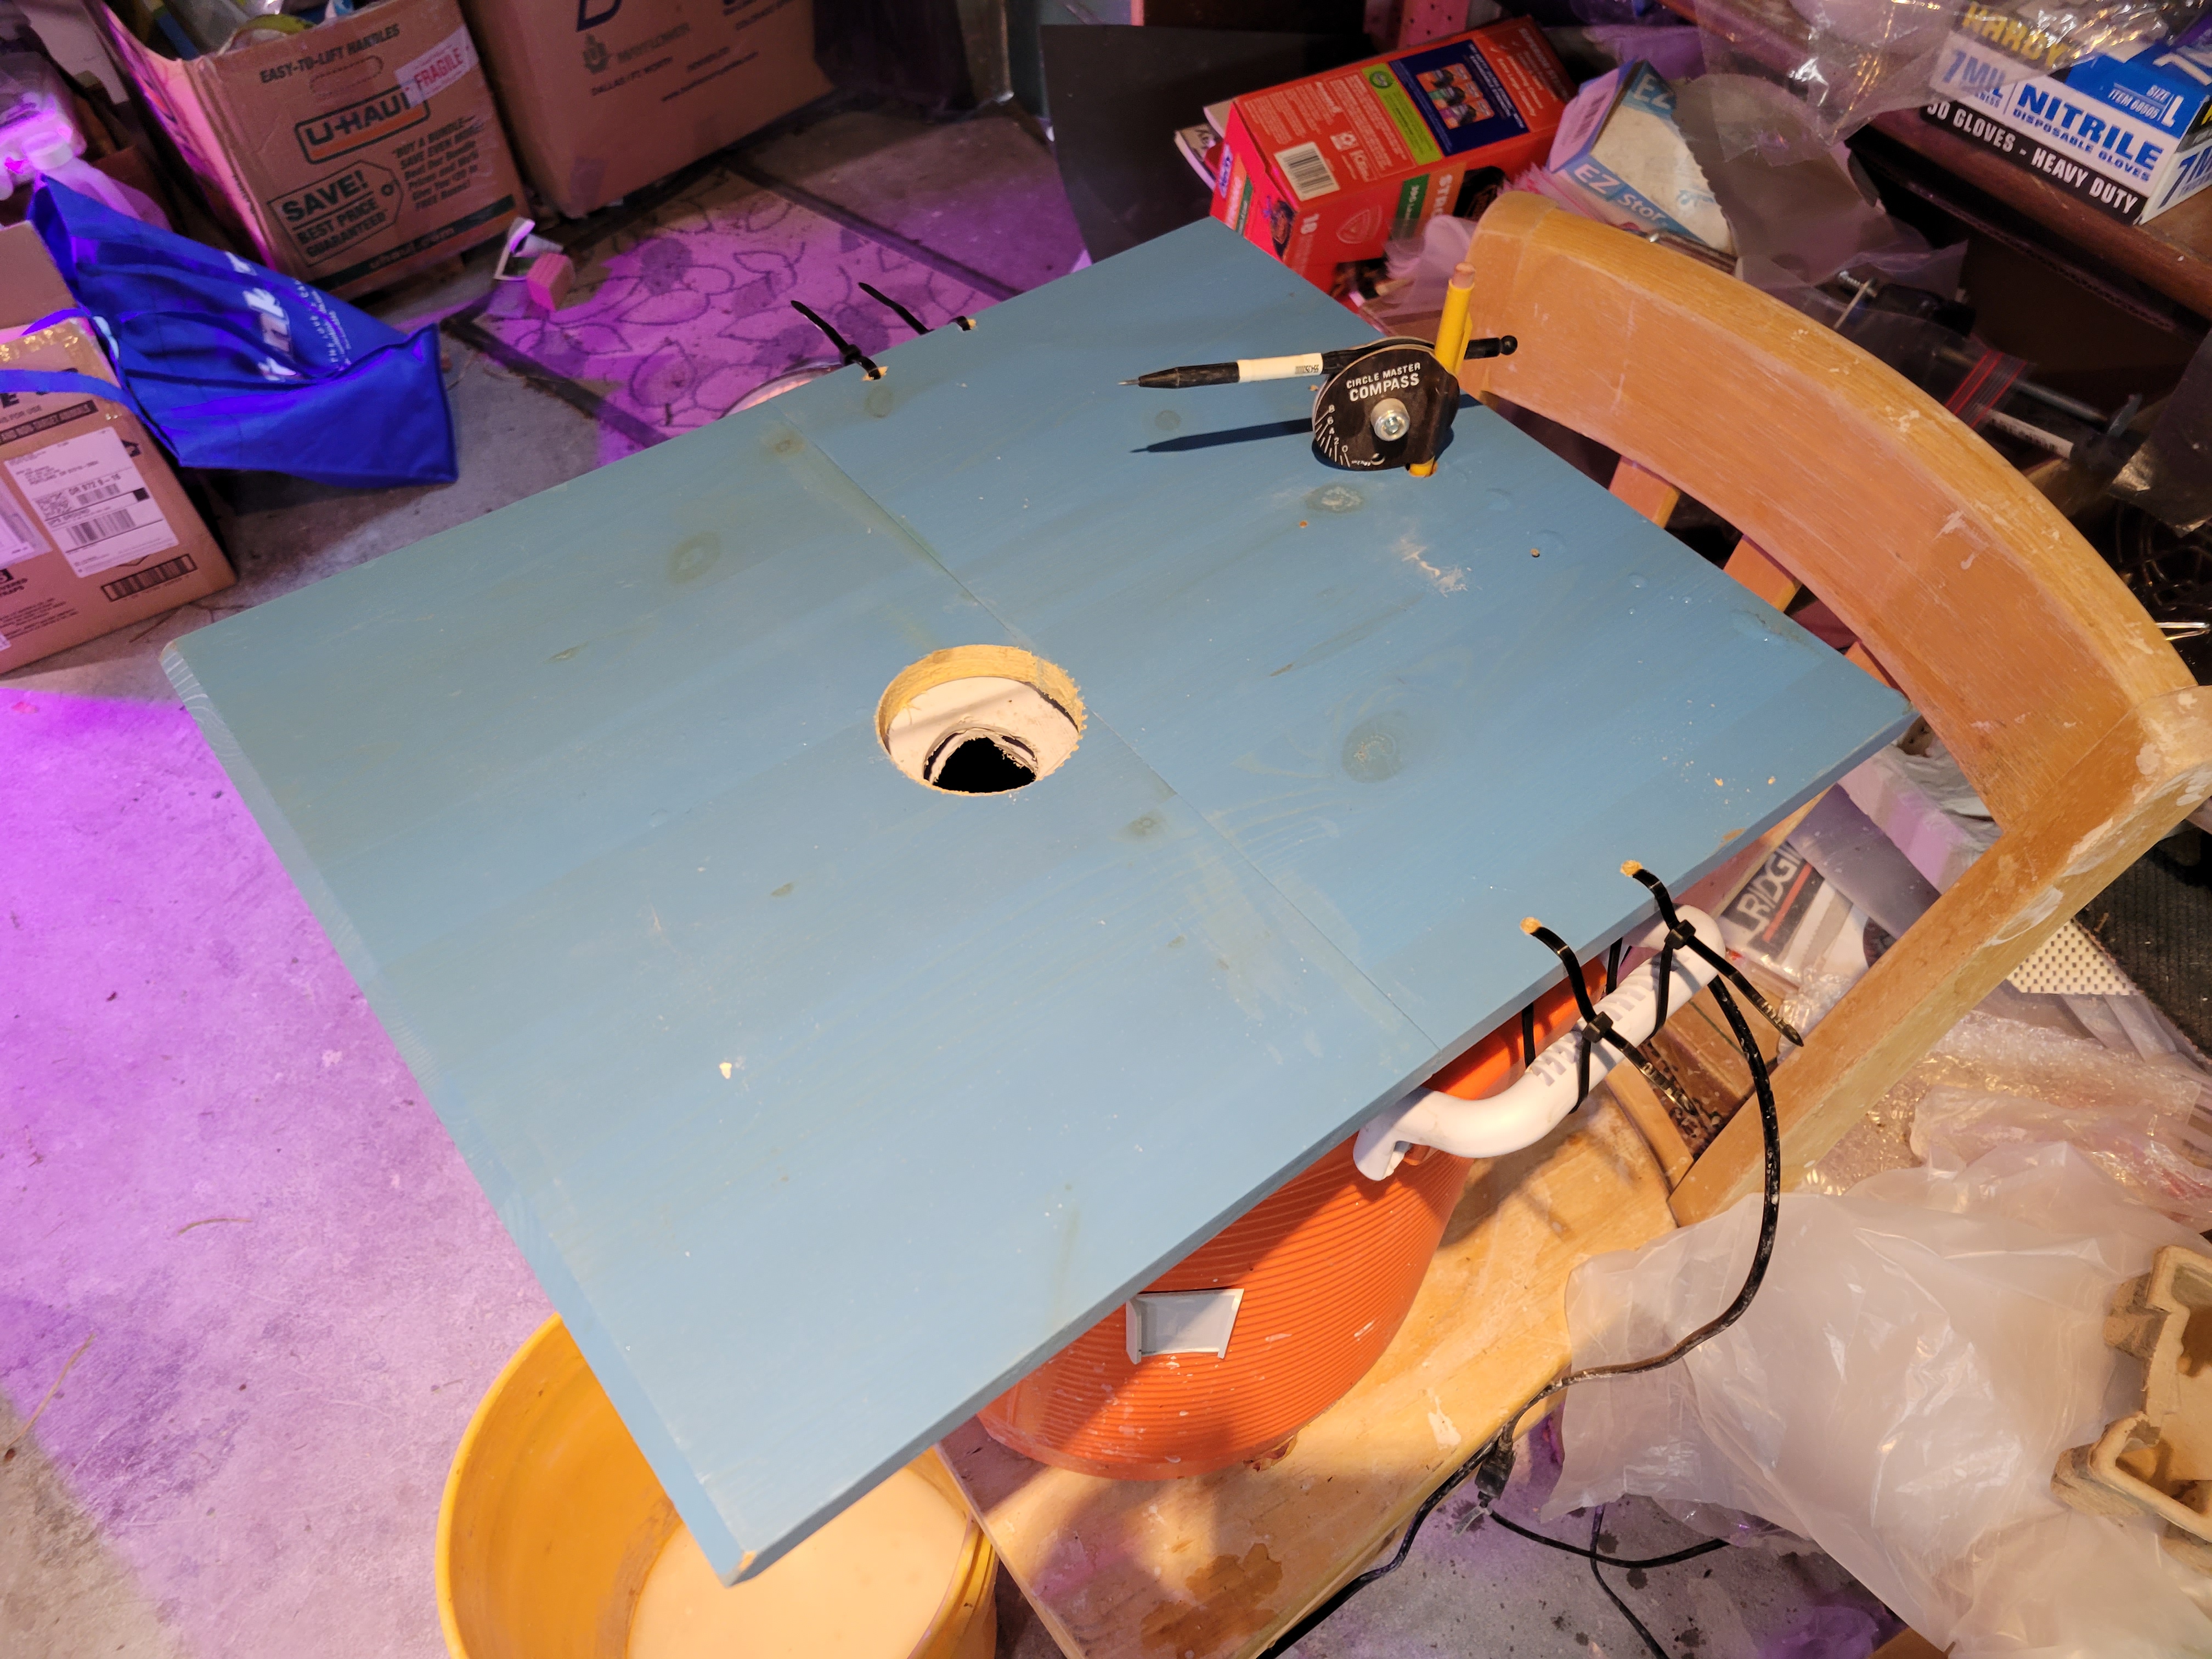
Now it's time to cut some holes! First, you're going to cut two holes in the lid of the beverage cooler (while it's off, so you don't get plastic in the water). One you'll drill with the 3/8" drill bit, which should be around 1.5"-2" in from one of the edges of the lid. The second one you'll use the hole saw for; you want to cut it around 1", but check what size it needs to be for that rubber stopper to fit snugly. The second hole should go opposite the first hole, and around 2" in from the closest edge.
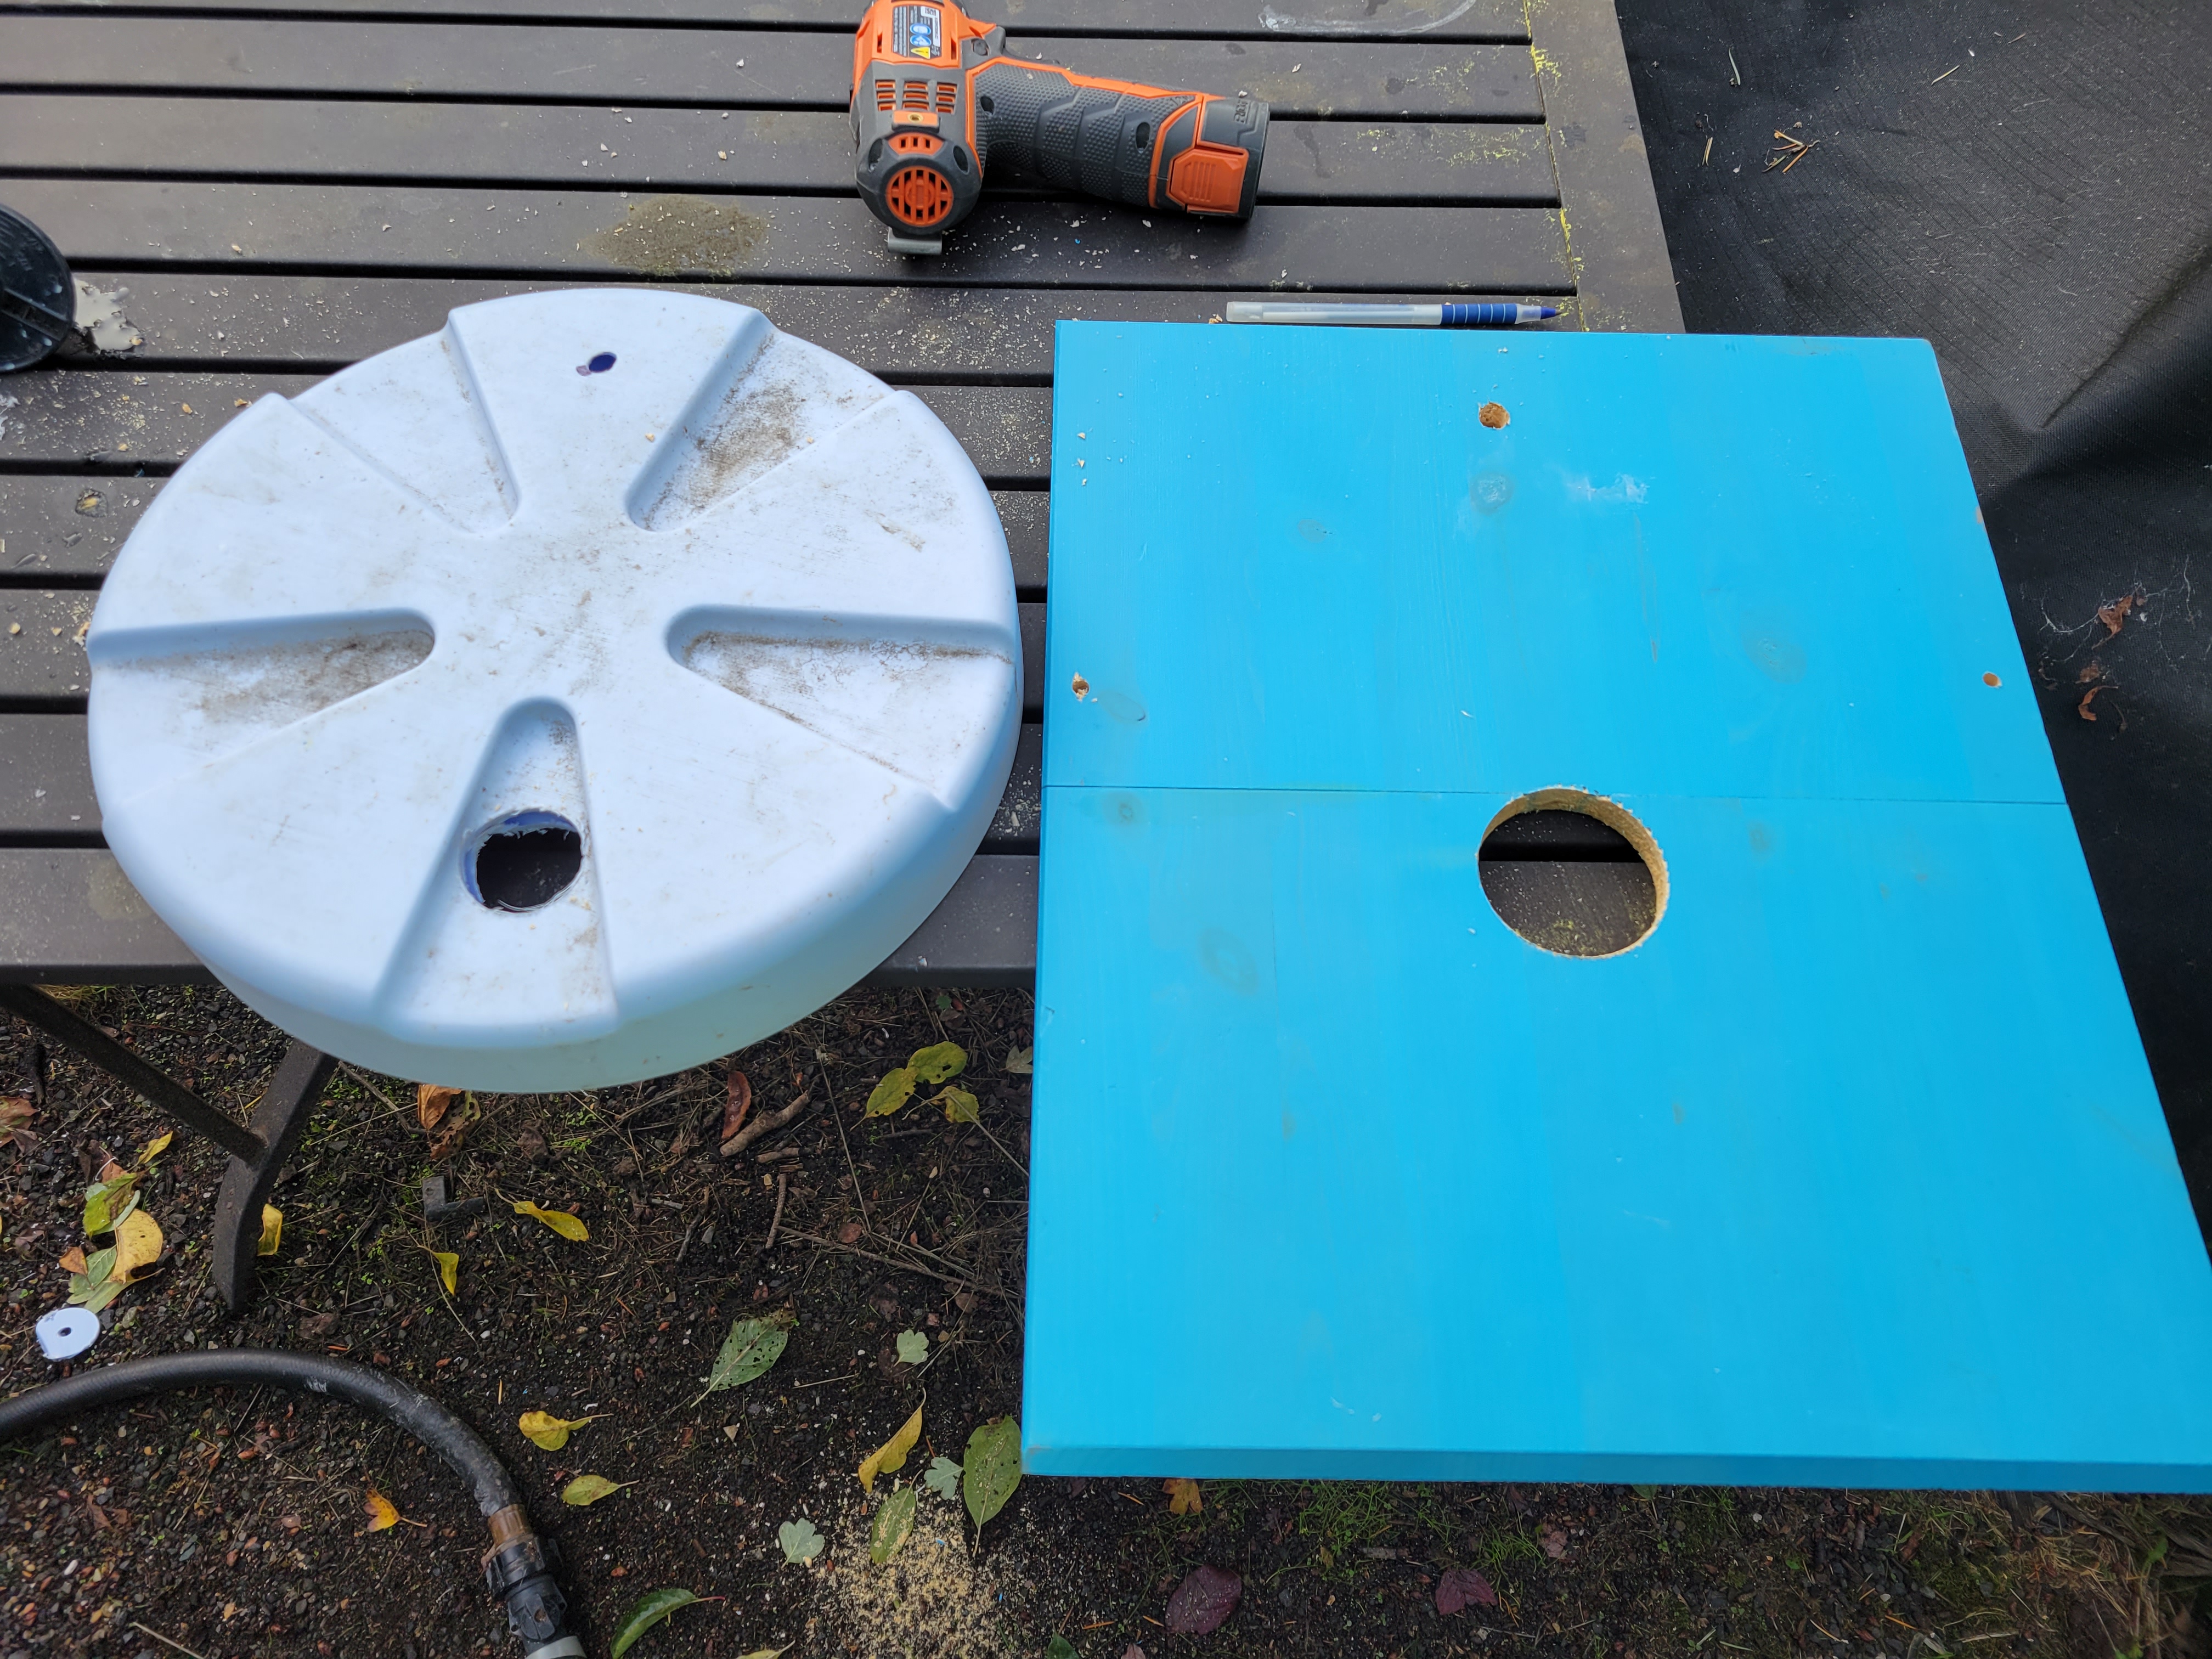
Now you need to cut matching holes into the board. Use the lid as a template to mark the holes. One narrow end of the board should tangent the edge of the lid with the small hole; the big hole will end up closer to the middle of the board. Drill the small hole with the same 3/8" drill bit. For the big hole, you want to make it bigger than the one in the lid, so get a 2" or 2.5" hole saw and cut a bigger hole, centered on the one you drew.
Put the 3D printed faucet mount on the board, with its hole matching up with the 3/8" hole. Using the 1/8" drill bit, drill three pilot holes to match the screw holes for the faucet mount tabs. Drill these around 1/4" deep.
Time to assemble. Screw the lid on the cooler so that the small hole is at the back. Put the board on top, line up the small hole, and put something through it to hold it aligned. Make sure the big hole is also aligned. Get the 1/4" drill bit and drill two holes close to the edges of the board where they hang over the handles of the beverage cooler. Put the cable ties through these holes and the handles, at first loose and then gradually tighten them one at a time, tying the board into place.
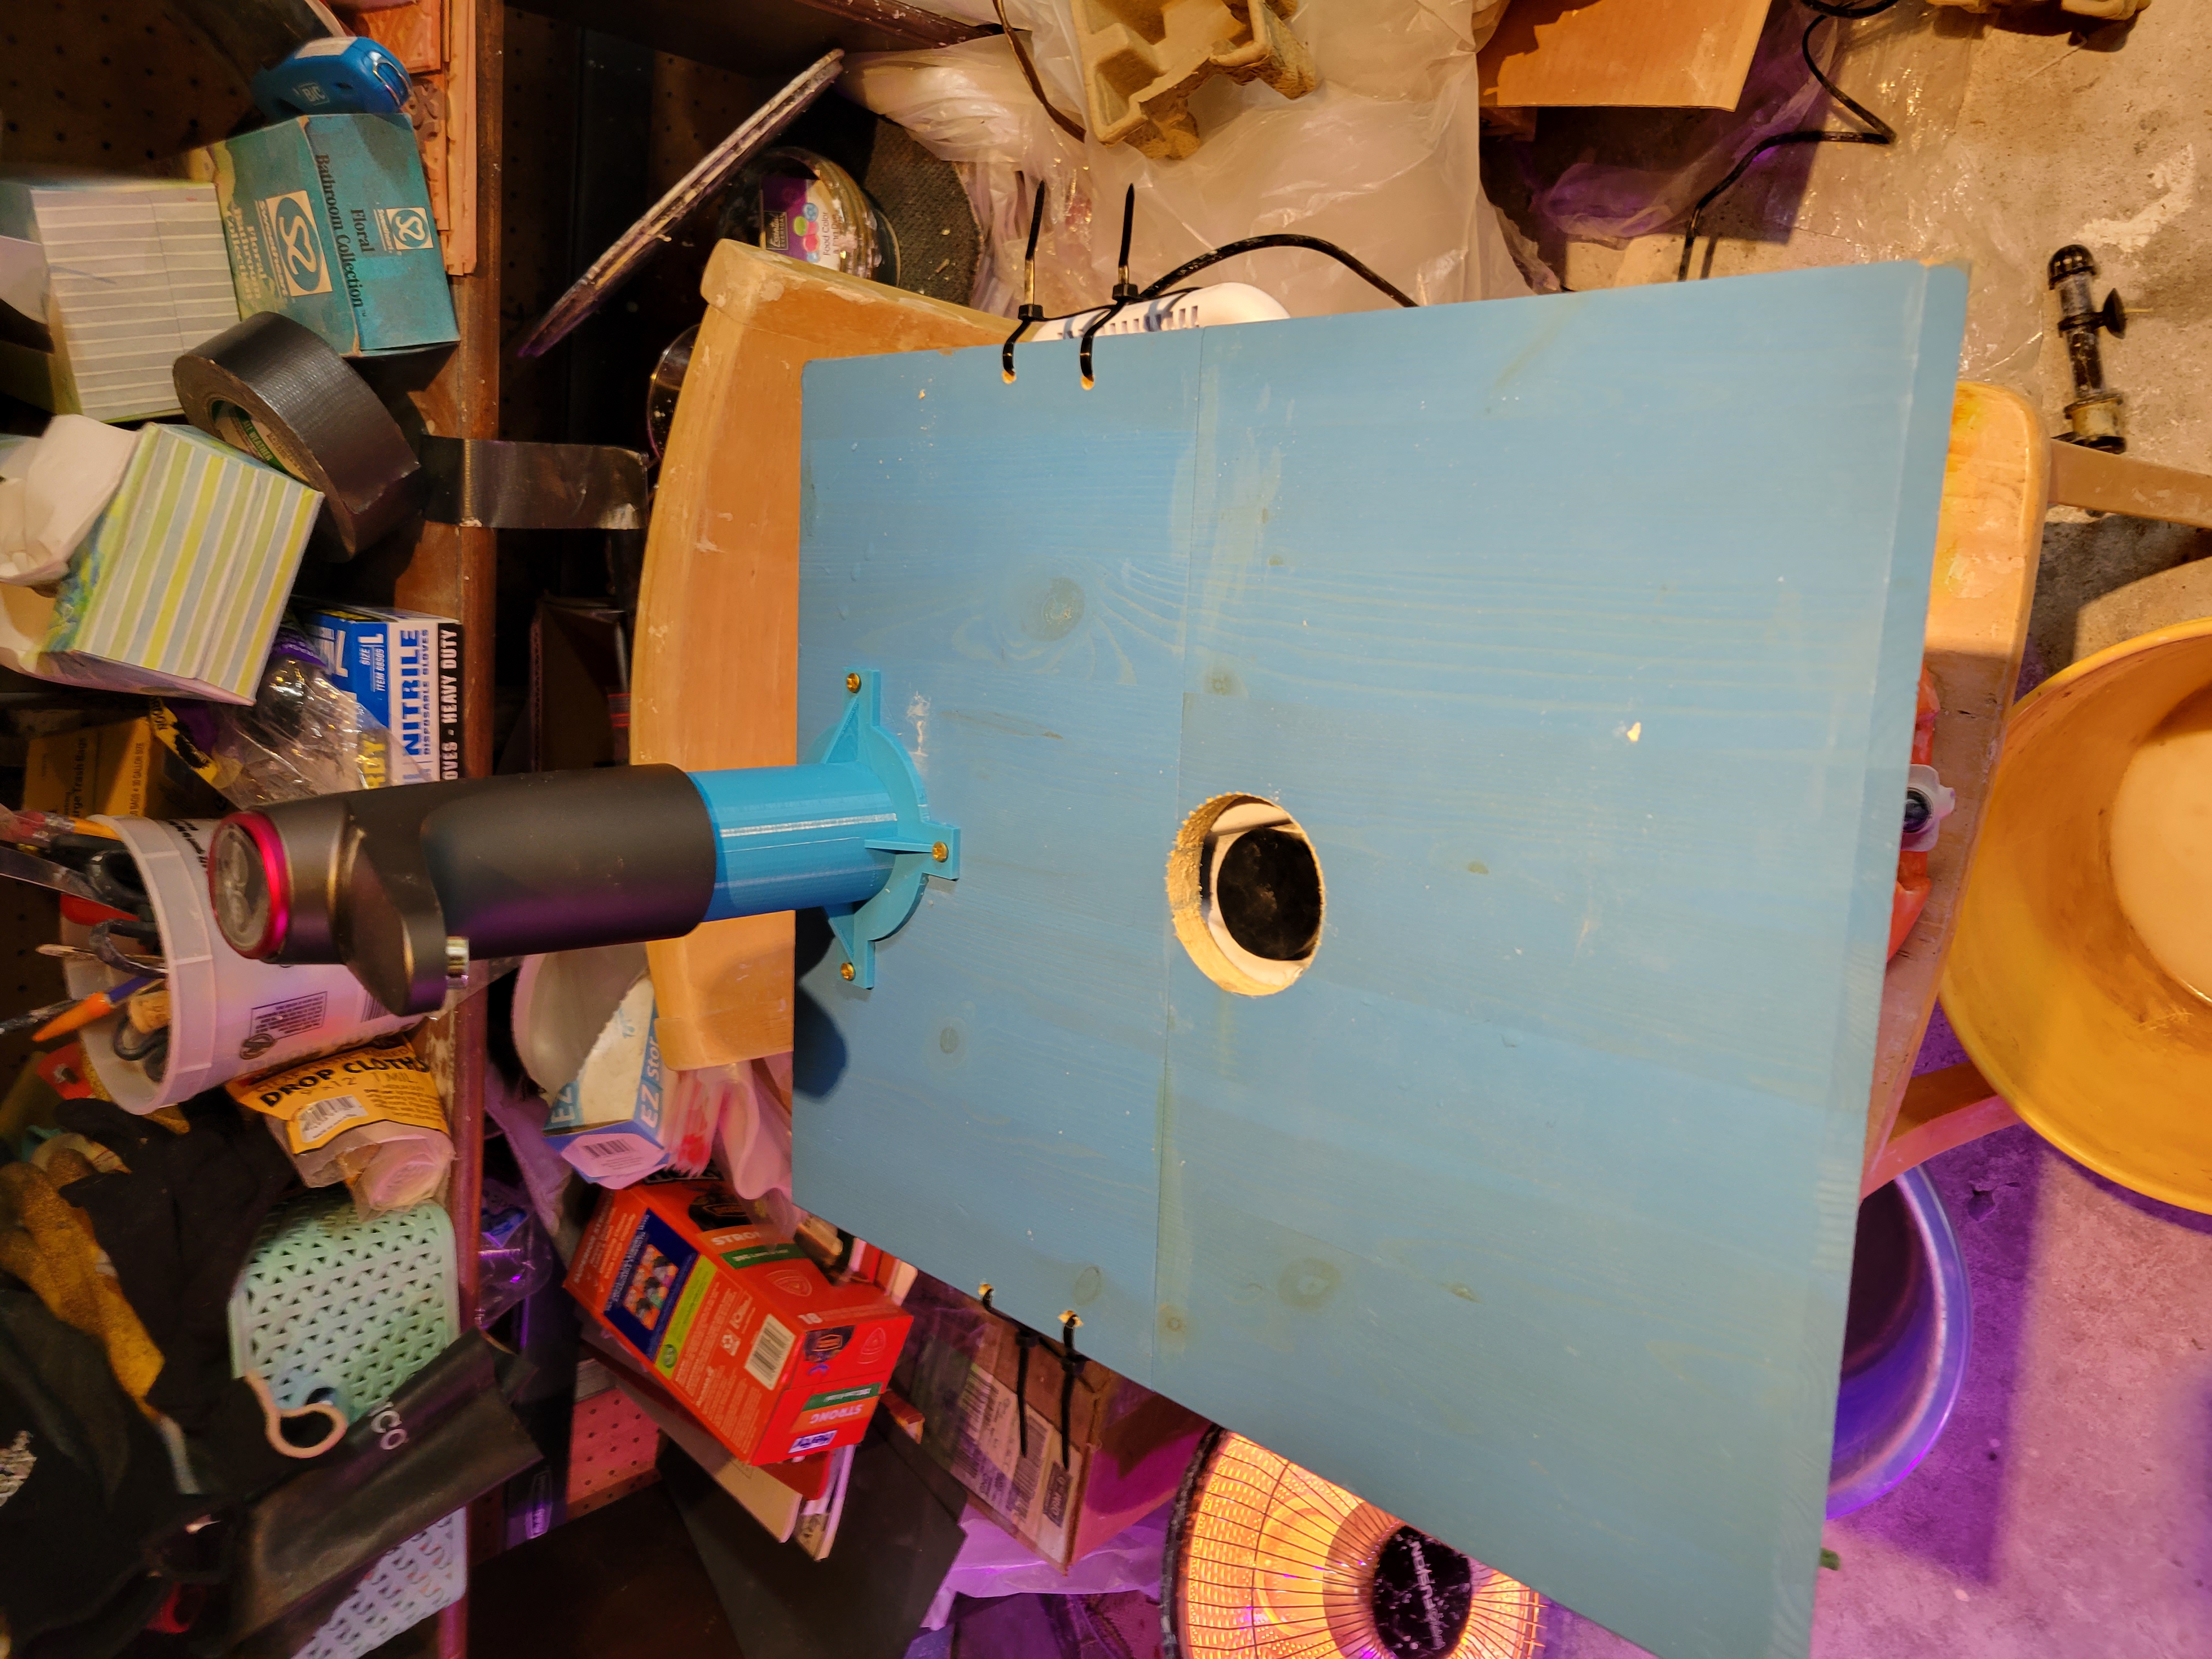
Put the rubber stopper in the hole in the beverage cooler lid. Assemble the electic faucet, attaching its silicone hose, run the hose through the faucet mount, and fit the faucet onto the mount. Run the silicone hose through the board and the lid and down into the water. Use the three brass screws to fasten the faucet mount to the board. Plug the USB charger into the extension cord, and the USB cord into the faucet.
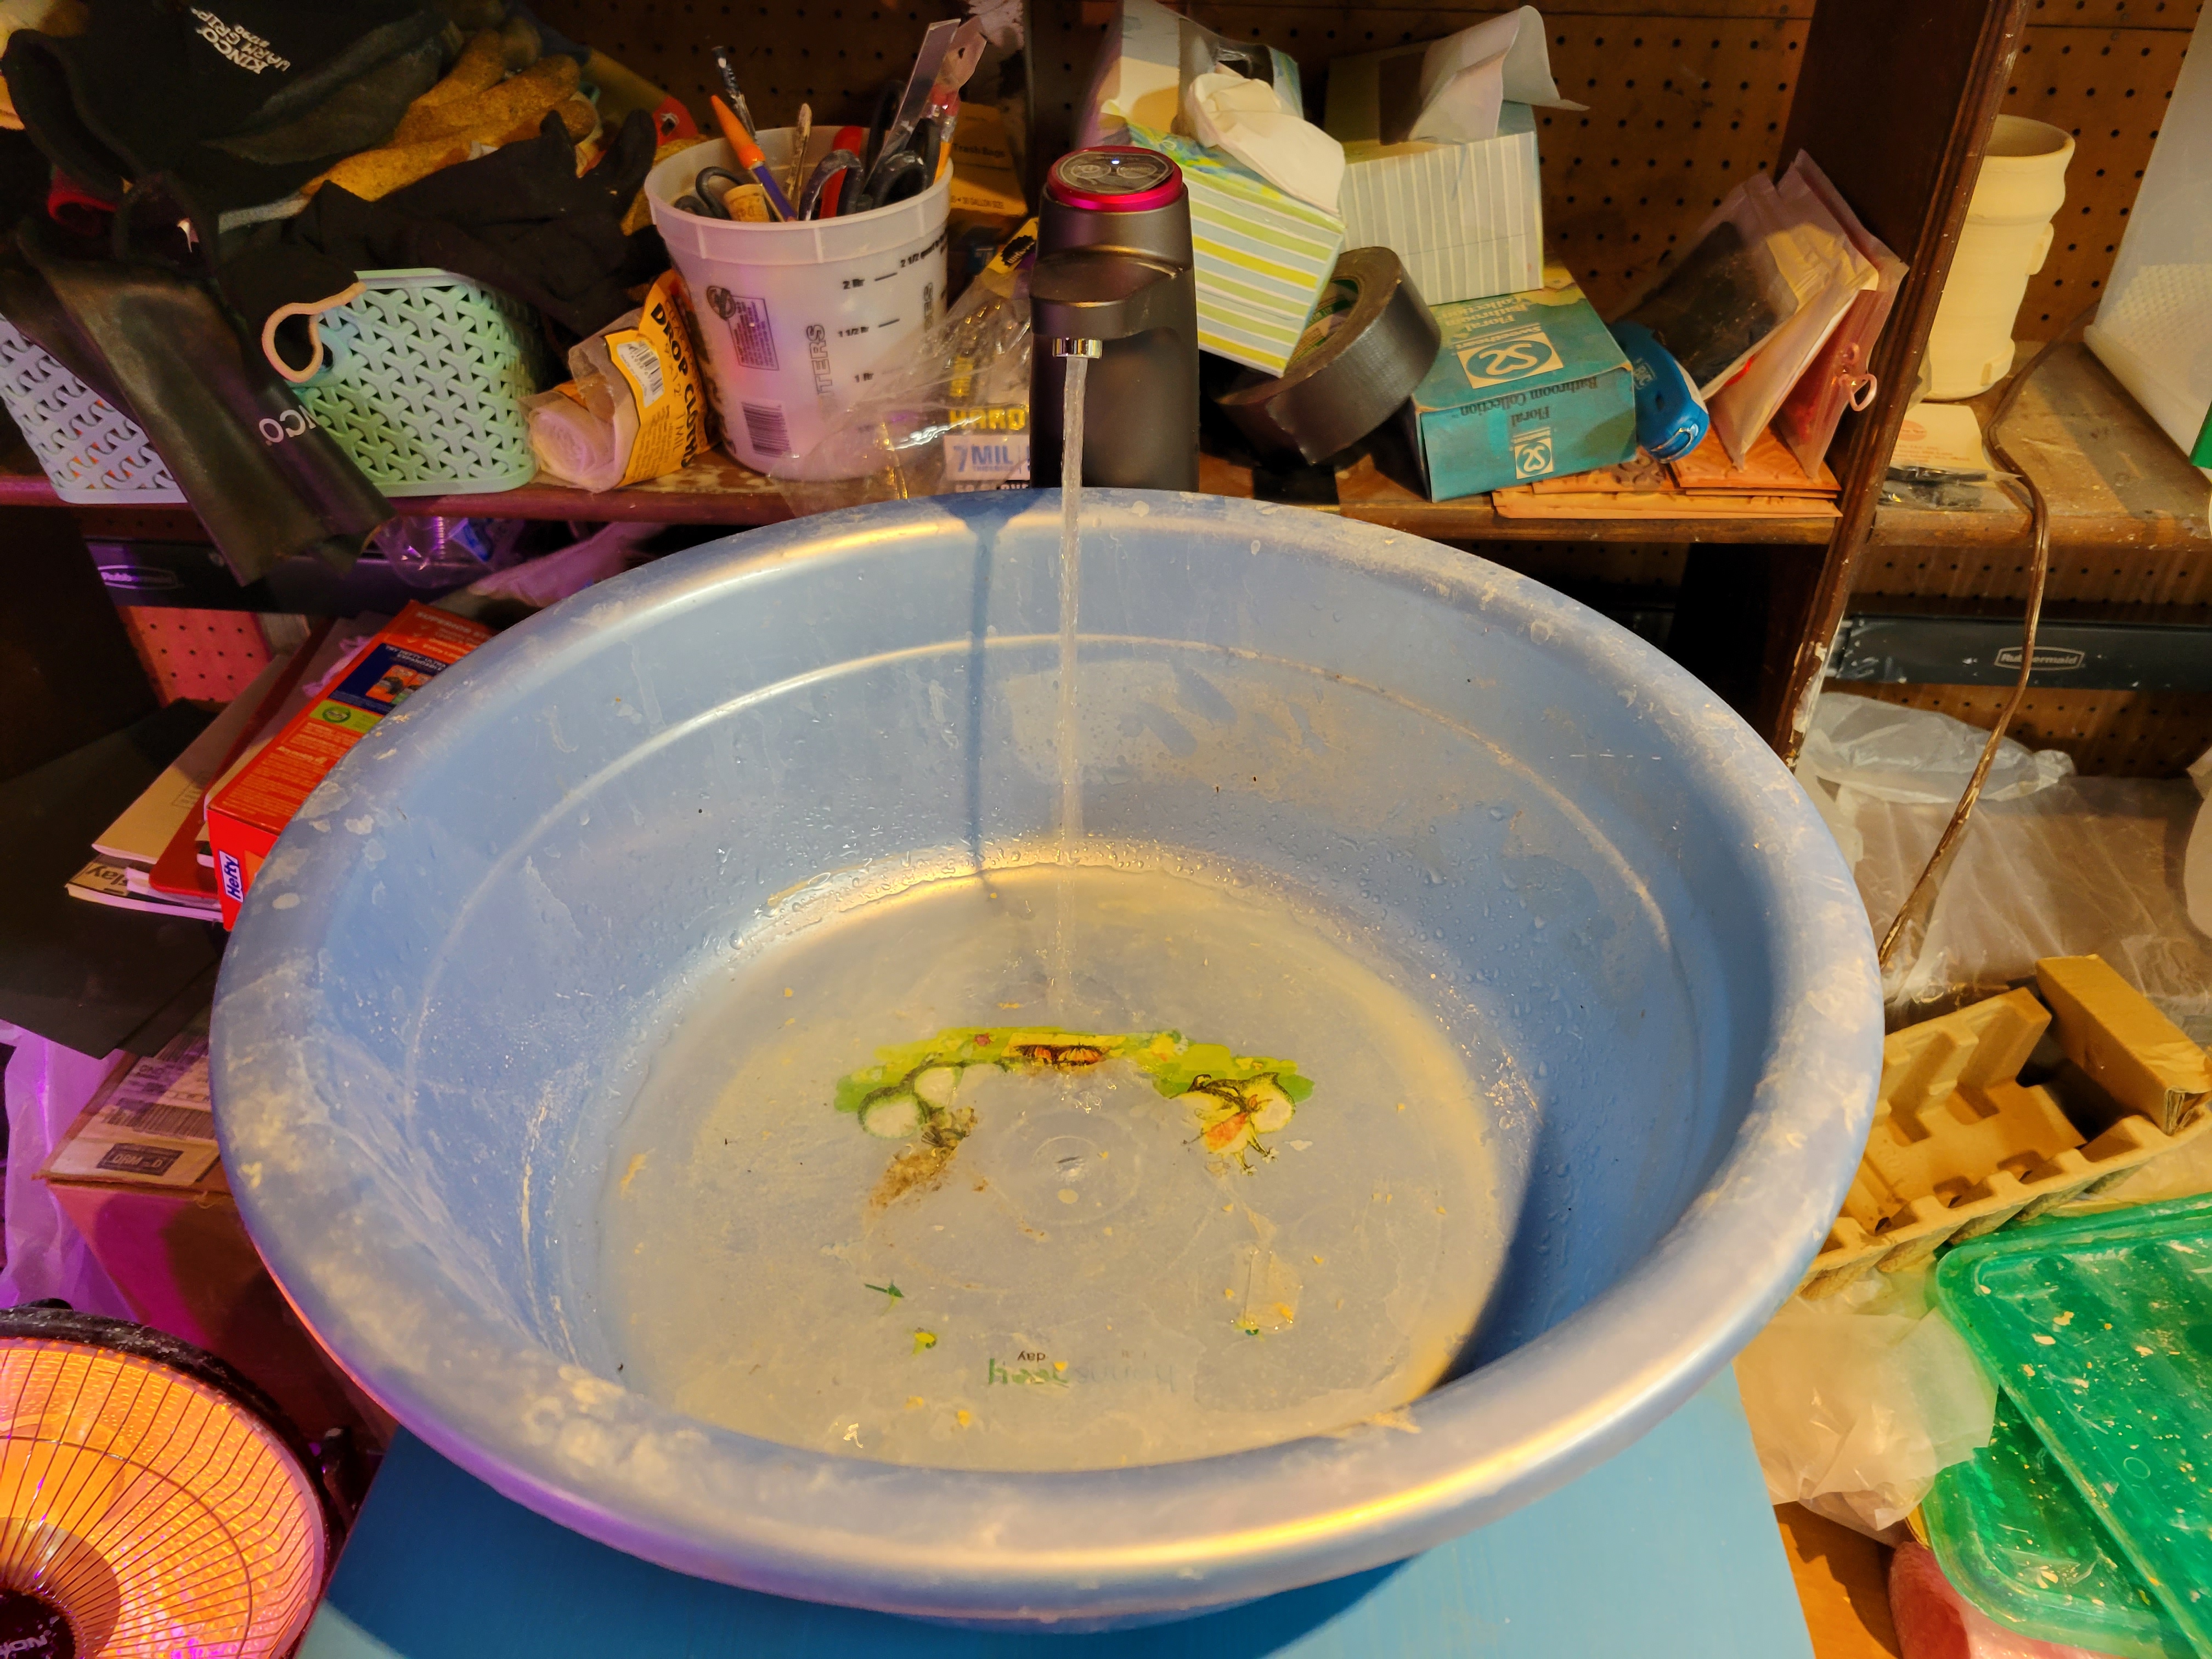
Put the plastic washbasin on the board. Press the button. You now have warm running water!
When you want to top off the water, move the basin, unplug the rubber stopper, and pour water in using the large funnel. I suggest pouring in already-warm water, or it's liable to take a long time to reheat. When the washbasin is full, dump it out in the yard.
Note that the silicone hose from the faucet will not reach the bottom of the cooler, so you can't use all the water. This is on purpose, so that the heater doesn't melt the cooler.