texture mats and tiki cups
In late May I found out that I needed to make five dozen custom tiki cups for an event in mid-July. I've never made a tiki cup before, although I'd thought about it, so I wasn't at all set up to create any, let alone more than 50 in about seven weeks. Potters will understand, that's a very short timeline for someone who only does pottery part-time, especially considering firing schedules.
This meant that a lot of more standard methods of making them weren't a possibility. Creating new plaster molds for casting would take too long, especially since I don't regularly do casting and am not set up for it. Sculpting the cups individually would take even longer. What could I do to put designs on them that would be relatively fast, both to engineer and to make each cup?
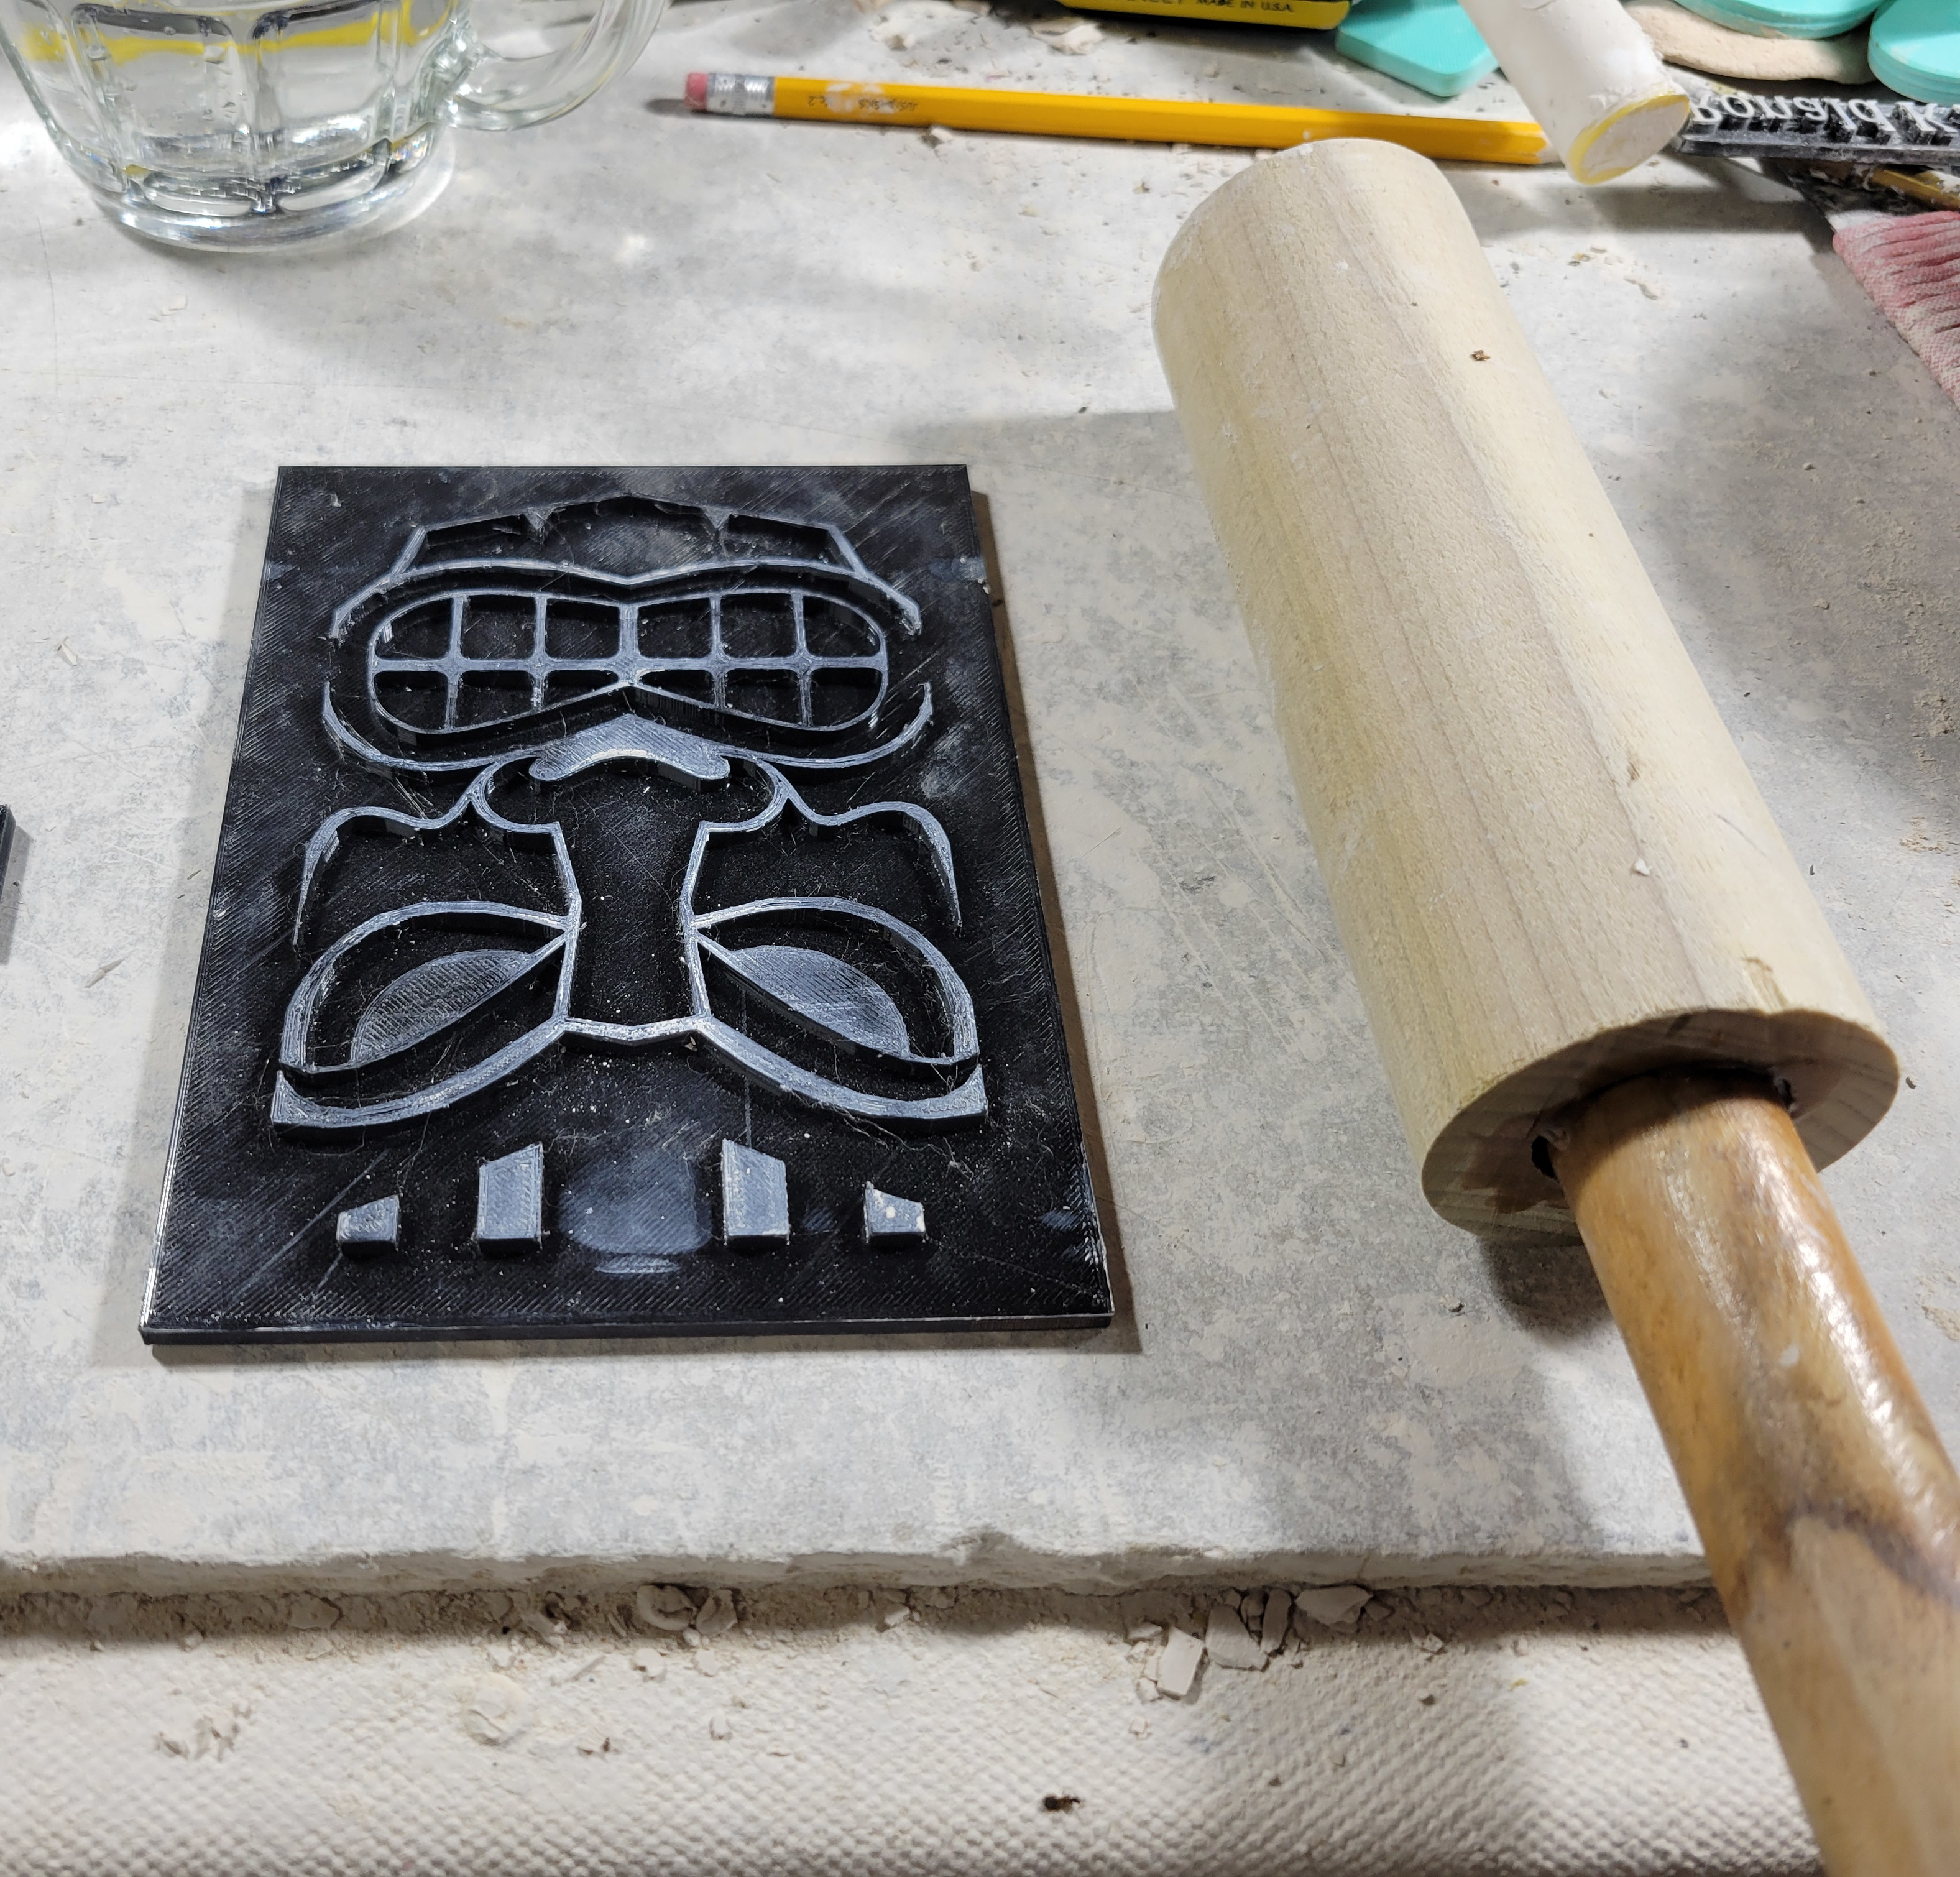
I asked on a ceramics forum (Clay Buddies) for ideas, and several people (including Tim See) suggested that stamps were my best bet. I hadn't had a lot of luck, though, stamping individual cups will on (or off) the wheel. So after some tinkering, I tried a different approach that I'd used with other textures; instead of bringing the stamp to the cup, I'd bring the cup to the stamp. I needed a texture mat.
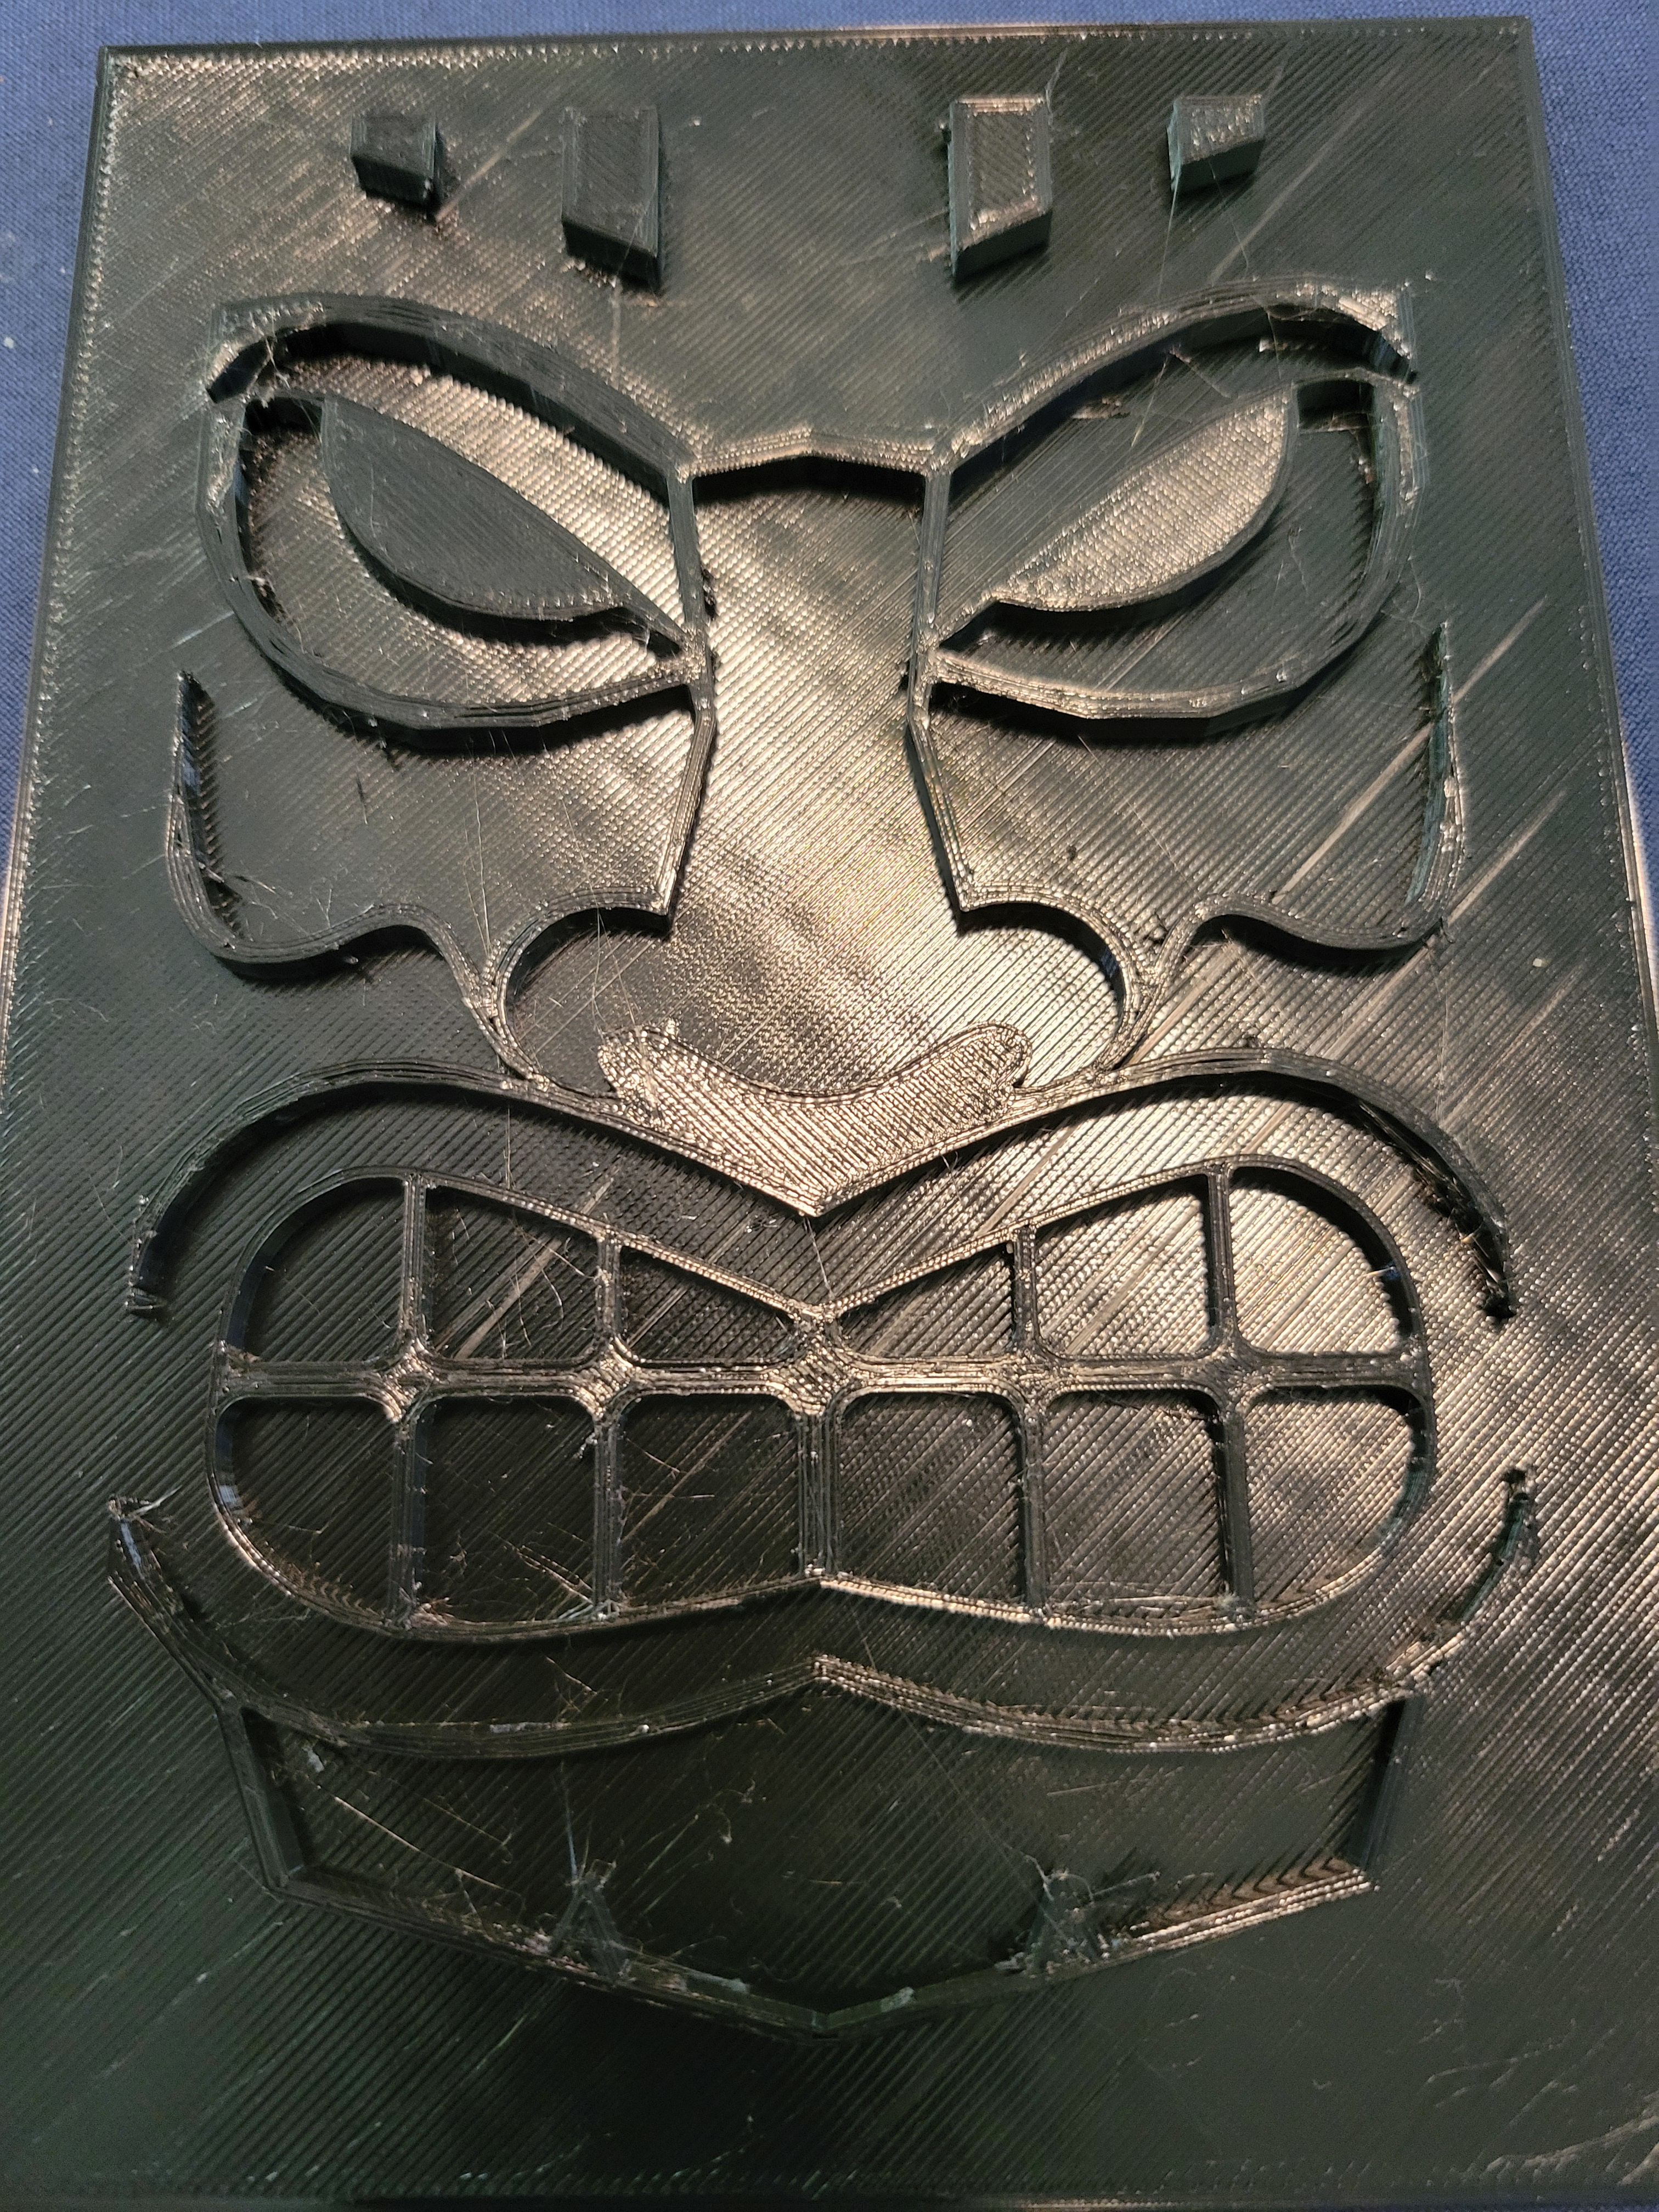
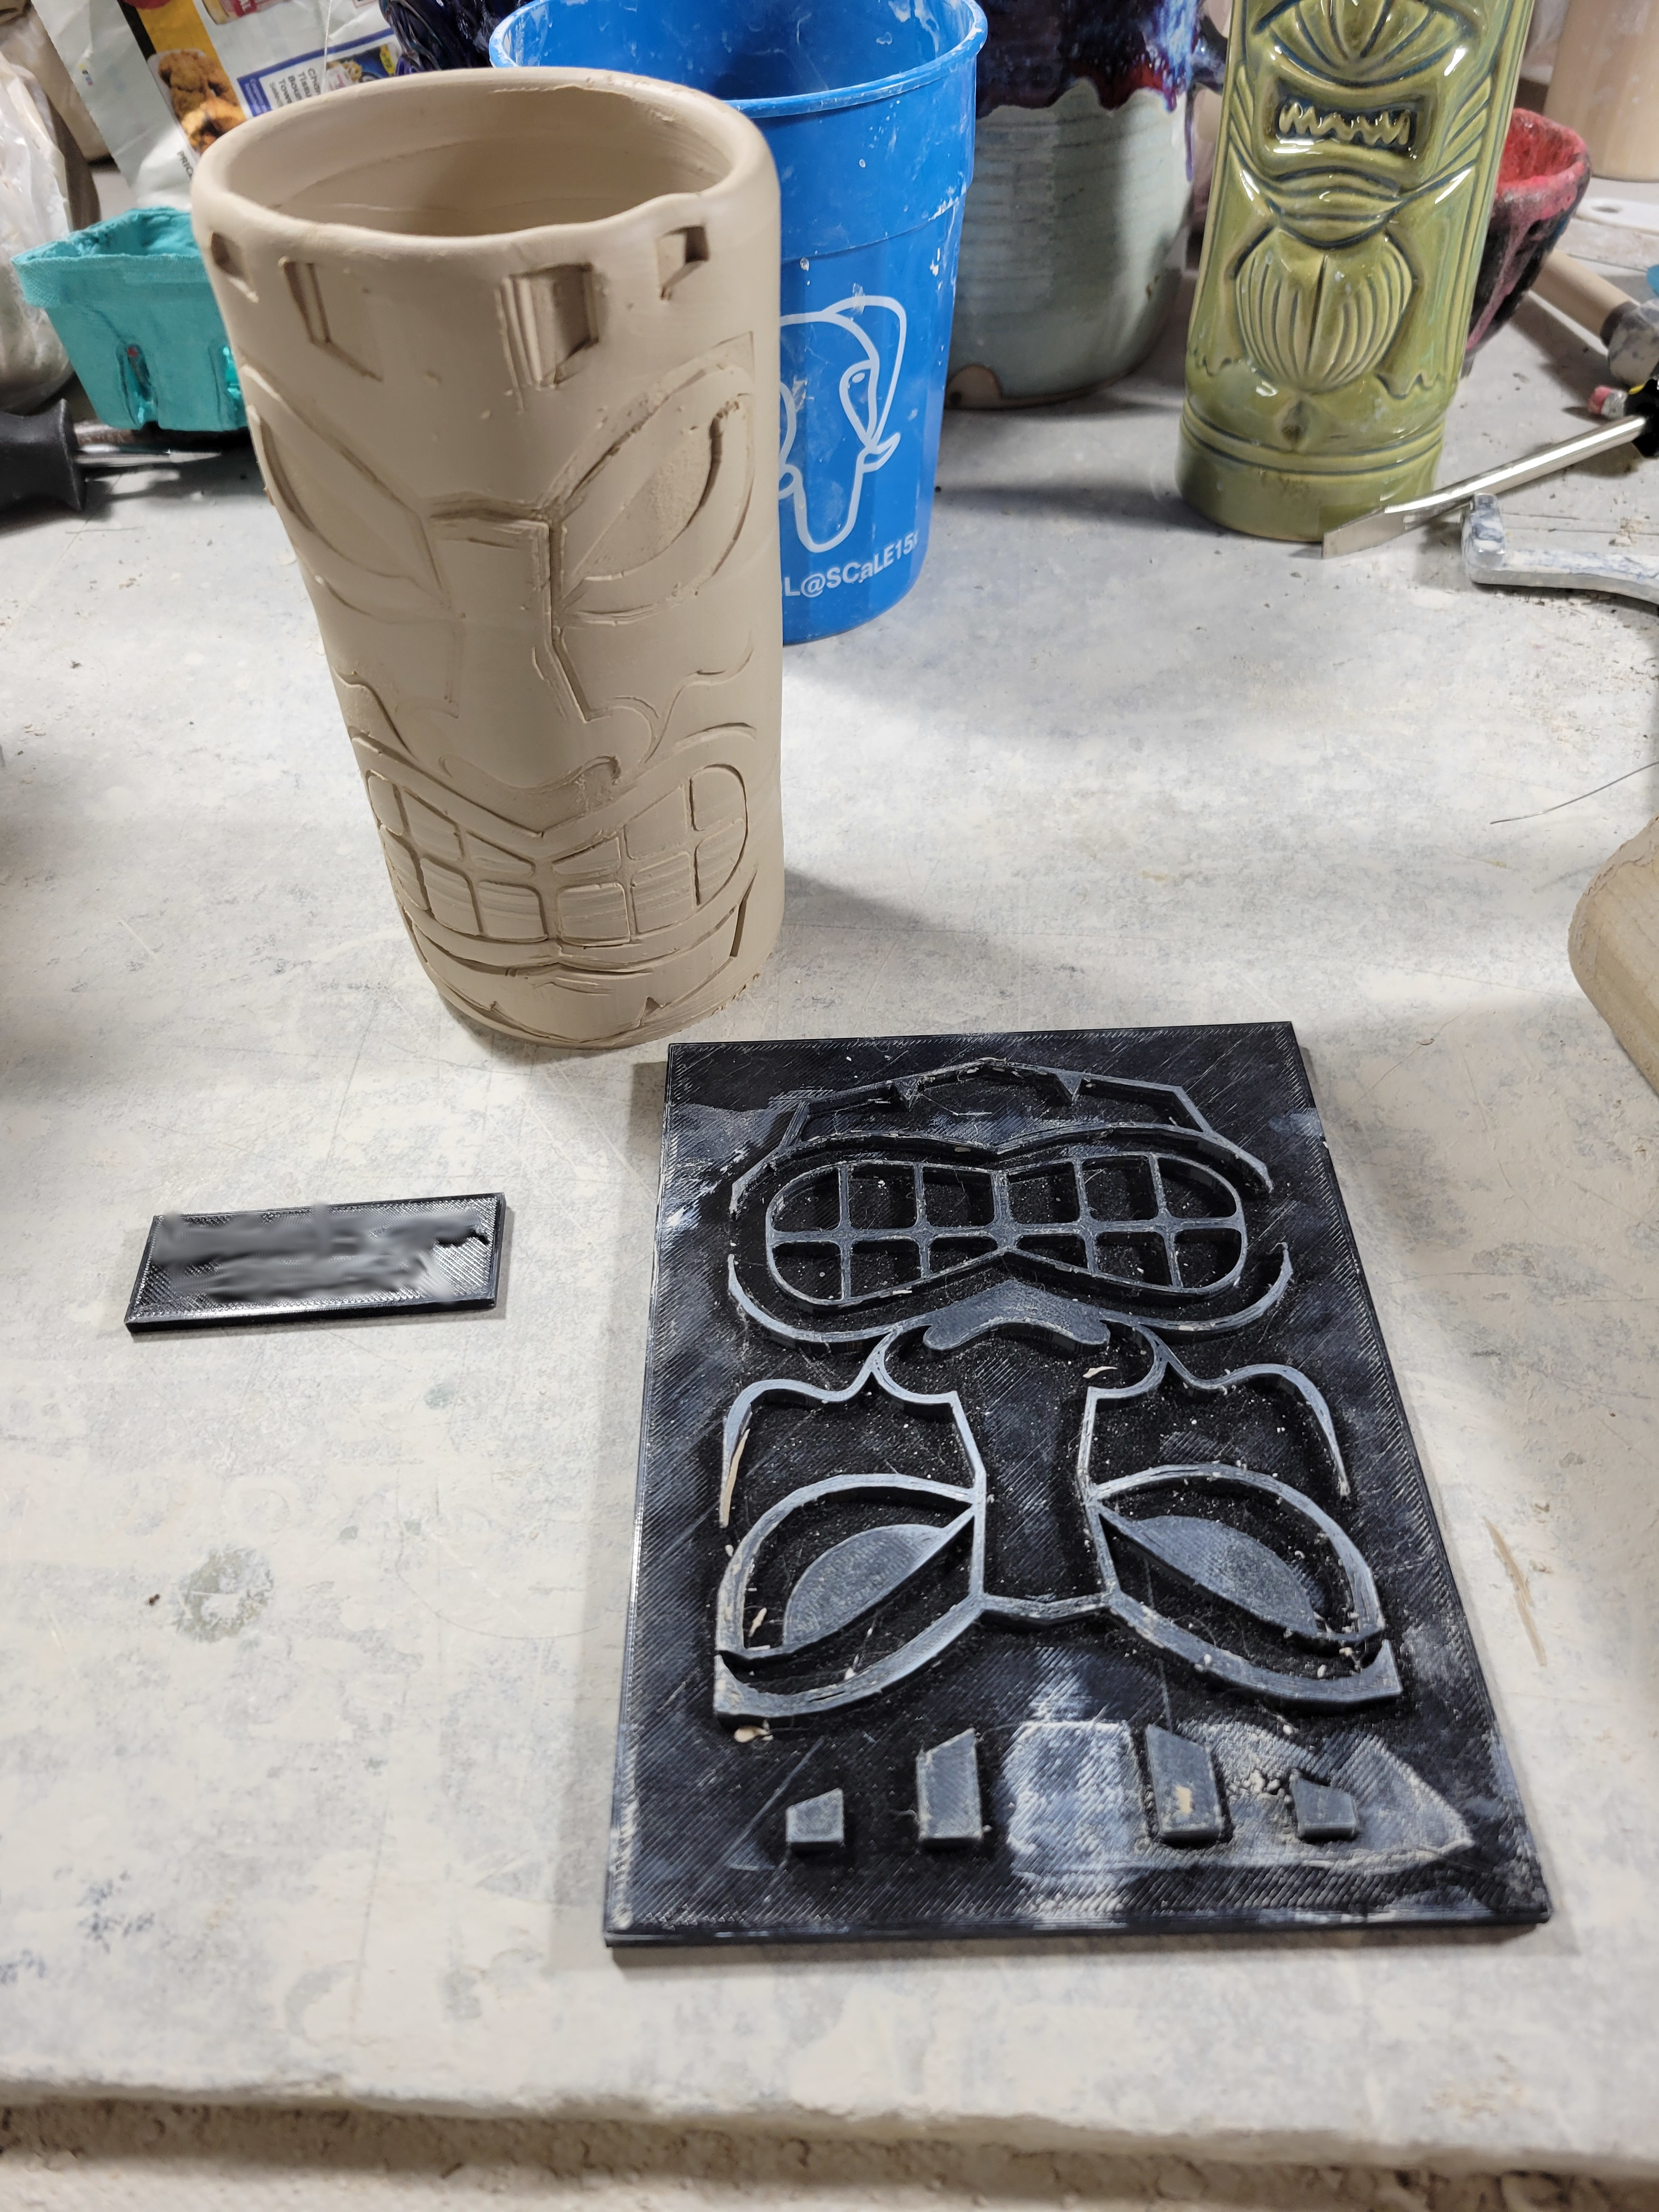
TPU is flexible printable plastic. I've been finding it works much better for stamps than rigid plastic, both because you can bend it around pieces and also because it sticks a bit less. It's perfect for texture mats. So I found some cartoons of tiki faces on a clipart site, modified them to make them simpler and more geometric, and turned one into a texture mat, which I printed in black TPU.
The next step was to create a wooden form for the inside of each cup, which could be used to roll the cup across the texture mat without losing its shape. I made mine from a 2" diameter post and inserted part of a broom handle for control. I did not want to 3d print the inside-cup dowel, both because plastic sticks to wet clay, and because I was concerned about strength.
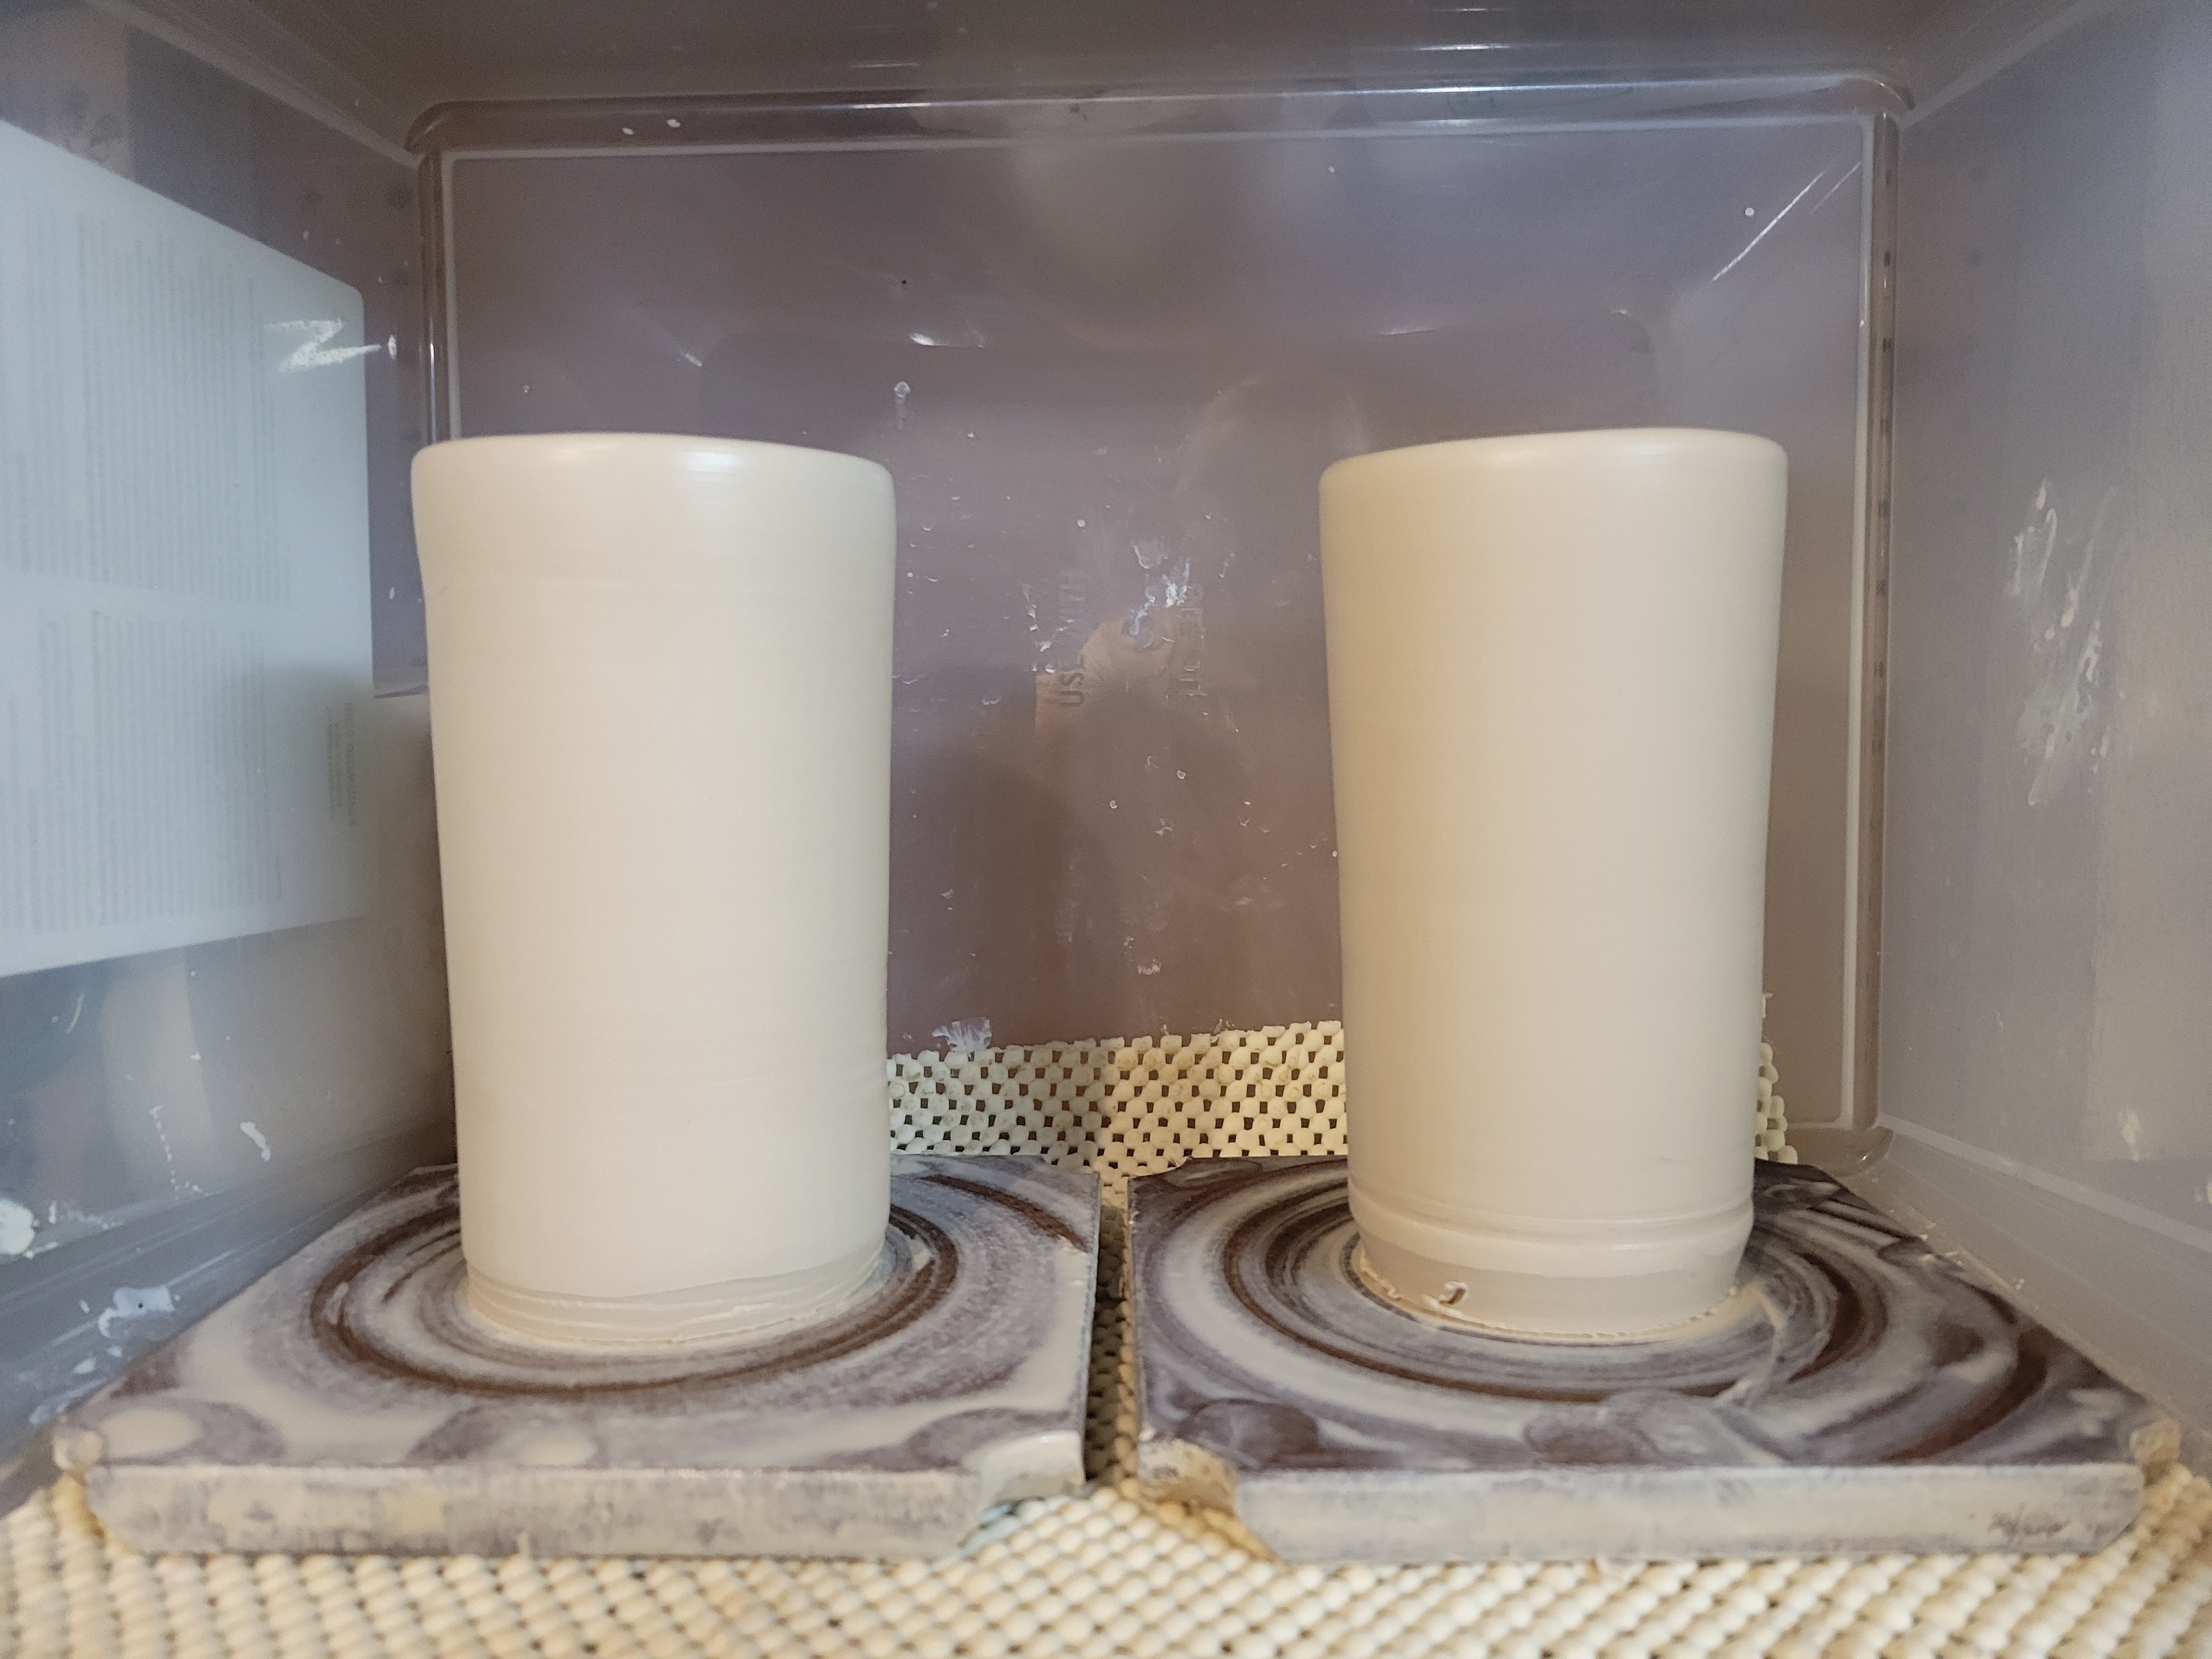
Next, I had to throw a bunch of perfectly cylindrical cups, with interiors that were 2.25" diameter and 5.5" tall to match the dowel. This was a bit harder than it sounds; I hadn't thought about the fact that my hands are too large for a 2.25" diameter cup, and as a result I had to finish each cup using a throwing stick on the inside.
The next step was to roll the cups on the mats to make the tiki faces. The first batch of 6 cups I ended up turning into regular mugs, because I found out (the "hard" way) that the clay needed to be quite soft to take an impression, like just 12-15 hours after throwing.
I learned a few things with this first trial. First, it was quite difficult to get a good impression if the design, like this one, had any large blocky shapes. Also those squares at the top with sharp corners really dug into the clay, ruining some cups. But I felt like I was on the right track.
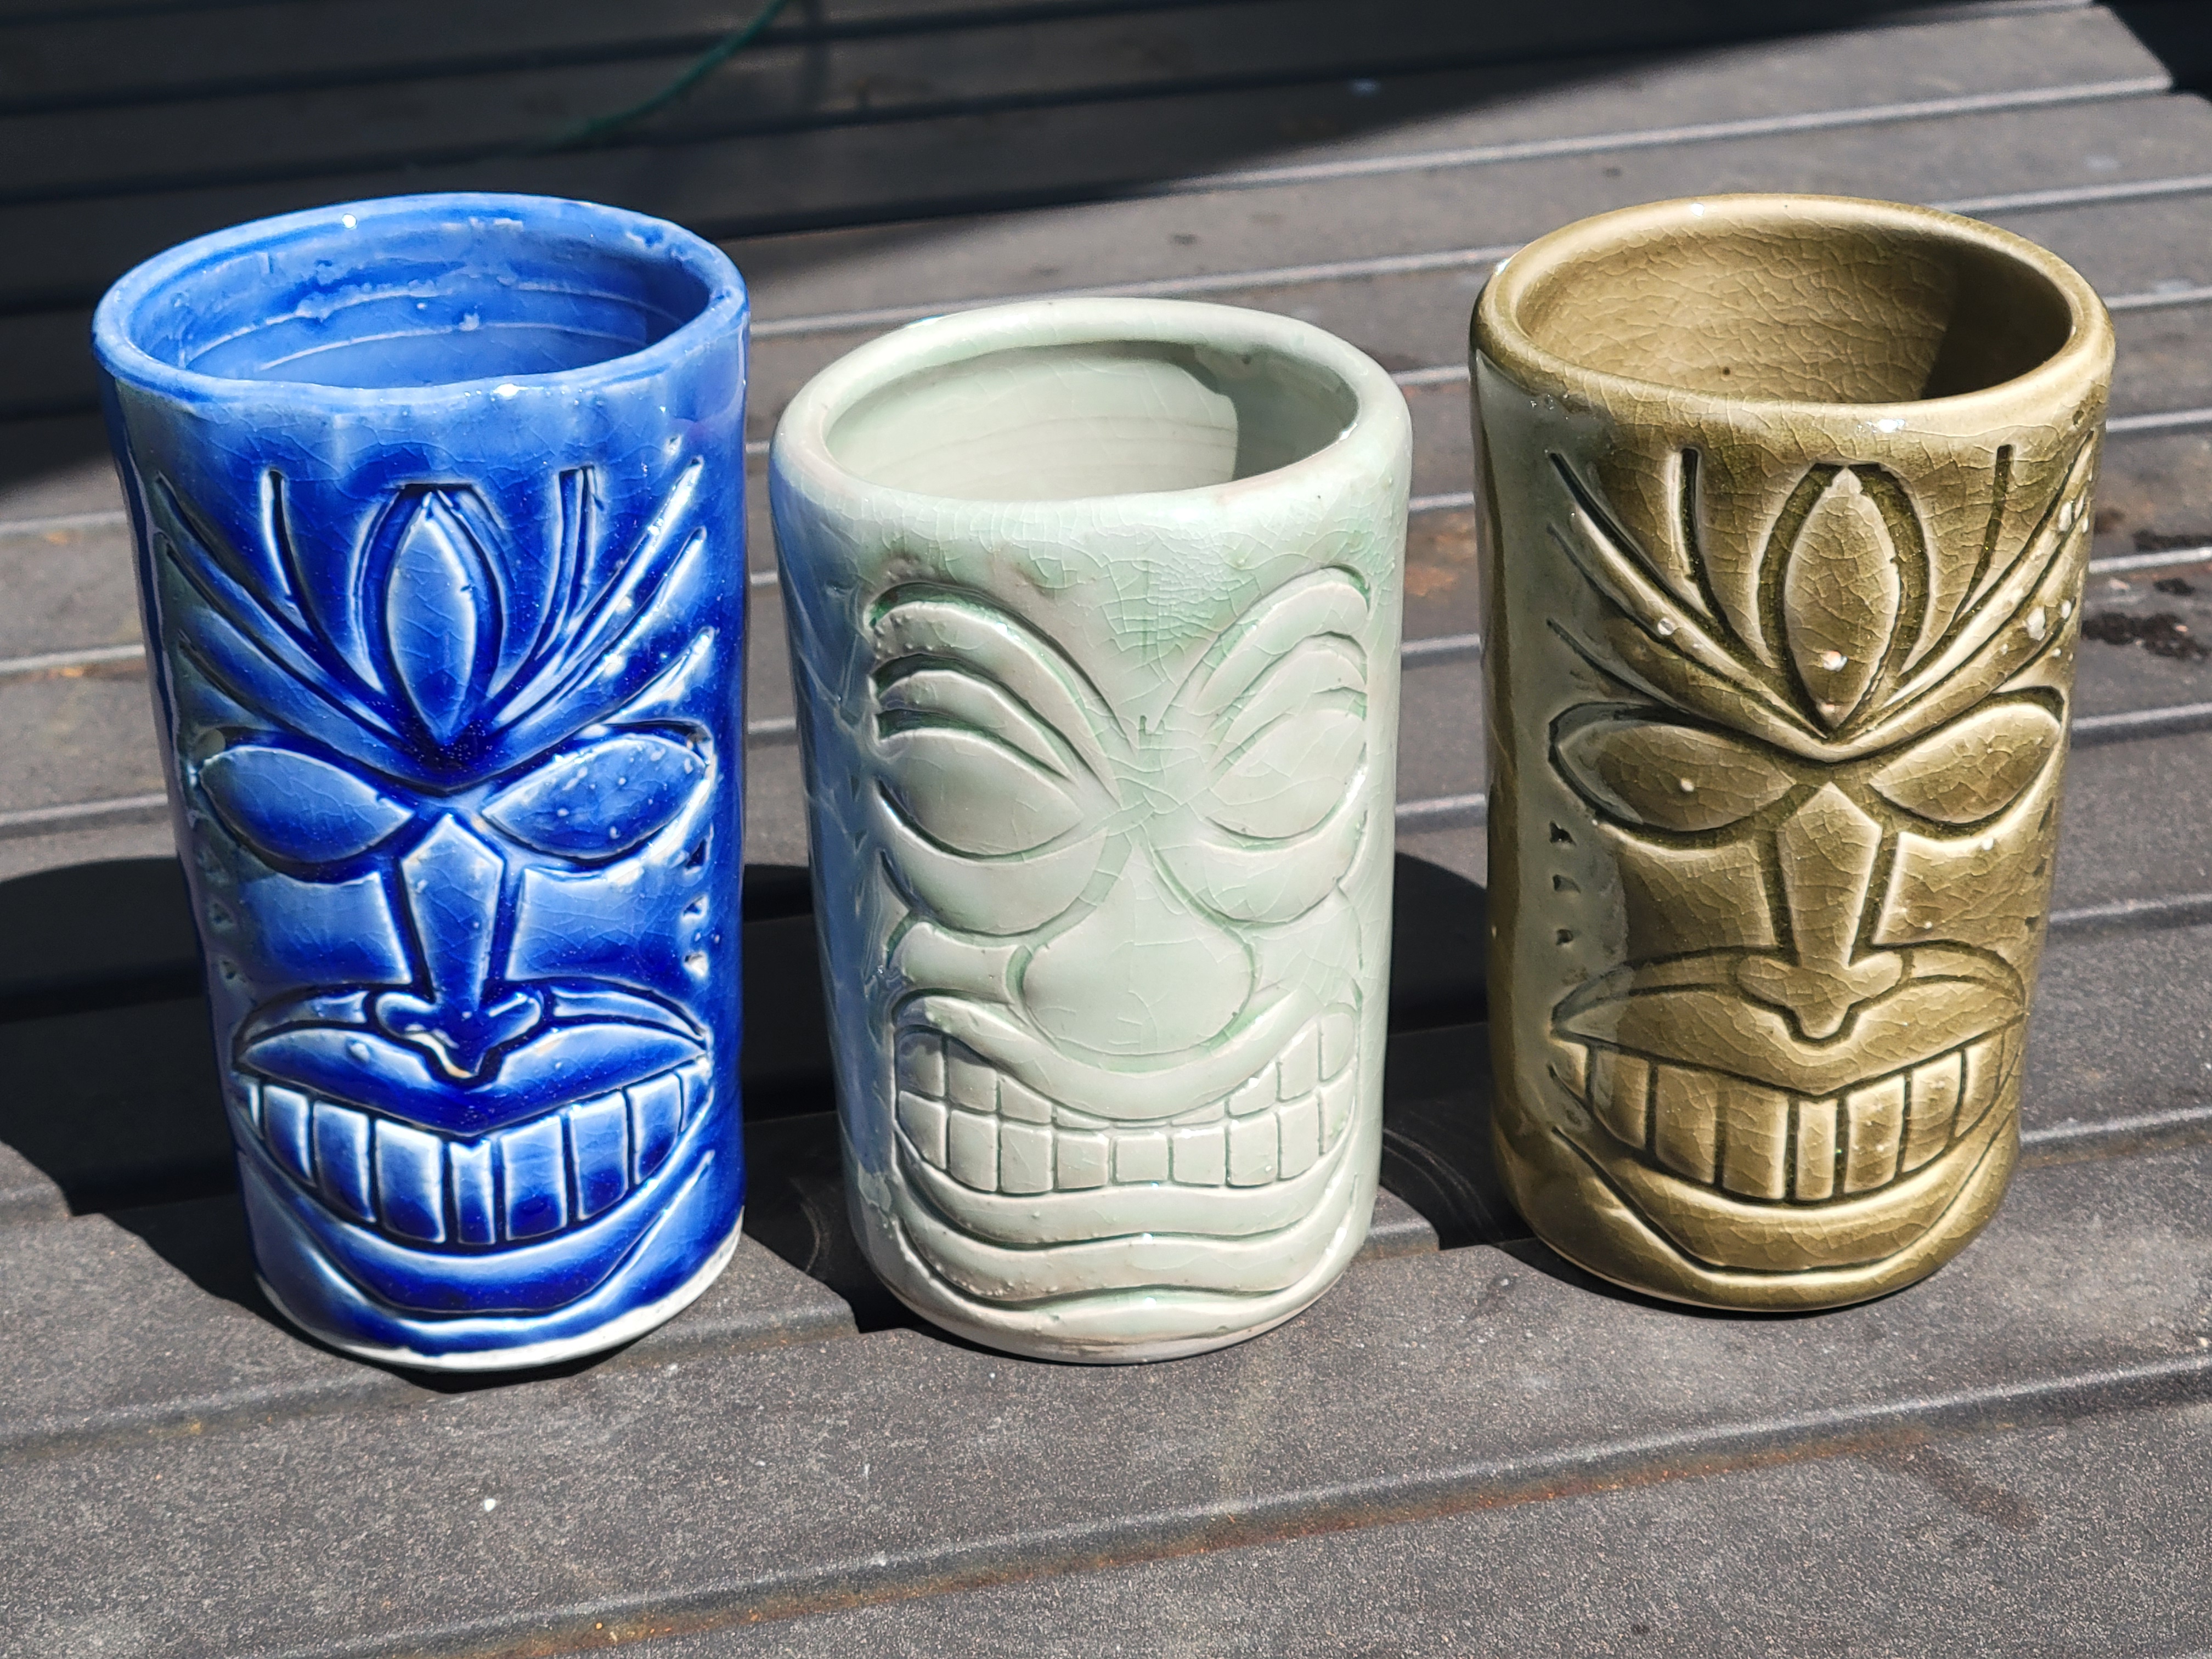
So I did two new designs, which were composed only of lines, and gave fairly even design coverage over the whole height of the cup. I also started dusting the designs with dry clay to make them stick less.

This worked a lot better. Those designs really popped and were clear all over the cup, and would look good once glazed.
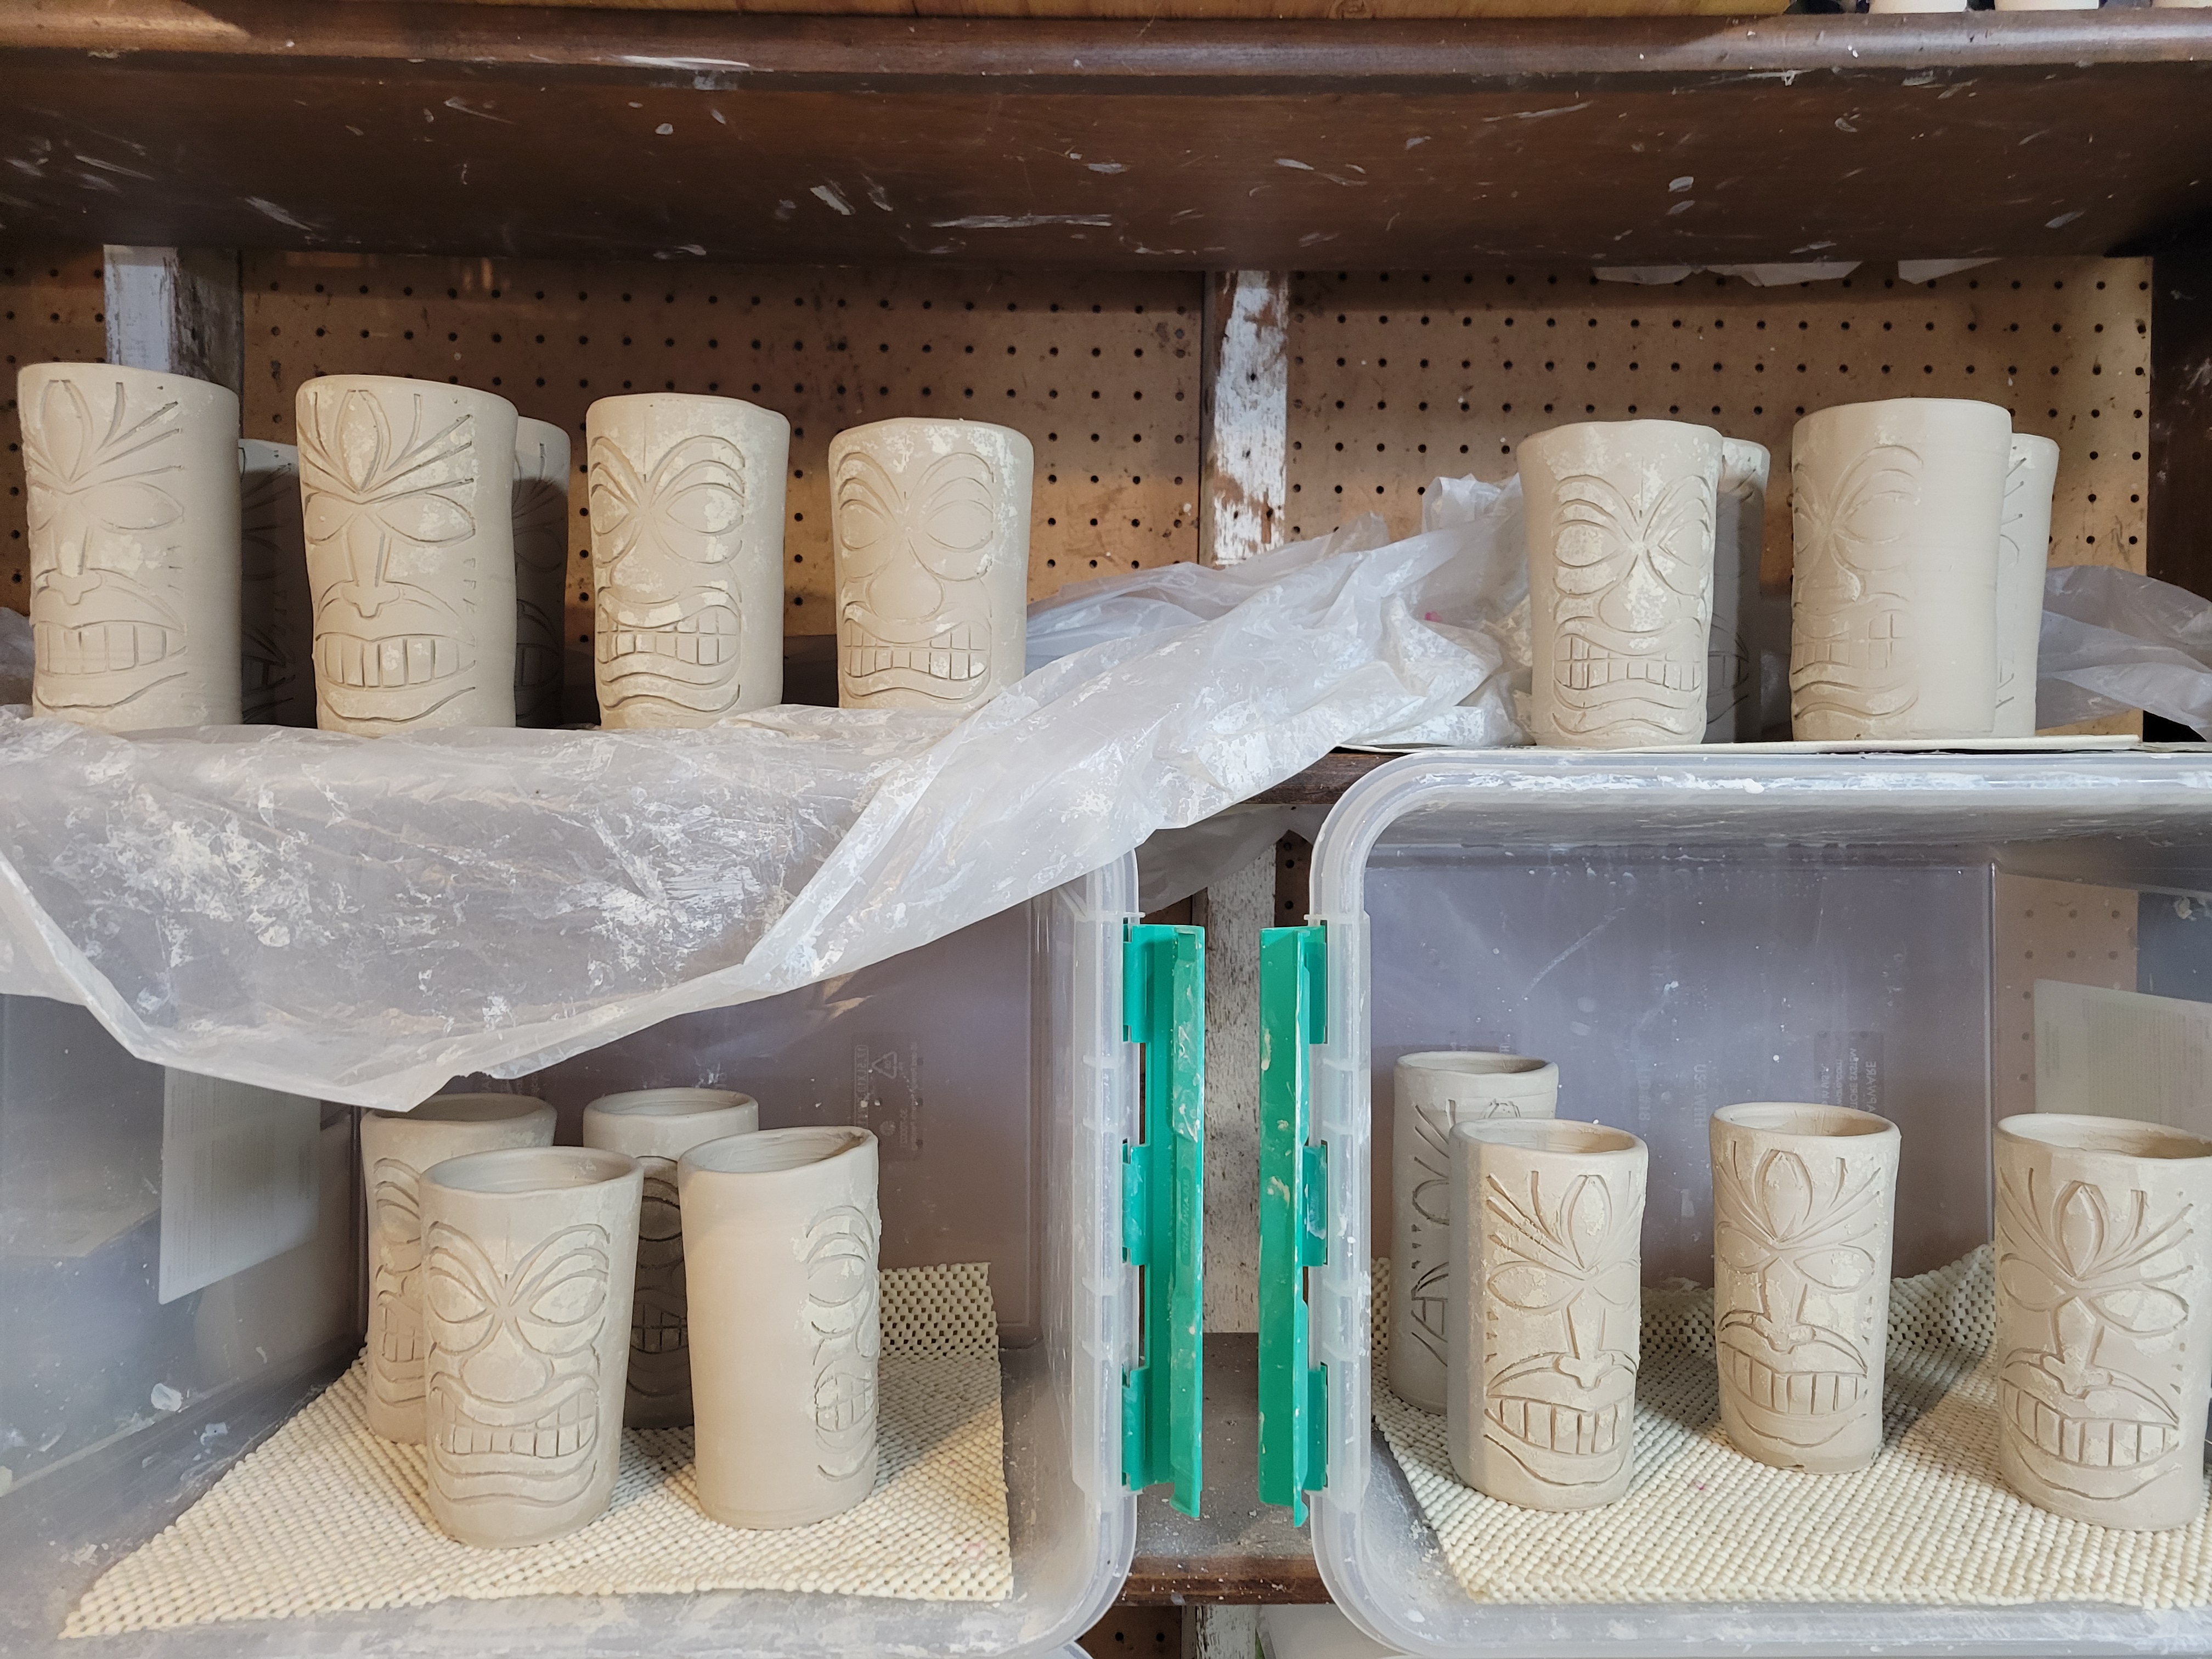
Next I repeated that several dozen times. And then drying, and firing, and glazing. Tip: if you do use dry clay to prevent a stamp from sticking, make sure you brush off all the loose dry clay once the piece hardens. I didn't do that on all the cups and it ruined the glaze on a few.
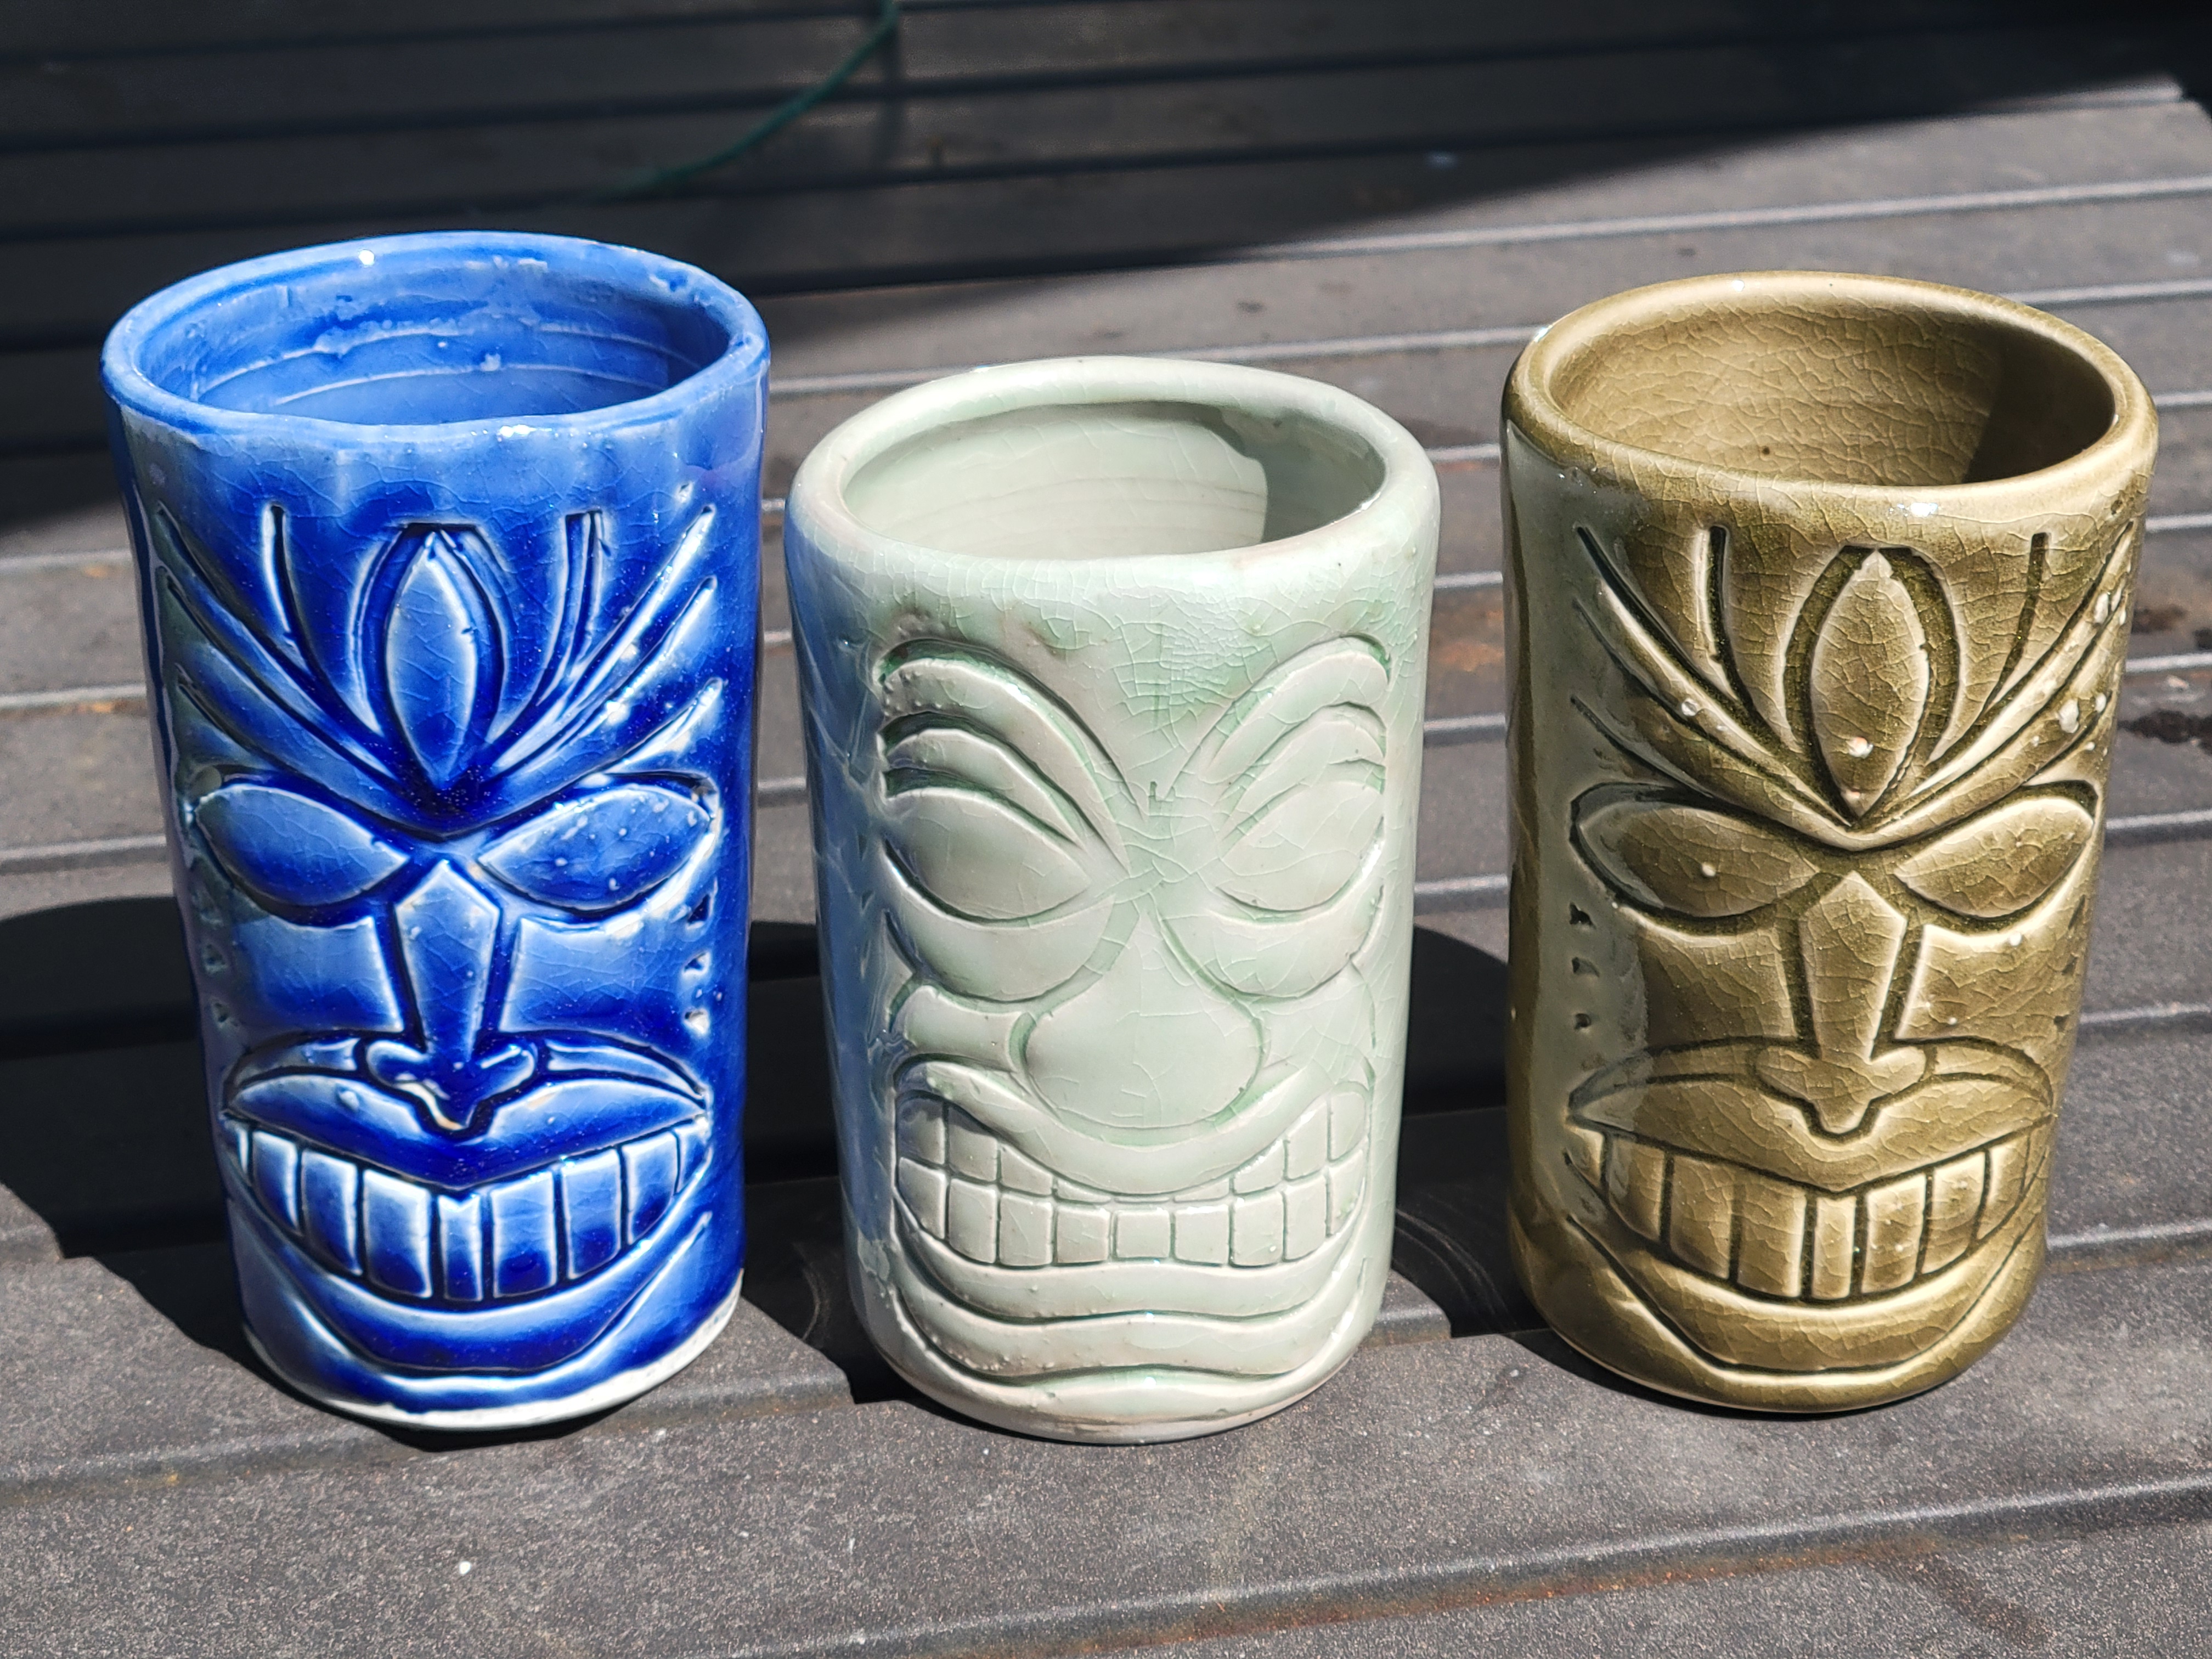
I glazed them all using translucent glazes (two celedons and two others) which would do the best job of emphasizing the tiki designs. They were all done, not just on time for the event, but actually two weeks early. Yay!
I'll definitely use this technique again, although I'll make some changes. Some padding on the dowel would probably be good. Also, maybe a cup form that was a bit wider and shorter to speed up throwing. But it worked pretty well.